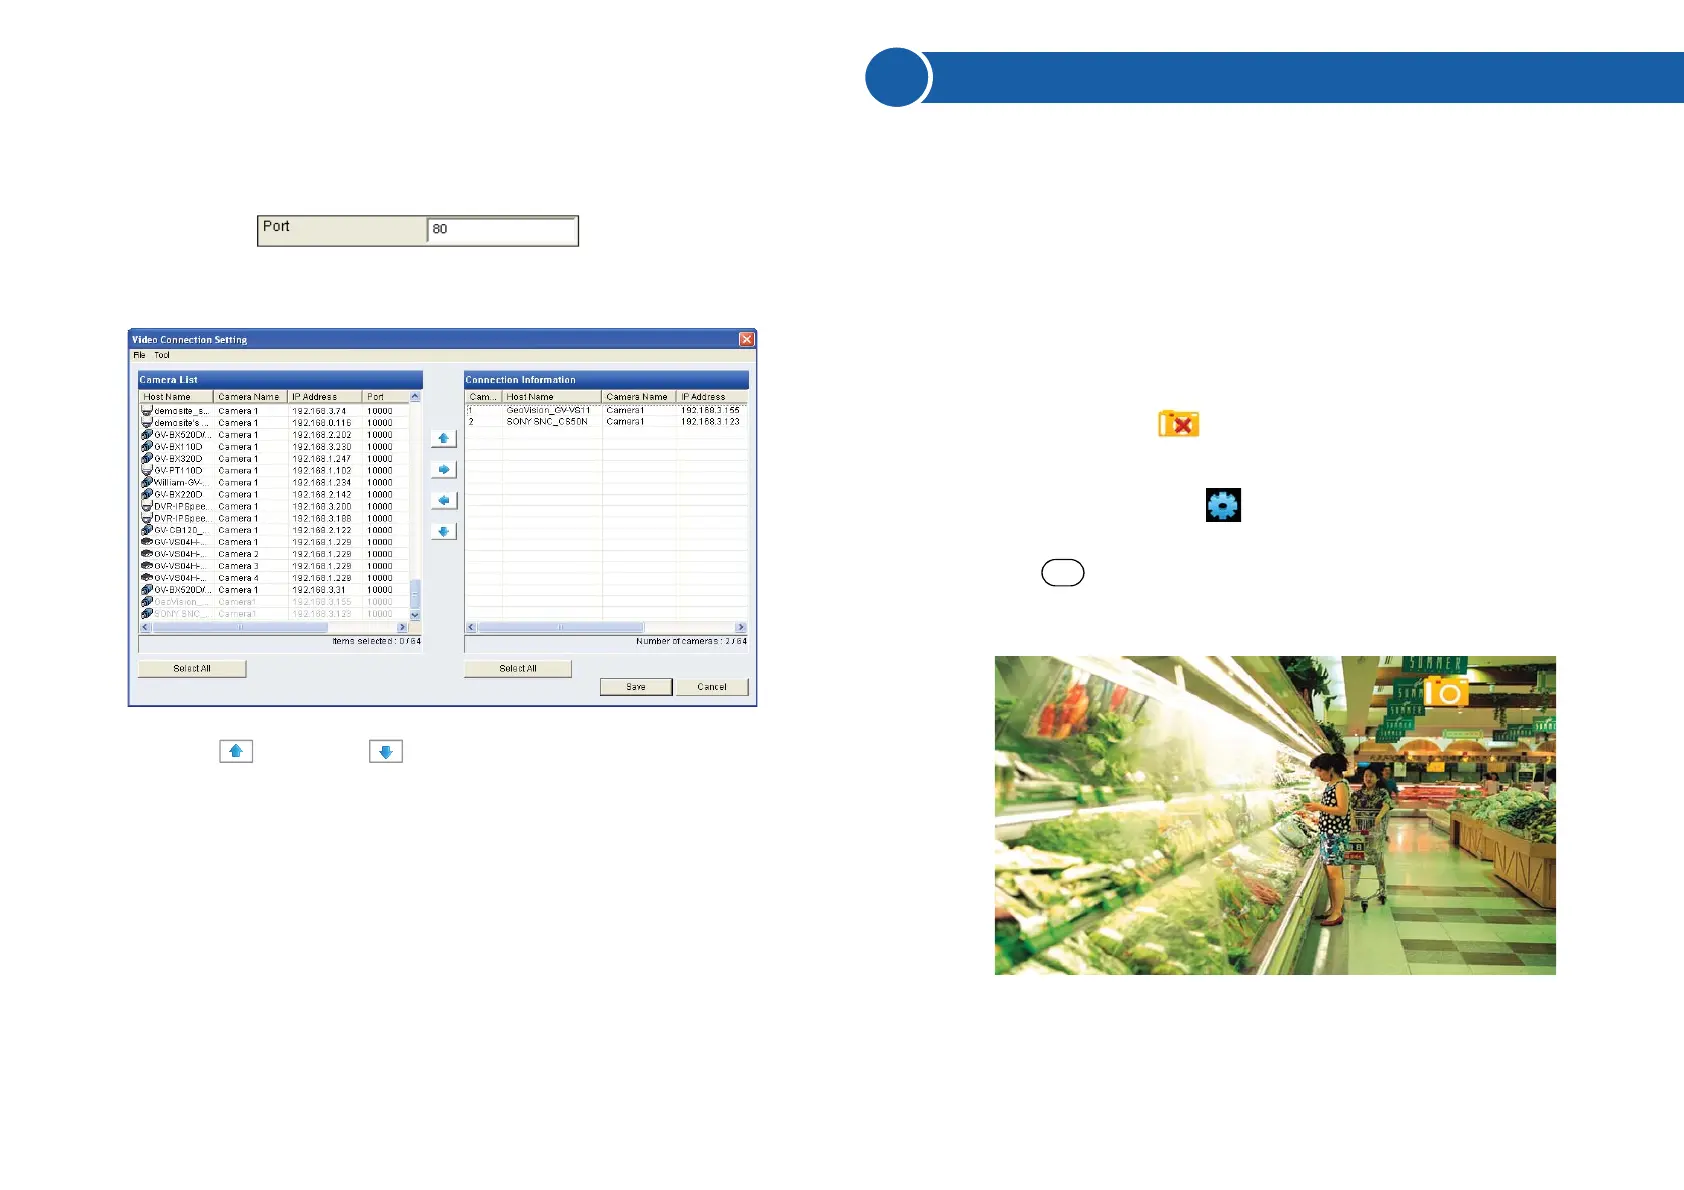
D. For ONVIF and PSIA, modify the Port to 80, else keep the port in
default.
E. Click OK. The camera is added to the list.
8. Use the up and down buttons to move the added channels
up and down the Connection Information list. The channels will be
displayed according to this order.
9. Click Save. The cameras on the Connection Information column will
be updated to the GV-IP Decoder Box / GV-Pad and displayed on the
monitor.
1. On the main menu, select and select the inserted storage device
in the Storage field.
2. Press the key to capture the image. A camera icon appears at
the top right corner of the monitor and 3 consecutive snapshots will be
taken and saved to the inserted storage device.
● you have at least 30 MB of space on your storage device.
● you have inserted a USB drive or SD card for storage.
● the storage type is correctly configured.
7
Taking a Snapshot
The security administrators can capture images when events occur.
Snapshot images are automatically saved to an inserted storage device
such as a USB drive or SD card in JPEG format.
Before you start, be sure:
Otherwise, the error icon appears when attempting to capture an
image.
REC
 Loading...