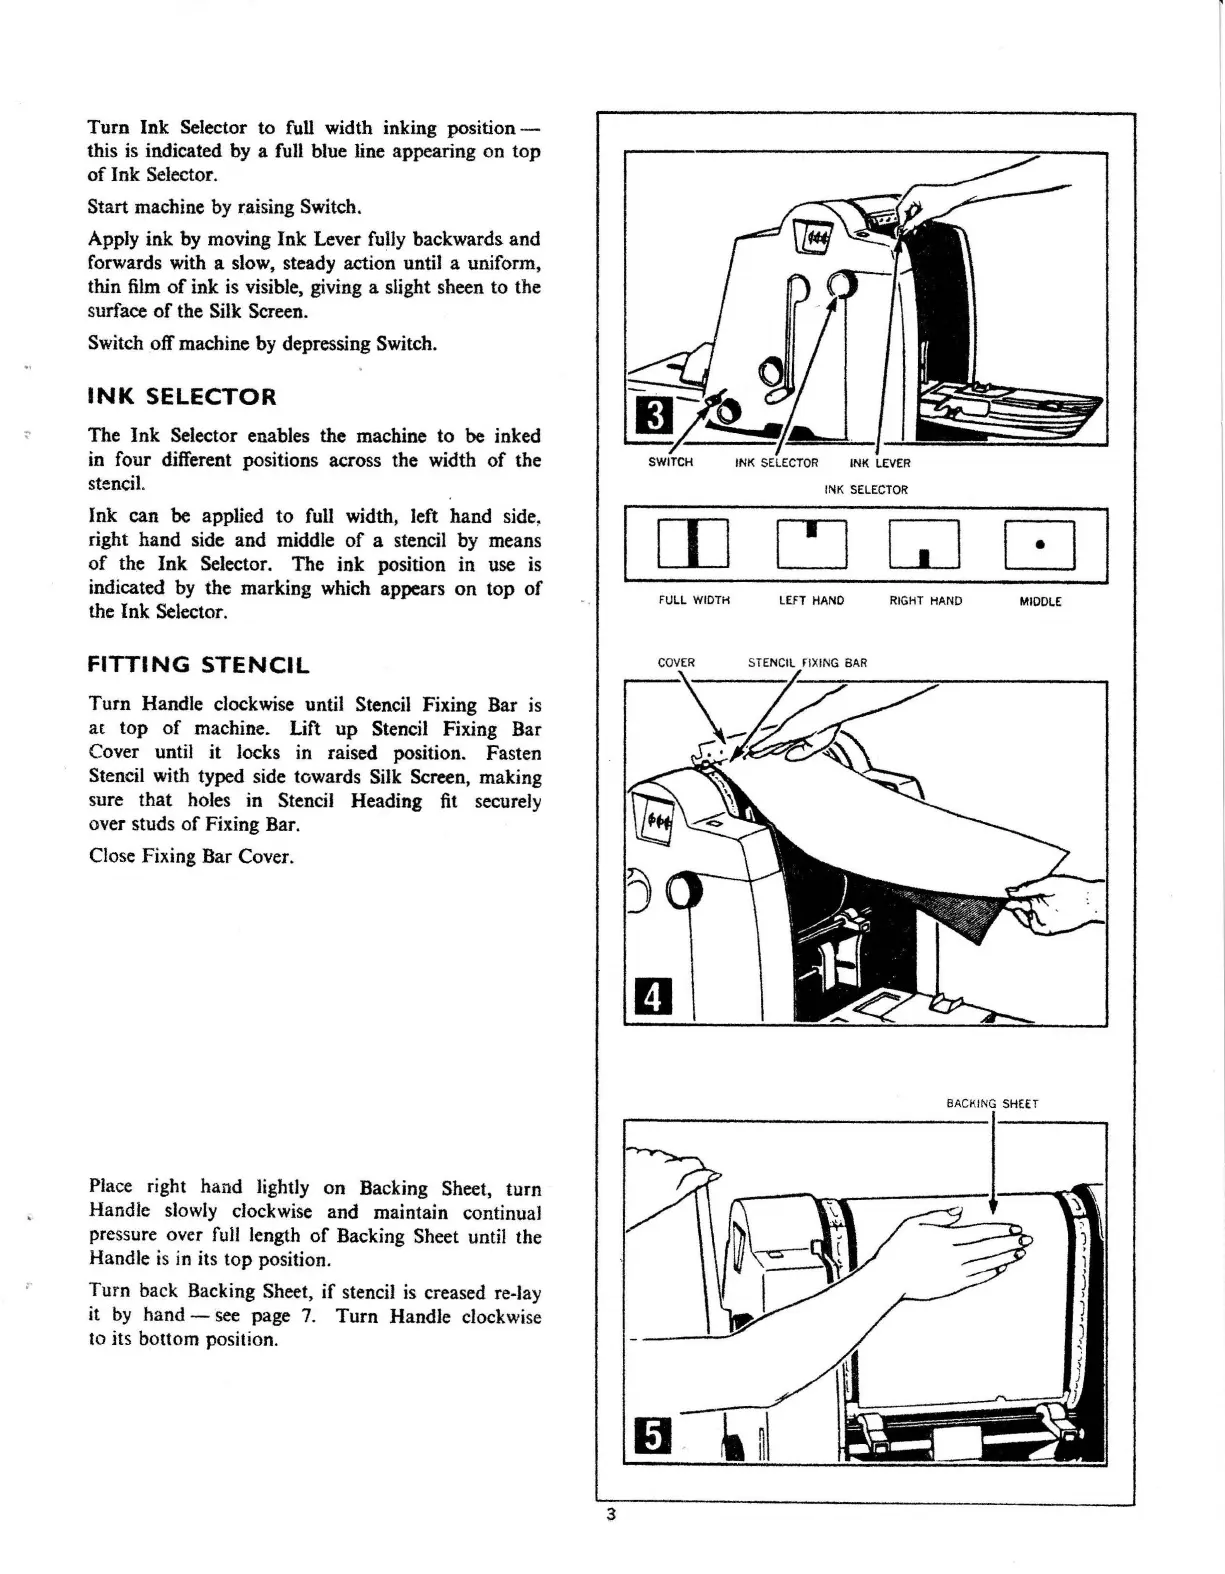
Turn Ink Selector to full width inking position -
this
is
indicated by a full blue line appearing on top
of
Ink Selector.
Start machine by raising Switch.
Apply ink
by
moving Ink Lever fully backwards. and
forwards with a slow. steady action until a uniform.
thin
film
of
ink
is
visible, giving a slight sheen to the
surface
of
the Silk Screen.
Switch off machine
by
depressing Switch.
INK
SELECTOR
The Ink Selector enables the machine to
be
inked
in
four different positions across the width
of
the
stencil.
Ink can
be
applied to full width, left hand side,
right hand side and middle
of
a stencil
by
means
of
the Ink Selector. The ink position in use is
indicated
by
the marking which appears on top
of
the Ink Selector.
FITTING
STENCIL
Turn Handle clockwise until Stencil Fixing Bar
is
at
top
of
machine. Lift up Stencil Fixing Bar
Cover until it locks in raised position. Fasten
Stencil with typed side towards Silk Screen, making
sure that holes in Stencil Heading
fit
securely
over studs
of
Fixing Bar.
Close Fixing Bar Cover.
Place right hand lightly on Backing Sheet, turn
Handle slowly clockwise and maintain continual
pressure over
full
length
of
Backing Sheet until the
Handle
is
in
its top position.
Turn back Backing Sheet,
if
stencil
is
creased re-lay
it
by
hand -
see
page
7.
Turn Handle clockwise
to its bottom position.
3
IJ;!?~/Ab:LJ
SWITCH INK
SELECTOR
INK
LEVER
INK
SELECTOR
CJ
GJ
□
I
FULL WIDTH
LEFT
HAND
RIGHT
HAND
MIDDLE
COVER
STENCIL rlXING
BAR
-
-
El
BACKING
SHEET