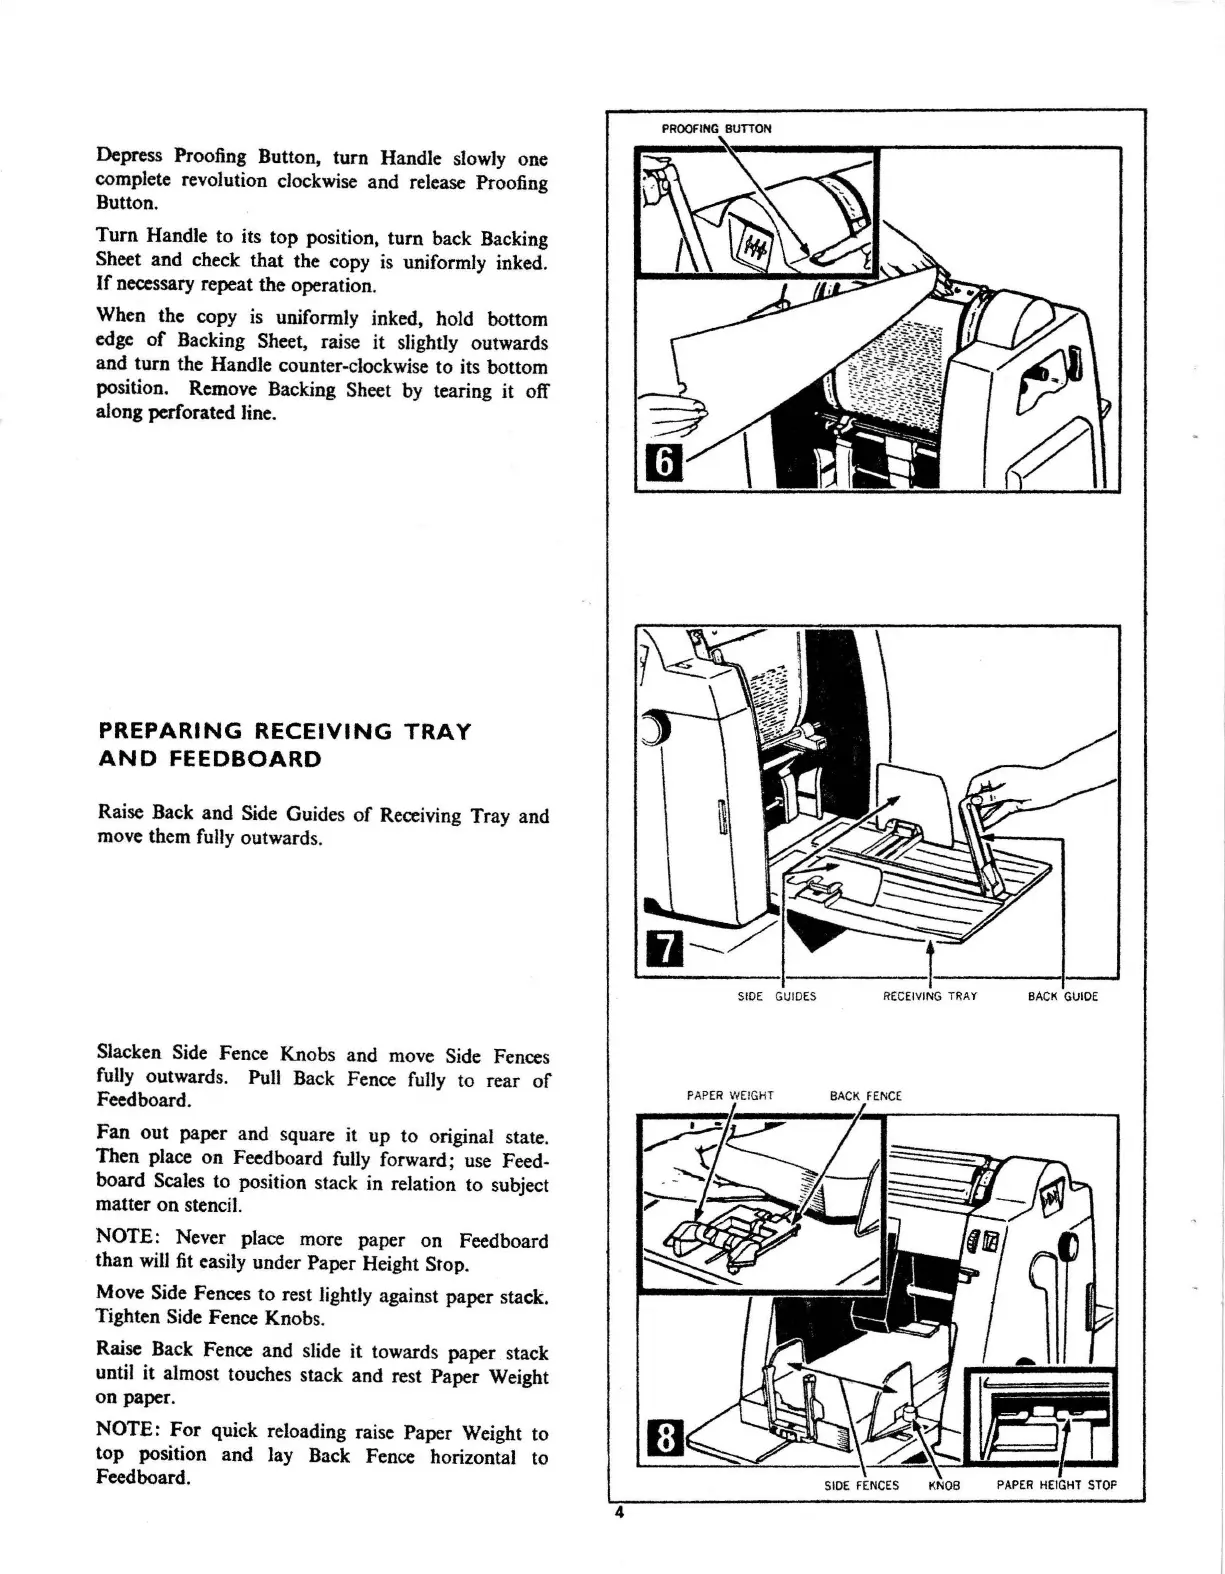
Depress
Proofing Button, turn Handle slowly one
complete revolution clockwise and release Proofing
Button.
Tum
Handle to its top position,
tum
back Backing
Sheet and check that the copy
is
uniformly inked.
If
necessary repeat the operation.
When the copy
is
uniformly inked, hold bottom
edge
of
Backing Sheet, raise it slightly outwards
and turn the Handle counter-clockwise to its bottom
position. Remove Backing Sheet
by
tearing it off
along
pcrf
orated line.
PREPARING
RECEIVING
TRAY
AND
FEEDBOARD
Raise Back and Side Guides
of
Receiving Tray and
move them fully outwards.
Slacken Side Fence Knobs and move Side Fences
fully
outwards. Pull Back Fence fully to rear
of
Feed board.
Fan out paper and square it up to original state.
Then place on Fecdboard fully forward;
use
Feed-
board Scales to position stack in relation to subject
matter on stencil.
NOTE: Never place more paper on Feedboard
than
will
fit
easily under Paper Height Stop.
Move Side Fences to rest lightly against paper stack.
Tighten Side Fence Knobs.
Raise Back Fence and slide it towards paper stack
until it almost touches stack and rest Paper Weight
on paper.
NOTE:
For
quick reloading raise Paper Weight to
top position and lay Back Fence horizontal to
Feed board.
4
PROOFING
BUTTON
fJ--
S
IDE
GUIDES
REC
EI
V
IN
G TRAY
BA
CK G
UIDE
PAP
ER
WEIGHT
BACK FE
NCE
~
.
_·
1-====illi
.......
~
,,,
-L_
//;';o-;;;;
~
(:]
SIDE
FENCE
S KNOB