Do you have a question about the Gigabyte GA-X79-UD3 and is the answer not in the manual?
Guidelines for preventing damage during component installation.
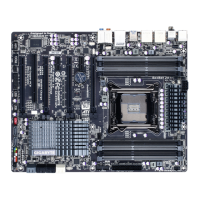
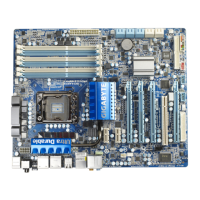
Details on CPU, Chipset, Memory, Audio, LAN, and expansion slots.
Steps for installing the CPU and its cooling system.
Guide for installing RAM modules into the motherboard slots.
Procedure for installing expansion cards like graphics or sound cards.
Identifies and explains the function of rear I/O ports.
Details the internal headers and connectors on the motherboard.
Describes the initial logo screen and function keys during boot.
Explains the 3D BIOS and main BIOS setup interface.
Overclocking and system monitoring settings for CPU, memory, and voltage.
Settings for boot options, NumLock state, logo display, and PCI ROM priority.
Configuration for onboard LAN, audio, USB, and SATA controllers.
Settings related to AC BACK, power-on by keyboard, resume by alarm, and sleep states.
Options for saving changes, loading defaults, and exiting the BIOS.
Guide for installing essential chipset drivers from the driver disk.
Information on GIGABYTE utilities and free software available on the driver disk.
Provides access to application guides and motherboard manuals.
Links to GIGABYTE's website for updating BIOS, drivers, and applications.
Utility for backing up and restoring system data.
Information on Q-Flash and @BIOS tools for updating system BIOS.
Software for system tuning, overclocking, and monitoring in Windows.
Suite of utilities for system management, performance, and security.
Utility for configuring RAID arrays for enhanced performance.
BIOS configuration tool usable within the Windows environment.
Guide to setting up SATA drives, including RAID configurations.
Steps to configure Intel X79 SATA controllers and RAID.
Steps to configure Marvell 88SE9172 SATA controllers and RAID.
Guide for installing SATA drivers and OS for RAID/AHCI configurations.
Instructions for setting up audio jacks for multi-channel configurations.
Solutions for common issues encountered during system operation.
Answers to common user queries about the motherboard.
Step-by-step guide to diagnose and solve startup problems.
| ECC | No |
|---|---|
| Non-ECC | Yes |
| Memory voltage | 1.5 V |
| Memory channels | Quad-channel |
| Number of memory slots | 4 |
| Supported memory types | DDR3-SDRAM |
| Maximum internal memory | 32 GB |
| Supported memory clock speeds | 1066, 1200, 1300, 1333, 1500, 1600, 1666, 1800, 1866, 1900, 2000, 2133 MHz |
| Processor socket | LGA 2011 (Socket R) |
| Processor manufacturer | Intel |
| Compatible processor series | Intel® Core™ i7 |
| USB 2.0 connectors | 3 |
| Number of SATA III connectors | 6 |
| Number of Parallel ATA connectors | 0 |
| USB 3.2 Gen 1 (3.1 Gen 1) connectors | 1 |
| BIOS type | EFI AMI |
| ACPI version | 2.0a |
| BIOS memory size | 64 Mbit |
| eSATA ports quantity | 2 |
| USB 2.0 ports quantity | 8 |
| Audio chip | Realtek ALC898 |
| Component for | PC |
| Audio output channels | 7.1 channels |
| Motherboard form factor | ATX |
| Compatible operating systems | Windows 7/Vista/XP |
| RAID levels | 0, 1, 5, 10 |
| Supported storage drive interfaces | SATA II, SATA III |
| Parallel processing technology support | 2-Way SLI, 3-Way SLI, Hybrid CrossFireX, Quad-GPU CrossFireX, Quad-GPU SLI |
| PCI Express slots version | 3.0 |
| Networking features | 10/100/1000 Mbit/sec |
| Ethernet interface type | Gigabit Ethernet |
| Depth | 244 mm |
|---|---|
| Width | 305 mm |