5
Gigaset A280 / CHN / A31008-M2045-Y101-3-7619 / starting.fm / 26.05.2010
First steps
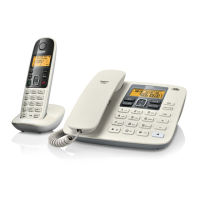
Check the pack contents
◆ one Gigaset A280 base station
◆ one mains adapter for base station
◆ one corded handset with cable
◆ one cordless Gigaset A18H handset
◆ one handset charging cradle with mains adapter
◆ two batteries
◆ one battery cover
◆ one phone cord
◆ one user guide
Setting up the base station and charging cradle
The base station and charging cradle are designed for use in enclosed dry rooms with a temperature range of
+5
°C to +45 °C.
¤ Set up the base station at a central location on a flat, non-slip surface in your house or apartment.
The phone's feet do not usually leave any marks on surfaces. However, due to the multitude of different varnishes
and polishes used on today's furnishings, the occurrence of marks on the surfaces cannot be completely ruled
out.
Please note:
◆ Never expose the telephone to heat sources, direct sunlight or other electrical appliances.
◆ Protect your Gigaset from moisture, dust, corrosive liquids and vapours.
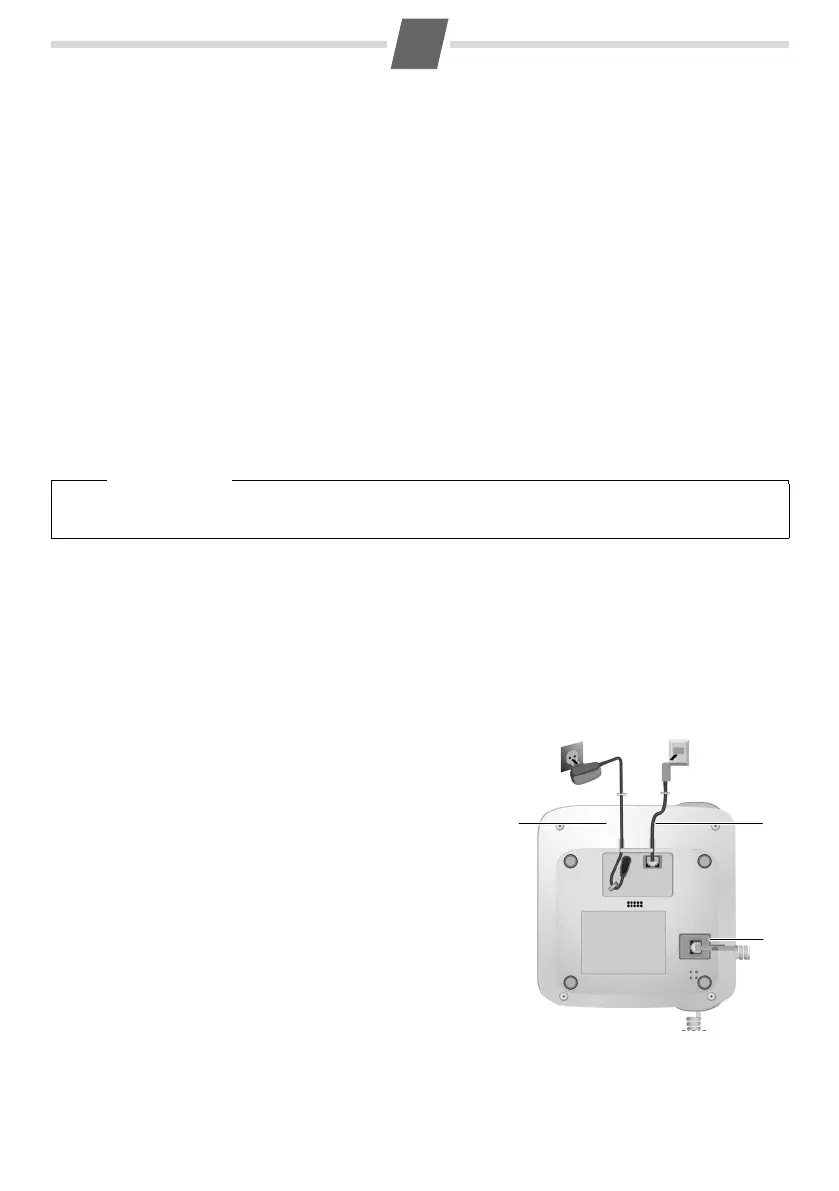
Connecting the base station
¤ First connect the mains adapter 1.
¤ Then connect the telephone jack 2 and insert the cables into
the cable ducts.
¤ Then plug the handset cable in the handset. Connect the
handset to the base station 3 and insert the cables into the
cable ducts.
Please note:
◆ The mains adapter should always be connected, as the
phone has only basic phone functions without mains connec
-
tion.
◆ Only use the mains adapter and phone cord supplied.
◆ Pin connections on telephone cables can vary. If you buy a
replacement phone cord, make sure that the phone jack has
the correct type of wiring.
Please note
Pay attention to the range of the base station.
This is up to 300 m in unobstructed outdoor areas and up to 50 m inside buildings.
1
2
1
1
1
3