4
GOLF CADDY
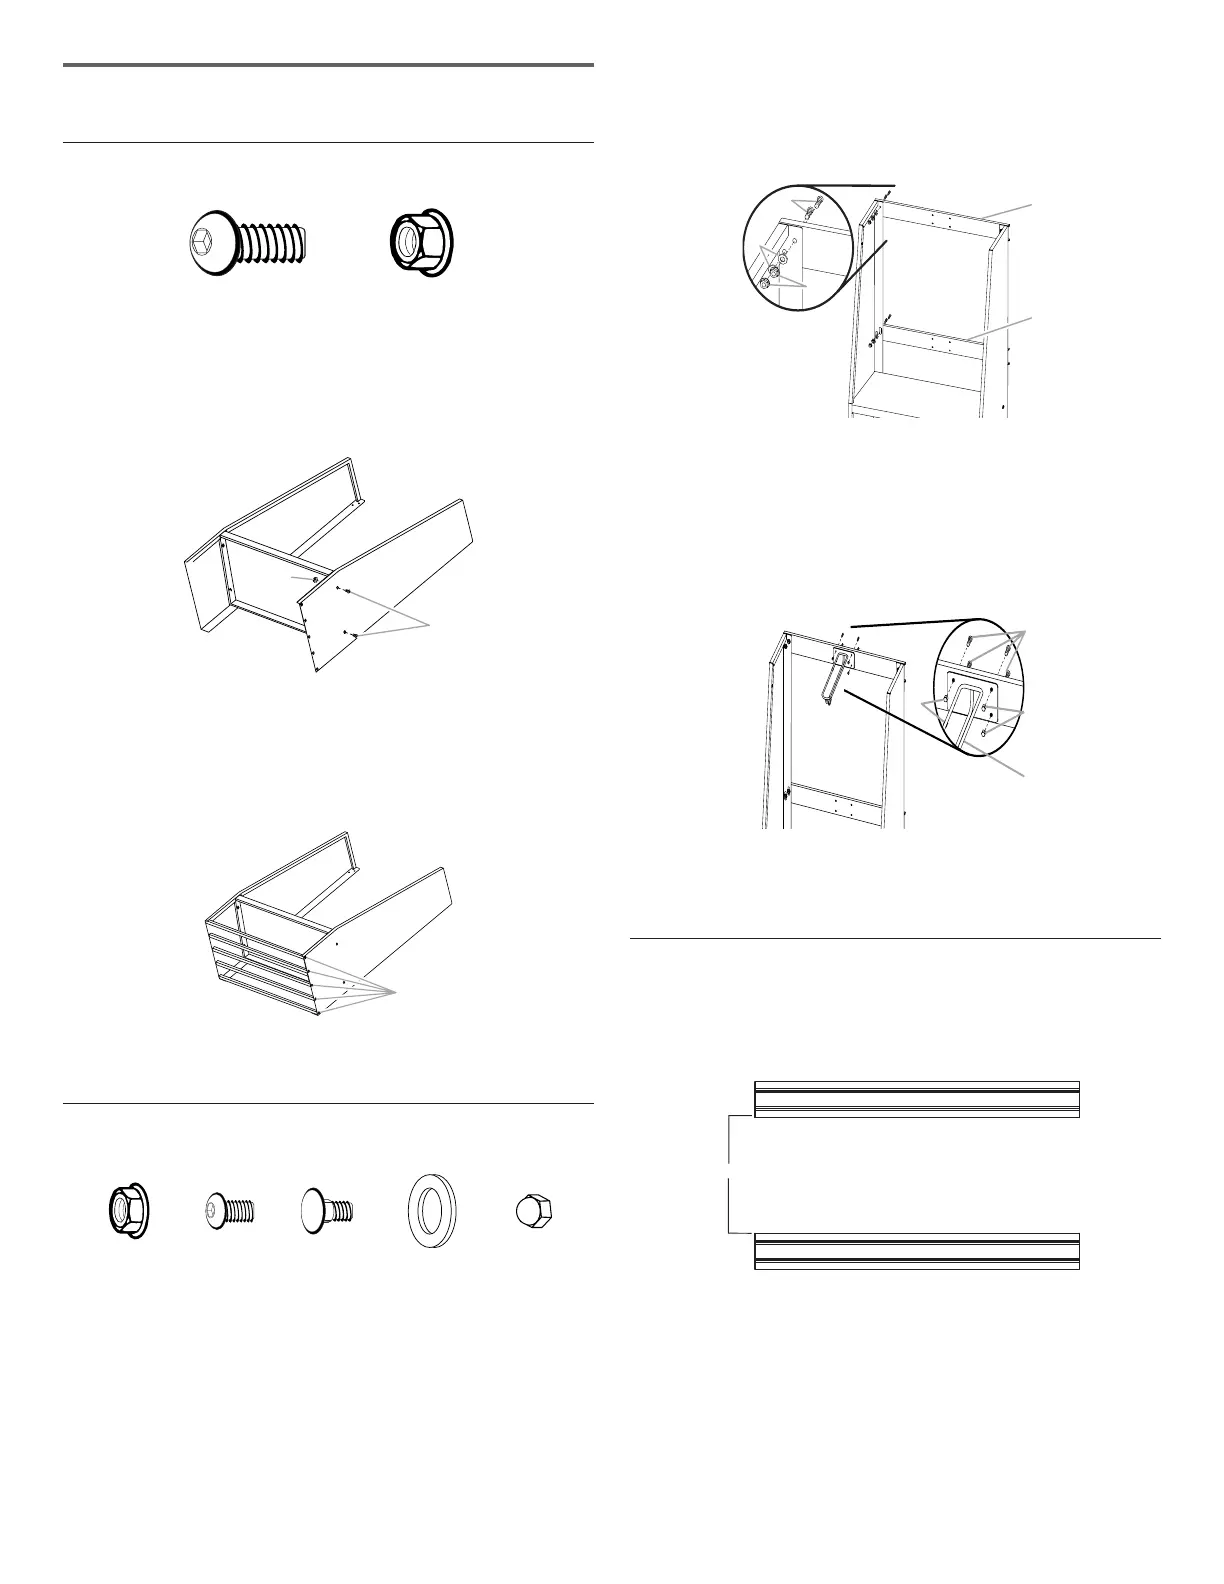
Assemble Golf Caddy
F1
F1:
5
/
16
” (7.93 mm)
hex-head bolt (14)
F2
F2:
5
/
16
” (7.93 mm)
ange nut (4)
1. Using
5
/
16
” (7.93 mm) hex-head bolts (F1) and
5
/
16
” (7.93 mm)
ange nuts (F2), attach the golf bag shelf to the sides as
shown.
B
A
A.
5
/
16
” (7.93 mm) ange nut (F2)
B.
5
/
16
” (7.93 mm) hex-head bolt (F1)
2. Create a shoe shelf by using
5
/
16
” (7.93 mm) hex-head bolts
(F1), to attach the 5 rods to both sides of the golf caddy, as
shown.
A
A.
5
/
16
” (7.93 mm) hex-head bolt (F1)
3. Stand the golf caddy upright.
Attach Mounting Brackets
F2 F3b F7
F2
5
/
16
” (7.93 mm)
ange nut (8)
F3b Phillips-head screw (4)
F7 Carriage-head bolt (8)
F8 F10
F8 Washer (8)
F10 Acorn nut (4)
1. With the mounting bracket rims pointing down, align the 2
bracket holes with the top two holes in each side.
2. Working from the back, insert a carriage-head bolt (F7)
through the holes in the bracket and into the side.
3. Working from the front, fasten each bolt with a washer (F8)
and a ange nut (F2). Completely tighten the nuts.
4. Repeat steps 1 through 3 to attach the lower mounting
bracket.
NOTE : Hand tighten the nuts attaching the lower bracket.
In order to mount the golf caddy on the wall, this bracket will
need to be adjusted.
A. Carriage-head bolts (F7)
B. Washer (F8)
C. Flange nuts (F2)
D. Upper mounting bracket
E. Lower mounting bracket
5. Using Phillips-head screws (F3b) and acorn nuts (F10), attach
the golf bag divider to the 4 holes in the center of the upper
mounting bracket.
A. Phillips-head screws (F3b)
B. Acorn nuts (F10)
C. Golf bag divider
Mount the Golf Caddy to the
Wall
IMPORTANT : If Gladiator
®
GearTrack
®
channels will be used
to mount the golf caddy, they must be installed 18” (46 cm)
apart.
1. Determine caddy mounting location on GearWall
®
panel or
GearTrack
®
channels.
2. Engage the upper mounting bracket into the wall slots by
lifting up, pushing toward the wall and lowering the bracket
rims into the slots.
3. Inspect the golf caddy from the side to ensure the upper
mounting bracket rims are fully engaged in the slots as
shown.
)
 Loading...