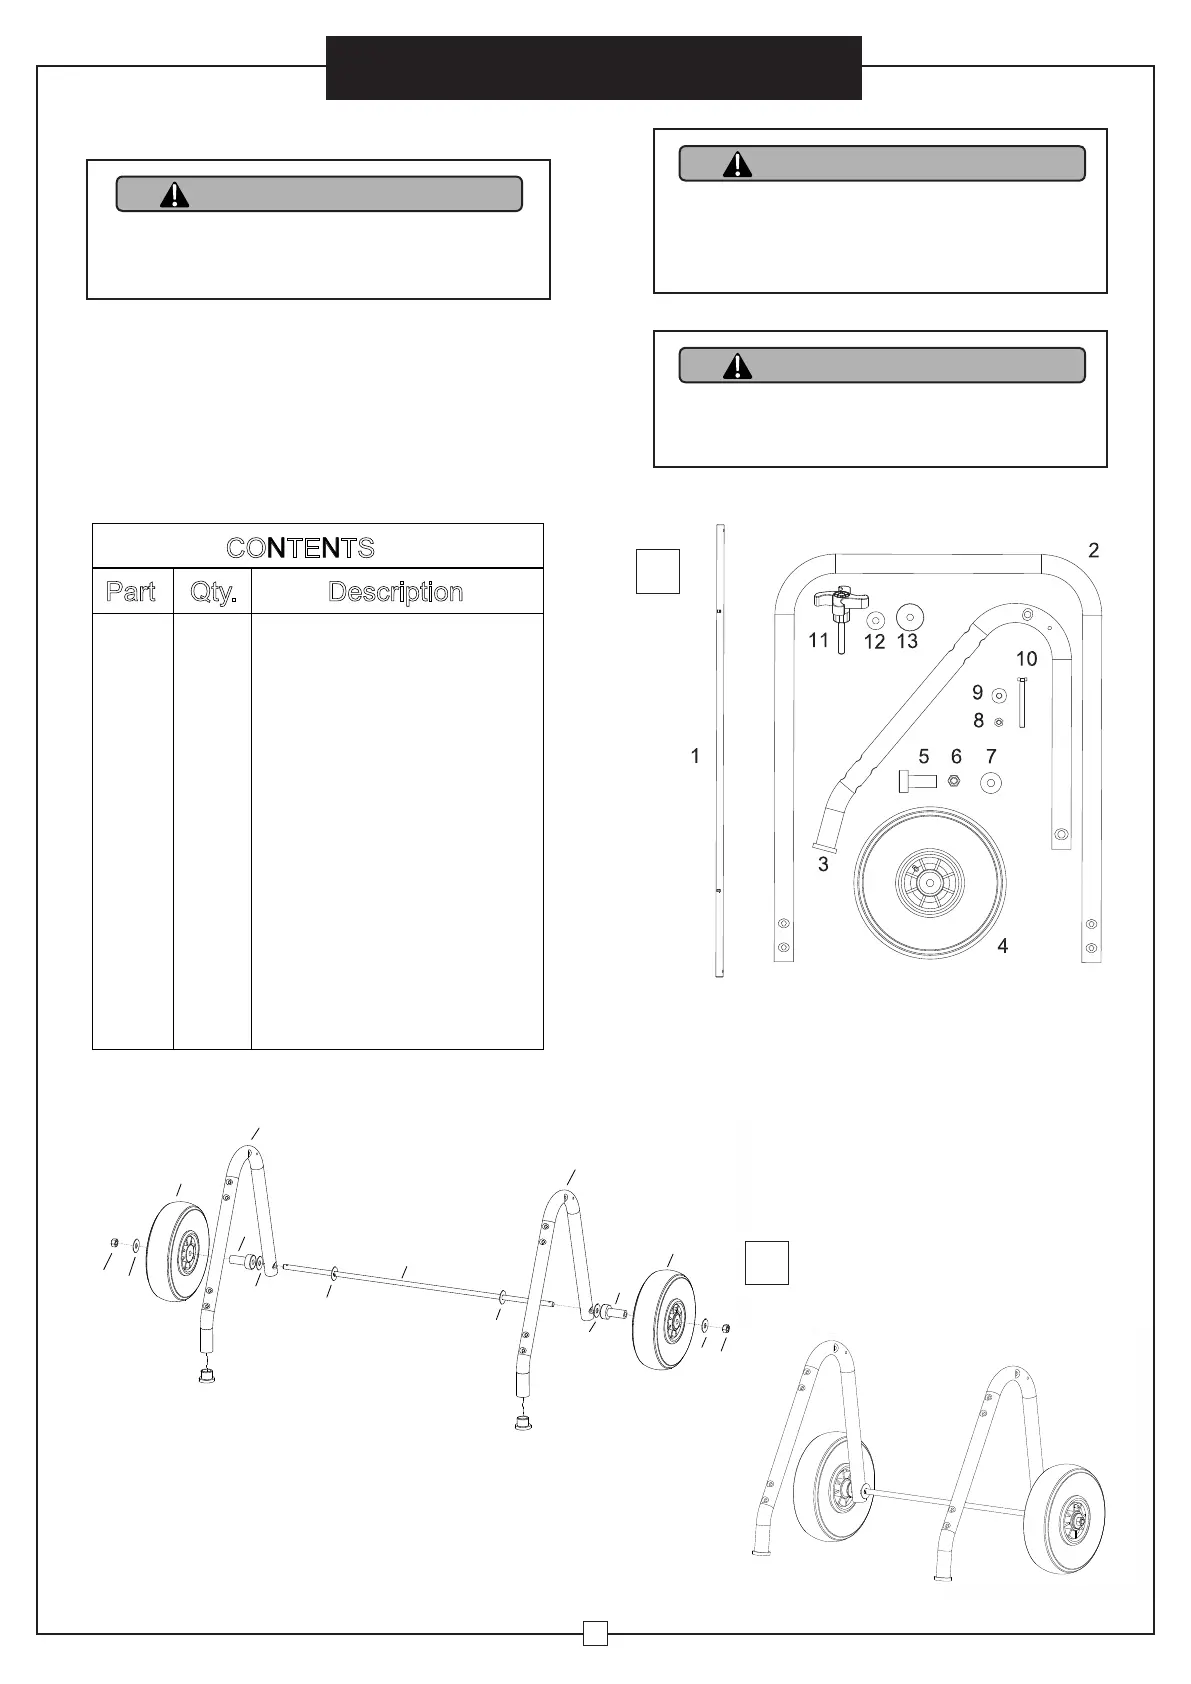
Tighten M12 nuts (6) to wheels.
WARNING
All wiring must be installed by a certified
electrician in accordance with electrical
safety standards.
CAUTION
Keep electrical cords, drapery,
furnishings and other combustibles
at least 3 feet (0.9 m) from heater,
to prevent risk of fire.
WARNING
To reduce the risk of fire, do not store or
use gasoline or other flammable vapors
and liquids near the heater.
5
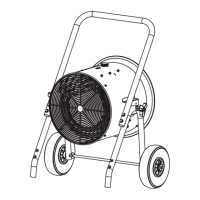
Electric Blower Heater
All wiring procedures and connections must be in
accordance with national and local codes.
Prior to installation:
Disconnect the main supply connection.
The heater must be connected to individual rated branch circuit
breaker only. (See spec sheet).
Use proper conductor size for power supply. (See spec sheet).
INSTALLATION INSTRUCTIONS
Open package and remove heater and
assembly components.
User’s Manual
1
2
CONTENTS
Part Qty. Description
11Axle
21Handle
3 2 Foot Stand
42Wheel
52Bushing
6 2 M12 Nut
7 4 12mm ID Washer
8 4 M8 Nut
9 8 8mm ID Washer
10 4 M8 x 80 Screw
11 2 M6 x 55 Screw
12 2 6mm ID Washer
13 2 M6 x 20 Nut
14 2 Knob
15 2 10mm ID Washer
16 2 50 x 10mm Rubber Pad
Use axle (1), bushing (5) and 12mm ID
washer (7) to assemble foot stand (2)
and wheels (4).
1
3
56 7
8
9
10
11
14 15 16
12 13
4
2
CONTENTS
Part Qty. Description
1
2
3
4
5
6
7
8
9
10
11
12
13
1
1
2
2
2
2
2
2
6
4
4
8
Axle
Handle
Foot Stand
Wheel
Bushing
M12 Nut
M8 Nut
12mm ID Washer
8mm ID Waher
M8 x 80 Screw
Knob
10mm ID Waher
50 x 10mm Rubber Pad
2
Use axle (1), bushing (5) and 12mm ID
washer (7) to assemble foot stand (3)
and wheels (4).
Tighten M12 nuts (6) to wheels.