Page 8
Installation
Feet
Install feet by screwing each foot into the threaded openings on the bottom of the fryer. Failure to use feet will void
warranty and could cause unsafe conditions.
Leveling
Level unit by adjusting the four feet and tighten securely. The adjustable feet have an adjustment of one inch for
lineup with other Commercial Pro countertop lines. Check the feet regularly to make sure they are tight. Make sure
the work surfaces of the bench/table the fryers sits on are kept clean and maintained to avoid any accidents. Make
sure the bench/table is adequately built to hold the weight of the fryer. Empty (without oil/shortening added) PF10E
= 16.8 lbs, PF16E = 19.2 lbs, PF32E = 29.2 lbs.
IMPORTANT:
Suitable Pans: Use only the fry baskets and fry pot provided with your fryer. DO NOT substitute the
baskets or fry pot with any other container.
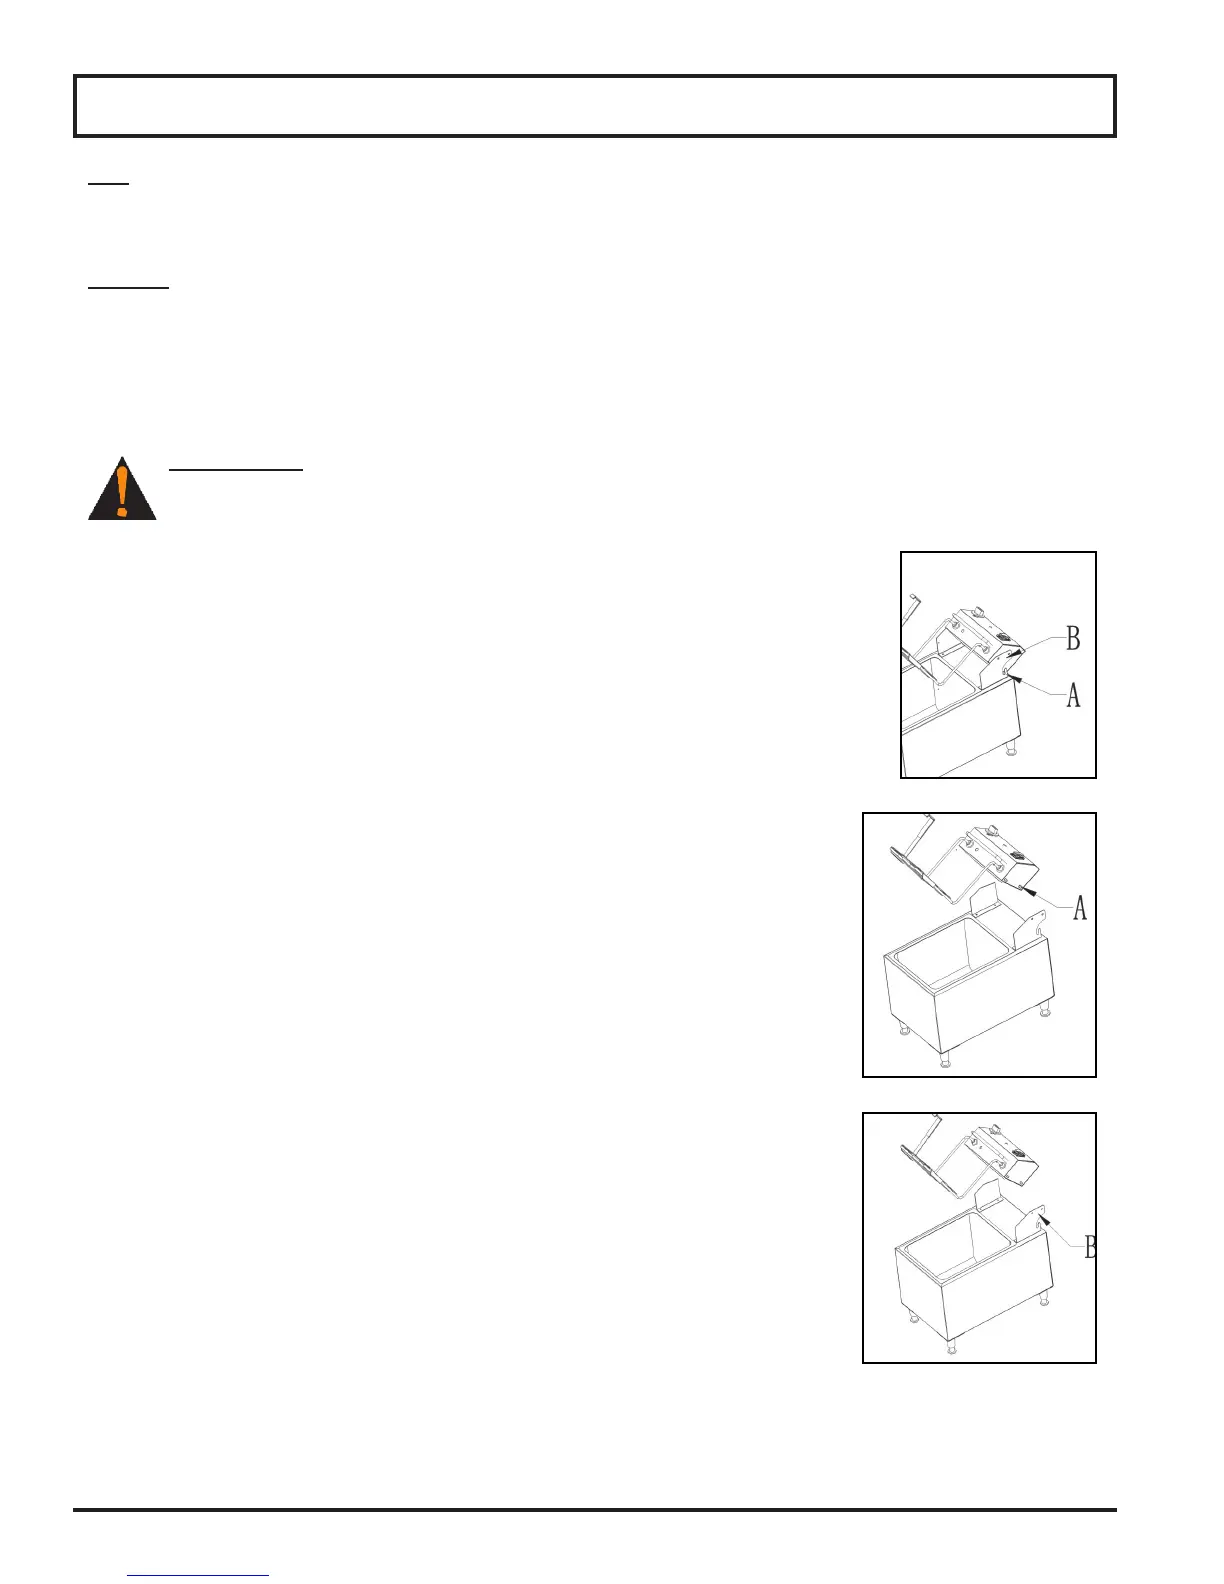
The fryer electrical head has two locating buttons that need to be aligned (Fig 8-1).
1. Make sure the oil pan is placed into the fryer body evenly, and lower the element
into the frying pot bay following the two simple steps (Fig. 8-2 and Fig. 8-3). Points
A, cradles and guides the head to the fryer body.
NOTE: Easy push buttons to lock and unlock located on the operator right-side; lift and
lower heating element for cooking or cleaning. Point A is the cradle pin guide.
Point B determines the position of the head in either the working (Drip Oil)
position or cleaning (Remove Pot) position.
2. Place the electrical head into the supporting cradle brackets placing Points
A into the element cradle pin guide; then gently pull the fryer electrical head
forward to lock Point B into the rst position.
NOTE: Point B allows the fryer head to stay in the raised (Drip Oil or Remove
Pot) position, or by pushing and/or depressing the button and holding the
insulated element handle, you can also lower the element into the pan and
its operating position.
These steps can be repeated in reverse for cleaning purposes.
NOTE: Point B has two level options: Fully raised 90° (Remove Pot position), allows
pan to be removed; raised to 75° (Drip Oil position), allows for cleaning and
draining oil/fat from the element.
Make sure the fryer is off. It is now ready to be lled with the appropriate oil/
shortening required. For shortening, it is advised to breakdown rst to avoid
overheating of the element.
NOTE: In the “Off” position, the fryer pot can be lled with the heating element up
or down. Once the pot is full with appropriate cooking oil, carefully lower the
heating element into the pot if up. Make sure the heating element is always
fully covered with oil. Once the heating element is fully covered with oil, the
fryer can then be turned “On”. Refer to the Operating Instruction in this manual to
properly start and operate the fryer.
Fig. 8-1
Fig. 8-2
Fig. 8-3
 Loading...