EasyManuals Logo

go-e Gemini flex Quick Reference Guide

go-e Gemini flex
24 pages
To Next Page IconTo Next Page
To Previous Page IconTo Previous Page
Page #6 background imageLoading...
Page #6 background image
66
b
b
i
i
j
j
k
k
l
l
m
m
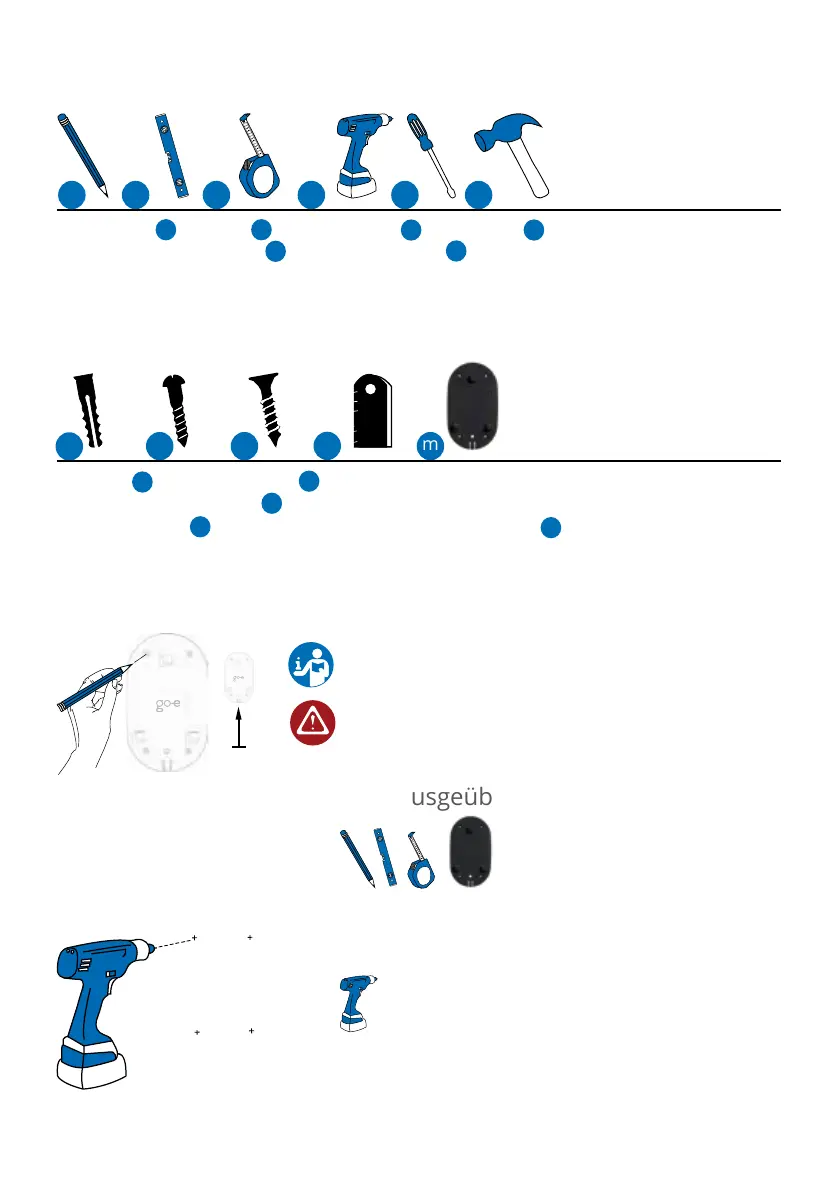
Bleistift Wasserwaage Maßband Bohrmaschine
Schraubendreher Hammer
Dübel8x40mmSchraubenfürWandhalterung4,5x50mm
SchraubefürU-Stück4x50mm
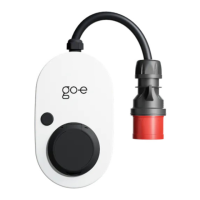
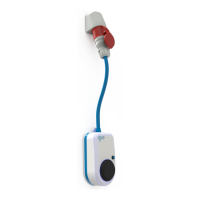
U-Stück (optionale Diebstahlsicherung) Wandmontageplatte
Beiliegendes Befestigungsmaterial
e
5x 4x 1x
a
a
c
c
d
d
e
e
f
f
3. Installation3. Installation
Benötigte Werkzeuge
1.
Halte die Wandmontageplatte an die
gewünschte Montageposition und rich-
te diese gerade aus. Markiere die Bohr-
löcher. Der go-e Charger muss gerade
unterhalb der CEE-Dose montiert wer-
den, damit wenig Druck auf die Zulei-
tung ausgeübt wird.
2. Bohre Löcher an den vier markierten
Stellen.
4x
4x
1 m - 1.45 m

Other manuals for go-e Gemini flex

Questions and Answers:

Question and Answer IconNeed help?

Do you have a question about the go-e Gemini flex and is the answer not in the manual?

go-e Gemini flex Specifications

General IconGeneral
Connector TypeType 2
Product TypeWallbox
RFIDYes
MID MeterYes
Protection ClassIP54
ConnectivityEthernet
CompatibilityAll EVs with Type 2 connector
Input Voltage400 V AC
Output Voltage400 V AC
Dimensions350 x 220 x 110 mm

Related product manuals