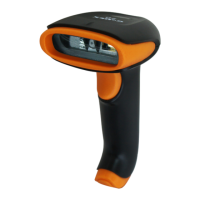
Getting Started
Turn off the computer’s power before connecting the scanner, then
power up the computer once the scanner is fully connected.
Connecting the Scanner
USB:
Keyboard Wedge:
Reading Techniques
Recall Defaults
The following bar code resets all standard product default settings.
Interface Selections
USB
Keyboard Wedge
³ 9 9 9998
Recall Defaults
³ 3 1 6400
USB Keyboard
Emulation
³ 5 1 551 4 3
Keyboard Wedge Emulation
Prefix
Scan one of the following bar codes to program your scanner to add
or remove a start of text character, or AIM or Nixdorf identification
characters before each bar code.
³ 1 1661 5
³ 1 1 6605
³ 1 0 7905
STX Prefix On
STX Prefix Off
³ 1 0791 5
AIM ID Prefix On
AIM ID Prefix Off
Suffix
Scan one of the following bar codes to program your scanner to add
or remove a carriage return, line feed, tab, or end of text after each
bar code.
³ 1 1 6613
³ 1 1660 3
³ 1 1660 4
CR Suffix On
CR Suffix Off
³ 1 1 6612
LF Suffix On
³ 1 1660 2
LF Suffix Off
³ 1 1 6610
Tab Suffix On
³ 1 1660 0
Tab Suffix Off
³ 1 1 6614
ETX Suffix On
ETX Suffix Off
User Configurable Prefix/Suffix
One or two prefix or suffix characters can be added and assigned for
data transmission. Use one of the codes below with a 3 code byte
sequence that represents the desired character (see ASCII
Conversion Chart, end of document) for your prefix or suffix. (To add
additional prefix/suffix characters, refer to your Single-Line
Configuration Guide.)
Scan the Enter/Exit Programming bar code to begin. Then scan
the 3 digit decimal equivalent of the ASCII character into the
appropriate character location with the cod
e byte bar codes (see
Code Bytes, end of document). To save, scan the Enter/Exit
Programming bar code again.
Example: To add an asterisk (*) as a prefix, scan the bar codes:
1. Enter/Exit Programming
2. Configurable Prefix #1
3. Code Byte 0
4. Code Byte 4
5. Code Byte 2
6. Enter/Exit Programming
³ 9 0450 0
Configurable Suffix #1
³ 9 0460 0
Configurable Suffix #2
³ 9 0350 0
Configurable Prefix #1
³ 9 0 3600
Configurable Prefix #2
³ 9 9 9999
Enter/Exit Programming
Supplements
Scan one of the bar codes below to program your scanner for 2 or 5
digit bar code supplements.
977 (2 Digit) Supplement Required: Turn on this feature when a 2
digit supplement is required for EAN-13 codes that begin with 977.
Scan Modes
³ 1 0 1217
2 Digit Supplements
On
³ 1 0120 7
2 Digit Supplements Off
³ 1 0 1216
5 Digit Supplements
On
³ 1 0120 6
5 Digit Supplements Off
³ 1 0 1314
977 Supplements On
³ 1 0130 4
977 Supplements Off
UPC/EAN Formatting
Scan Convert UPC-A to EAN-13 and a leading zero is transmitted
before a UPC-A bar code to convert it to EAN-13.
Scan Transmit Lead Zero on UPC-E to transmit a zero before each
UPC-E bar code.
³ 4 1 833 4
Continuous Blinky_1
³ 1 0 7514
Convert UPC-A to
EAN-13
³ 1 0750 4
Don’t Convert UPC-A to
EAN-13
³ 1 0 7513
Transmit Lead Zero on
UPC-E
³ 1 0750 3
Don’t Transmit Lead
Zero on UPC-E
GS220
Bar Code Scanner
Quick Start Guide
220-QS Rev D
12/12
818900
Continuous Blinky_2
118703
Continuous Blinky_3
Recall Defaults
When you scan Continuous Blinky Scan mode, the scanner beam
flashes and scans continuously. To enter the mode, scan below codes:
1. Enter/Exit Programming 2. Continuous Blinky_1
3. Continuous Blinky_2
4. Continuous Blinky_3
5. Enter/Exit Programming
To exit from
Continuous Blinky Scan mode
, scan the
Recall
Defaults
barcode.