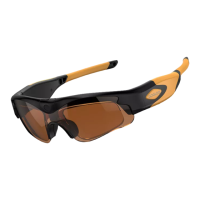
Utilisation de base FR
1. Mise en marche de l'enregistrement vidéo
Pour commencer l'enregistrement, appuyer sur le bouton ON/OFF pendant 1 sec.
La LED Vert/Bleuest ON; La lunette entre en mode initialisation.
Après 2~3 secondes,une vibrating se déclenche ”Z-Z” 2 fois et la LED Bleu(
1080P)
flashe doucement, L'enregistrement vidéo commence.
Note:Pendant l'enregistrement, LED Bleu pour 1080P, LED Verte pour 720P.
2. Mise en Pause pendant l'enregistrement
recording
pour mettre l'enregistrement en pause, presser le button ON/OFF une seule fois
pendant l'enregiustrement; une vibrating se déclenche ”Z” 1 fois et la LED arrete
de clignoter. Afin de reprendre l'enregitrement, presser le button ON/OFF 1 fois.
l 'enregistrement reprend, et la LED recommence à clignoter.
3. Arreter l'enregistrement
Pour arreter l'enregistrement presser le boutton ON/OFFpendant 2 secondes,
une vibration continue “Z...” se déclenche pendant secondes,la LED verte et bleu
clignotent rapidement pendant 3 secondes,la sequence vidéo est enregistrée
sur le disque.
Note: afin de limiter la taille des fichiers, L'enregistreur sauvegarde le fichier
toute les 30 minutes et recommence un nouveau fichier. Ceci peut être changé
pour 5 minutes,
15 minuteset 30 minutes dans le fichier SETTING.txt.
4.Comment enregistrer pendant le chargement de la batterie
This device can record during wall charging or power bank charging. After
connecting the power, the glasses enters into recording mode automatically.
Note: If you don’t want the glasses to enter into recordings automatically,
please take out the memory card before connecting the power.
There are 2 ways to take photos (Each time, it would take 3 photos):
1) During recording, short click the ON/OFF button 2 times quickly,
the vibrating alerts “Z” 1 time and the green/blue LED both on, then it
finished taking photo, after taken photo, the vibrating alerts “Z-Z” 2
times and goes back to recording mode.
2) During recording, short click the ON/OFF button for 1 time, then the
vibrating alerts “Z” 1 time, the device goes into standby mode and the
recording LED keeps on for a long. Short click the ON/OFF button 2
times quickly, the vibrating alerts “Z” 1 time and the green/blue LED
both on, then it finished taking photo. After taken photo, it would keep
in standby mode, you can continue to take photo (clicking the ON/OFF
button 2 times quickly), or click ON/OFF button 1 time to go back to
recording mode (the vibrating alerts “Z-Z” 2 times).
6. Toggling 1080P and 720P recordings
Factory default is 1080P recording mode (Blue LED). To toggle, press
the WiFi button for 2 seconds to change the recording mode.
When battery is low or running out of memory, the device will save the
current file and the green/blue LED will blink very fast and the vibrating
alerts “Z...”continuously for approx 3 seconds, then shuts off.
There is a reset button located next to the USB port of the glasses.