GL102B USER’S GUIDE GOLANDERUSA.COM
To use a PT100 probe and a heater to keep the temperature to 200°F, keep the output setting for PID
control mode, outy=2; set input type for PT100, Inty=P10.0; set target temperature SV=200.
Note: For 220V heater, change the AC power source to 220V AC, use hot line 1 (L1) and hot line 2 (L2) to
power the heater.
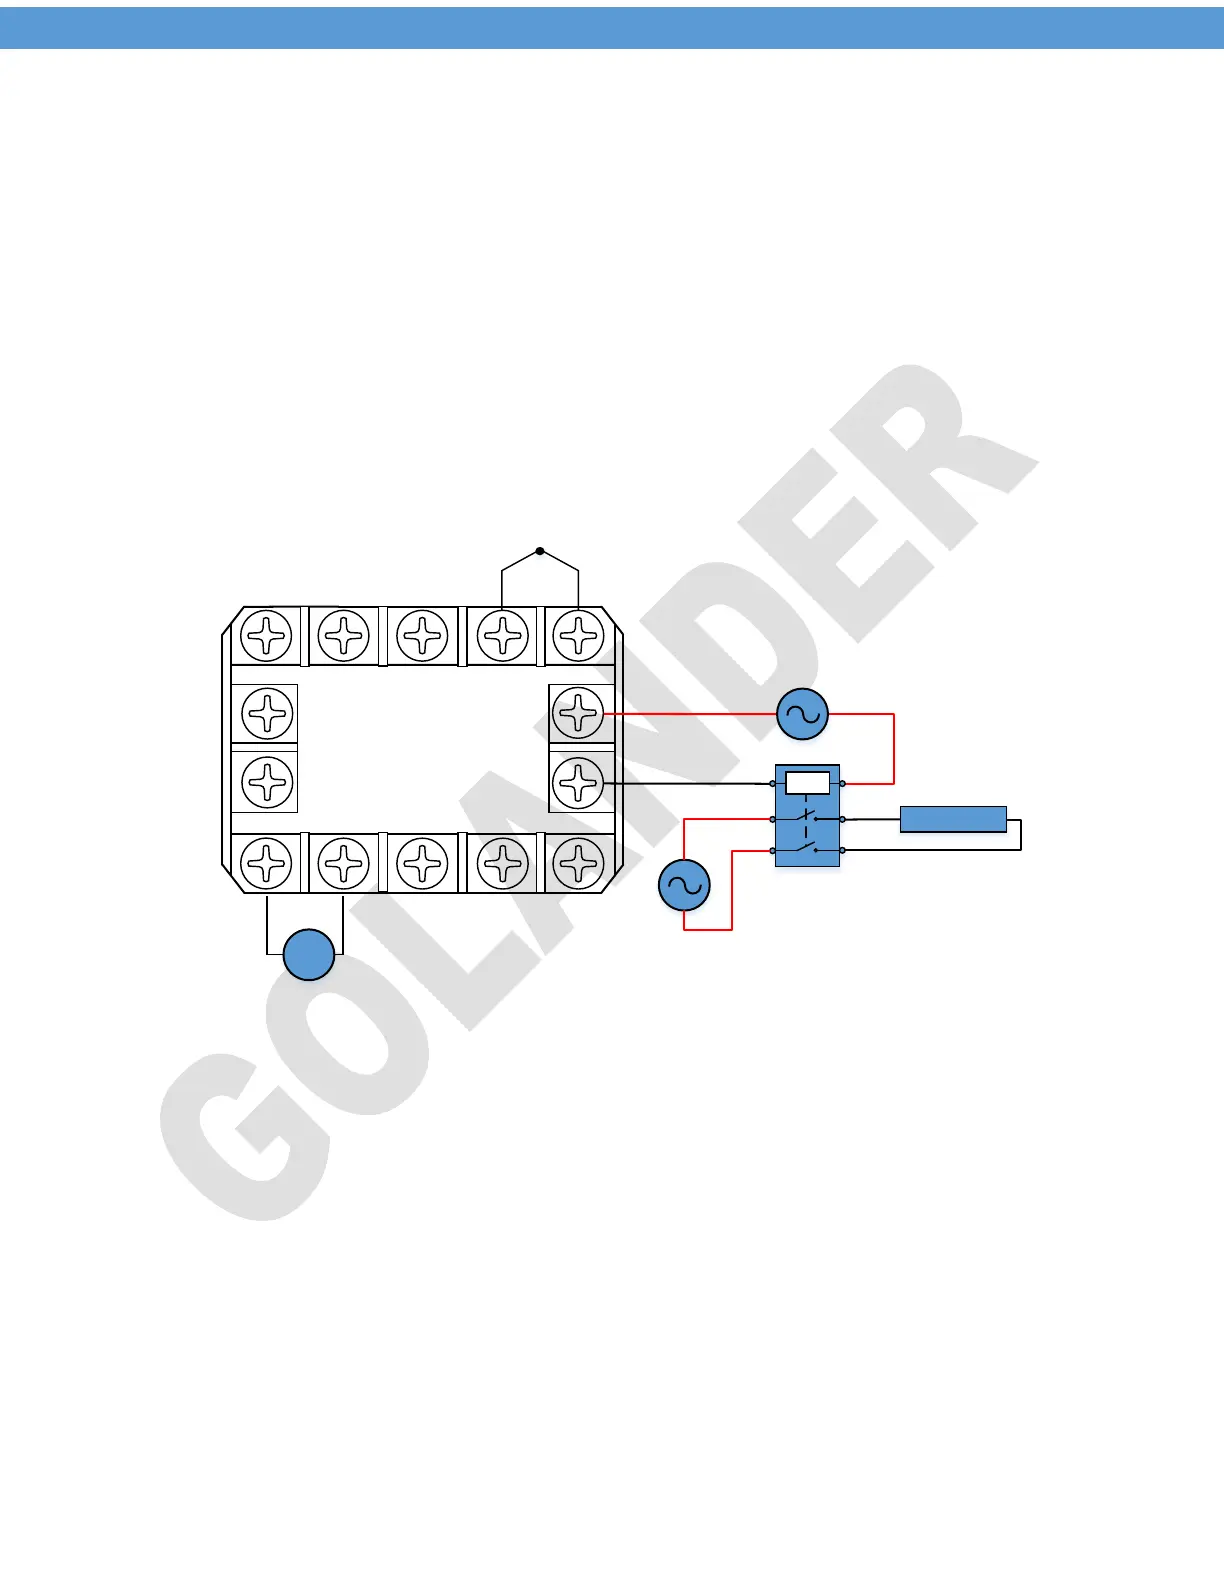
11.4 Control a 220V AC Heater via Contactor
If heater draws more than 3A, the J2 relay could not handle it directly. A 220V coil contactor can be used to
power the heater.
1) To use PID mode to control the heater, set outy=1, set cycle time ot=15 seconds to save the lifetime of
the J2 relay and contactor. Set the SV to the desired temperature you want to hold, for example, SV=350°F.
2) To keep the temperature in a range, for example, 330-350°F, set the output control to on/off mode,
outy=4; keep the cycle time setting ot=2. Set SV=350, Hy=20. The output will be off when temperature goes
above 350°F, and will be on again when temperature drops down to SV-Hy=320 °F.
8 9 10
1 2
3
4 5
7
6
-
+
11
12
13
14
220V AC
Contactor
Thermocouple
COIL
L1
L2
220V
AC
Heating
Element
9-30V DC
+
-
Figure 8. Use Contactor for Heater
11.5 Use J1 Relay to Trigger a 12V DC Alarm Buzzer
J1 relay is controlled by parameters AH1 and AL2.
1) High alarm: If you want the buzzer to be on when temperature is higher than 210°F, and to be off when
temperature drops down to 205°F, set AH1=210, AL1=205 (AH>AL).
2) Low alarm: If you want the buzzer to be on when temperature is lower than 5°F, and to be off when
temperature goes back to 10°F, set AH1=5, AL1=10 (AH<AL).
3) When the J2 relay is set to alarm (Outy=0, 2 or 3), the setting is similar to J1 relay.
10
 Loading...