User‘s Manual
28
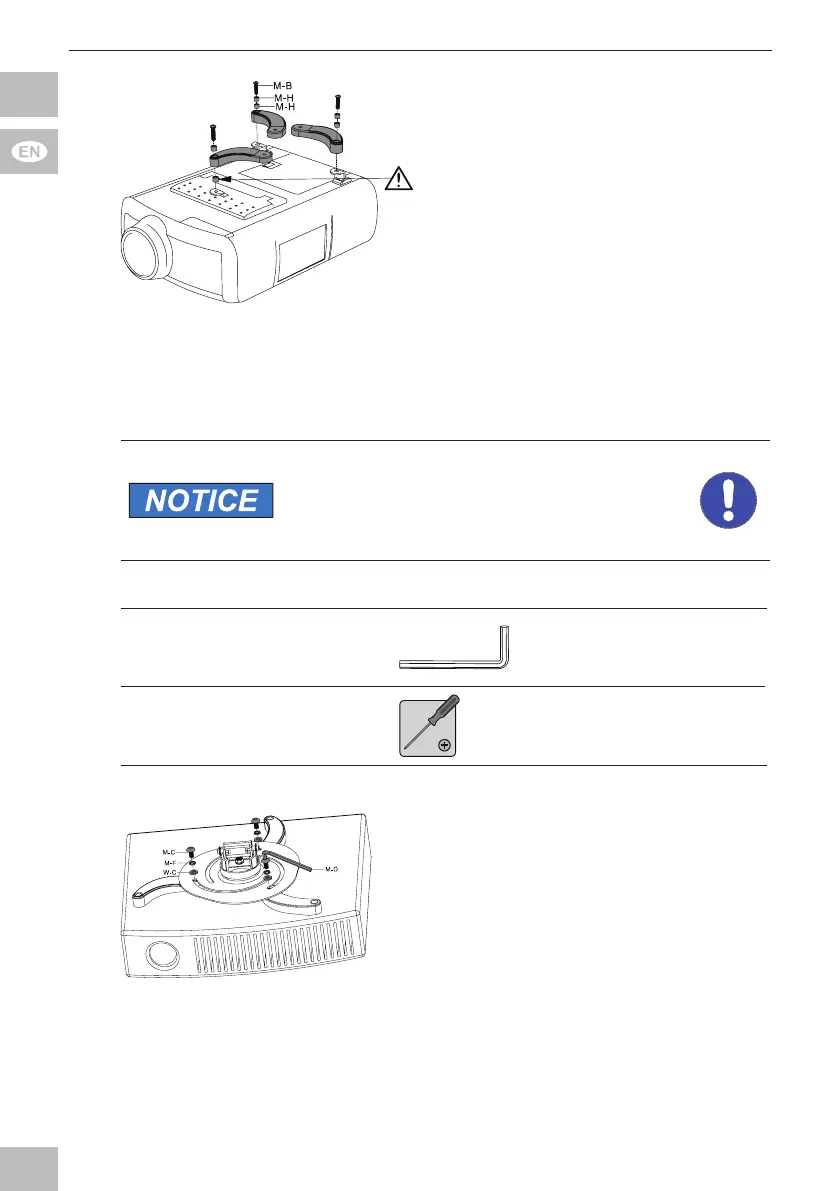
2. Connect the adjustable part
(M-E) to your beamer or
projector by using the screws
(M-B) and the spacers (M-H)
as shown.
3. Make sure using a spacer
(M-H) at the front mounting leg
(D) between mounting leg and
adjustable part (M-E).
Fig. 27:
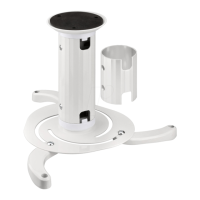
Installing the mounting legs CLIP Version 2
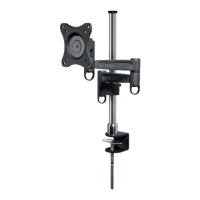
4.5 Connecting mounting legs with projector plate
Risk of material damage by improper
procedure
>> Only use moderate force when tightening
the screws in order to avoid damaging
threads.
Tab. 20: Connecting mounting legs with projector plate
Allen wrench
4mm
M-D
Philips head screwdriver
1. Align the projector plate (C) so
that the mounting legs (D) can
be optimally mounted in the
slots.
2. Connect the projector plate (C)
with the mounting legs (D) and
Fig. 28:
Connecting mounting legs with projector plate
M-F and W-C) by tightening
the Allen wrench (M-D) clock-
wise.