20
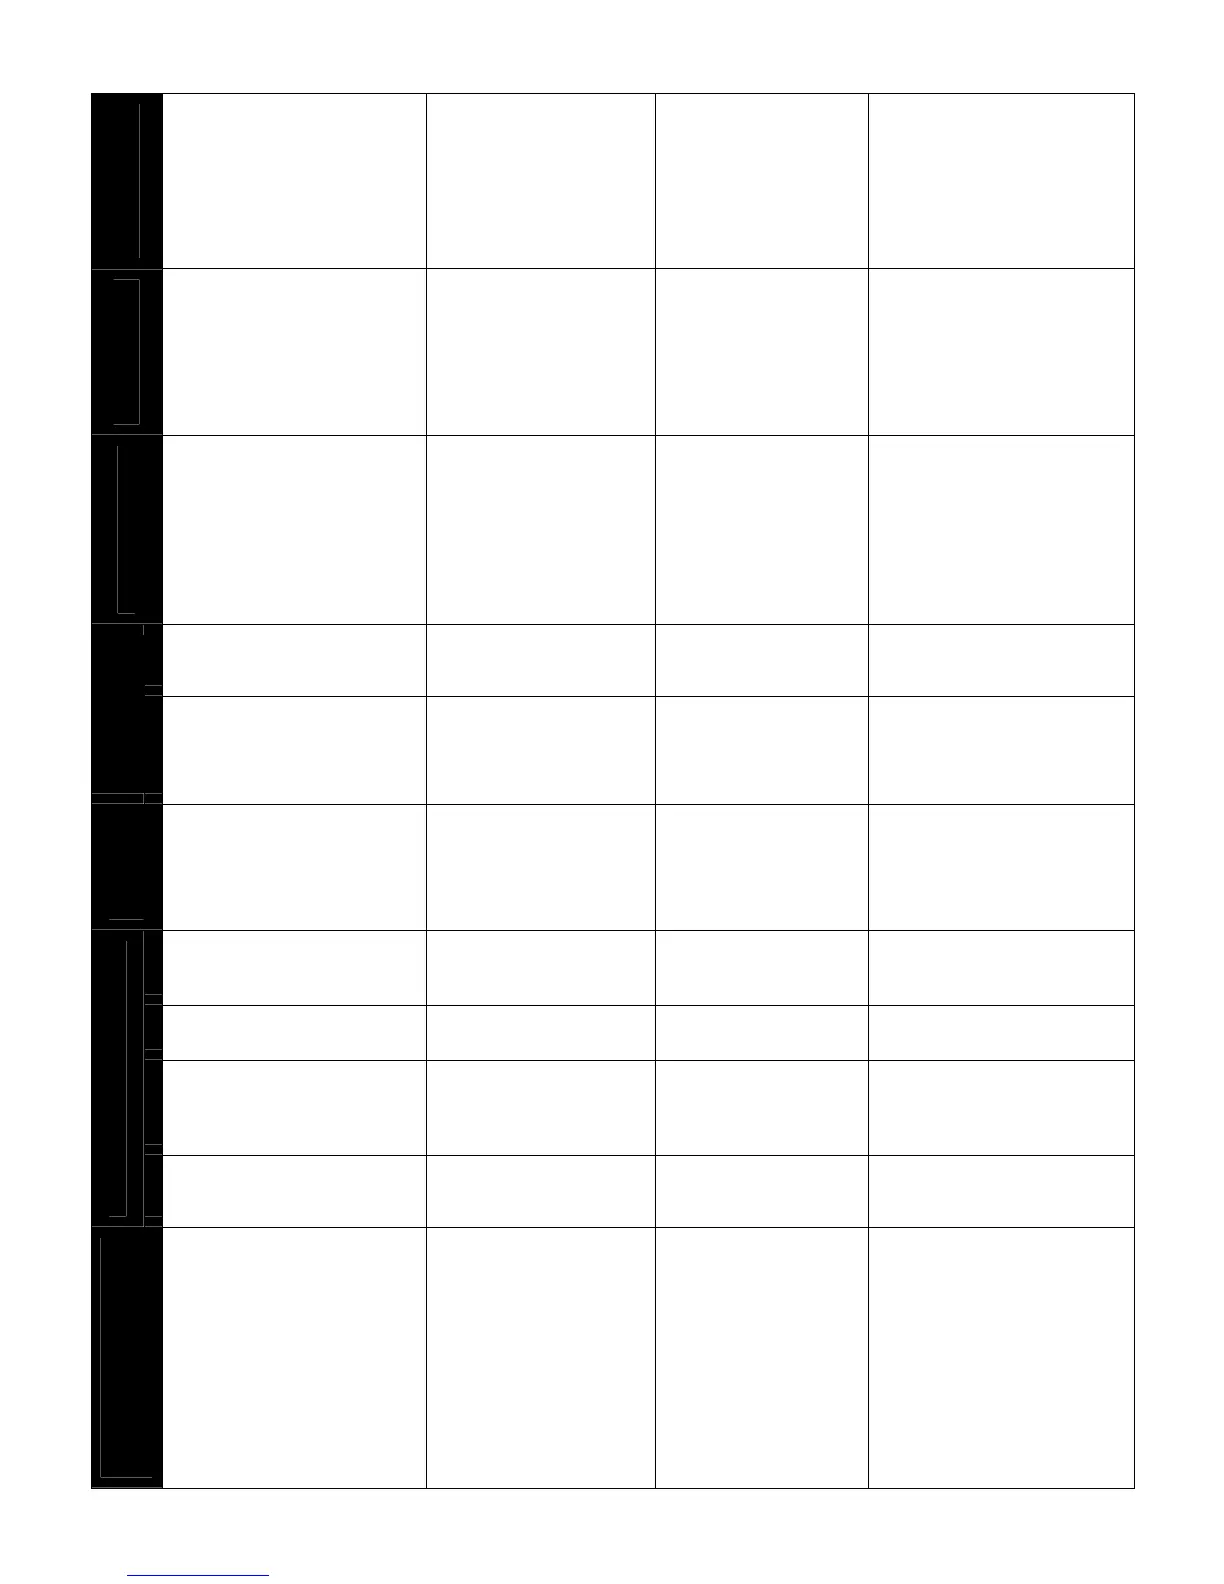
TROUBLESHOOTING INFORMATION: UNITARY DIAGNOSTIC CODES
Diagnostic/Status LED Codes
ComfortNet™
Thermostat Only
Symptoms of Abnormal
Operation (Legacy &
ComfortNet™ Thermostat)
Green Yellow Red Red Y1
Fault
Description
Message Code
Possible Causes
Corrective Actions Notes & Cautions
x Compressor and outdoor fan are
off.
x Compressor protector trips four
consecutive times.
x Average run time between trips is
less than 15 seconds.
x Integrated control module
diagnostic/status LED’s display
the indicated code.
x ComfortNet™ thermostat “Call for
Service” icon illuminated.
x ComfortNet™ thermostat scrolls
“Check Air Conditioner” or
“Check Heat Pump” message.
OFF 4 Flashes ON ON if
call
present
; OFF if
no call
x Locked Rotor
LOCKED
ROTOR
04
x Compressor bearings
are seized.
x Failed compressor run
capacitor.
x Faulty run capacitor
wiring.
x Faulty compressor
wiring.
x Low line voltage.
x Check compressor
operation;
repair/replace as
needed.
x Check run
capacitor; replace
as needed.
x Check wiring;
repair/replace as
needed.
x Verify line voltage
is within range on
rating plate;
contact local utility
if out of range.
x Turn power OFF
prior to repair.
x Must clear fault by
cycling 24VAC to
control.
x Replace with correct
replacement part(s).
x Compressor and outdoor fan are
off for greater than 4 hours.
x Low pressure and high pressure
switches are closed.
x Integrated control module
diagnostic/status LED’s display
the indicated code.
x ComfortNet™ thermostat “Call for
Service” icon illuminated.
x ComfortNet™ thermostat scrolls
“Check Air Conditioner” or
“Check Heat Pump” message.
OFF 5 Flashes OFF ON if
call
present
; OFF if
no call
x Open Circuit
OPEN
CIRCUIT
05
x Power is
disconnected.
x Failed compressor
protector.
x Compressor not
properly wired to
control.
x Check circuit
breakers and
fuses.
x Check wiring to
unit; repair/replace
as needed.
x Check compressor;
repair/replace as
needed.
x Check compressor
wiring;
repair/replace as
needed.
x Turn power OFF
prior to repair.
x Fault will clear after
1 normal cycle.
x Fault may be
cleared by cycling
24VAC to control.
x Replace with correct
replacement part(s).
x Compressor and outdoor fan are
off.
x Low pressure and high pressure
switches are closed.
x Integrated control module
diagnostic/status LED’s display
the indicated code.
x ComfortNet™ thermostat “Call for
Service” icon illuminated.
x ComfortNet™ thermostat scrolls
“Check Air Conditioner” or
“Check Heat Pump” message.
OFF 6 Flashes OFF ON if
call
present
; OFF if
no call
x Open Start
Circuit
OPEN
START
06
x Compressor start
winding is open.
x Failed compressor run
capacitor.
x Faulty run capacitor
wiring.
x Compressor not
properly wired to
control.
x Faulty compressor
wiring.
x Check compressor;
repair/replace as
needed.
x Check run
capacitor; replace
as needed.
x Check wiring;
repair/replace as
needed.
x Turn power OFF
prior to repair.
x Fault will clear after
1 normal cycle.
x Fault may be
cleared by cycling
24VAC to control.
x Replace with correct
replacement part(s).
x Compressor and outdoor fan are
off.
x Low pressure and high pressure
switches are closed.
x Open start circuit has been
detected 4 times with 5 minute
delay between each detection.
x Integrated control module
diagnostic/status LED’s display
the indicated code.
x ComfortNet™ thermostat “Call for
Service” icon illuminated.
x ComfortNet™ thermostat scrolls
“Check Air Conditioner” or
“Check Heat Pump” message.
OFF 6 Flashes ON ON if
call
present
; OFF if
no call
x Open Start
Circuit
Lockout
OPEN
START
LOCK
06
x Compressor start
winding is open.
x Failed compressor run
capacitor.
x Faulty run capacitor
wiring.
x Compressor not
properly wired to
control.
x Faulty compressor
wiring.
x Check compressor;
repair/replace as
needed.
x Check run
capacitor; replace
as needed.
x Check wiring;
repair/replace as
needed.
x Turn power OFF
prior to repair.
x Must clear fault by
cycling 24VAC to
control.
x Replace with correct
replacement part(s).