200mm 300mm200mm
300mm
500mm
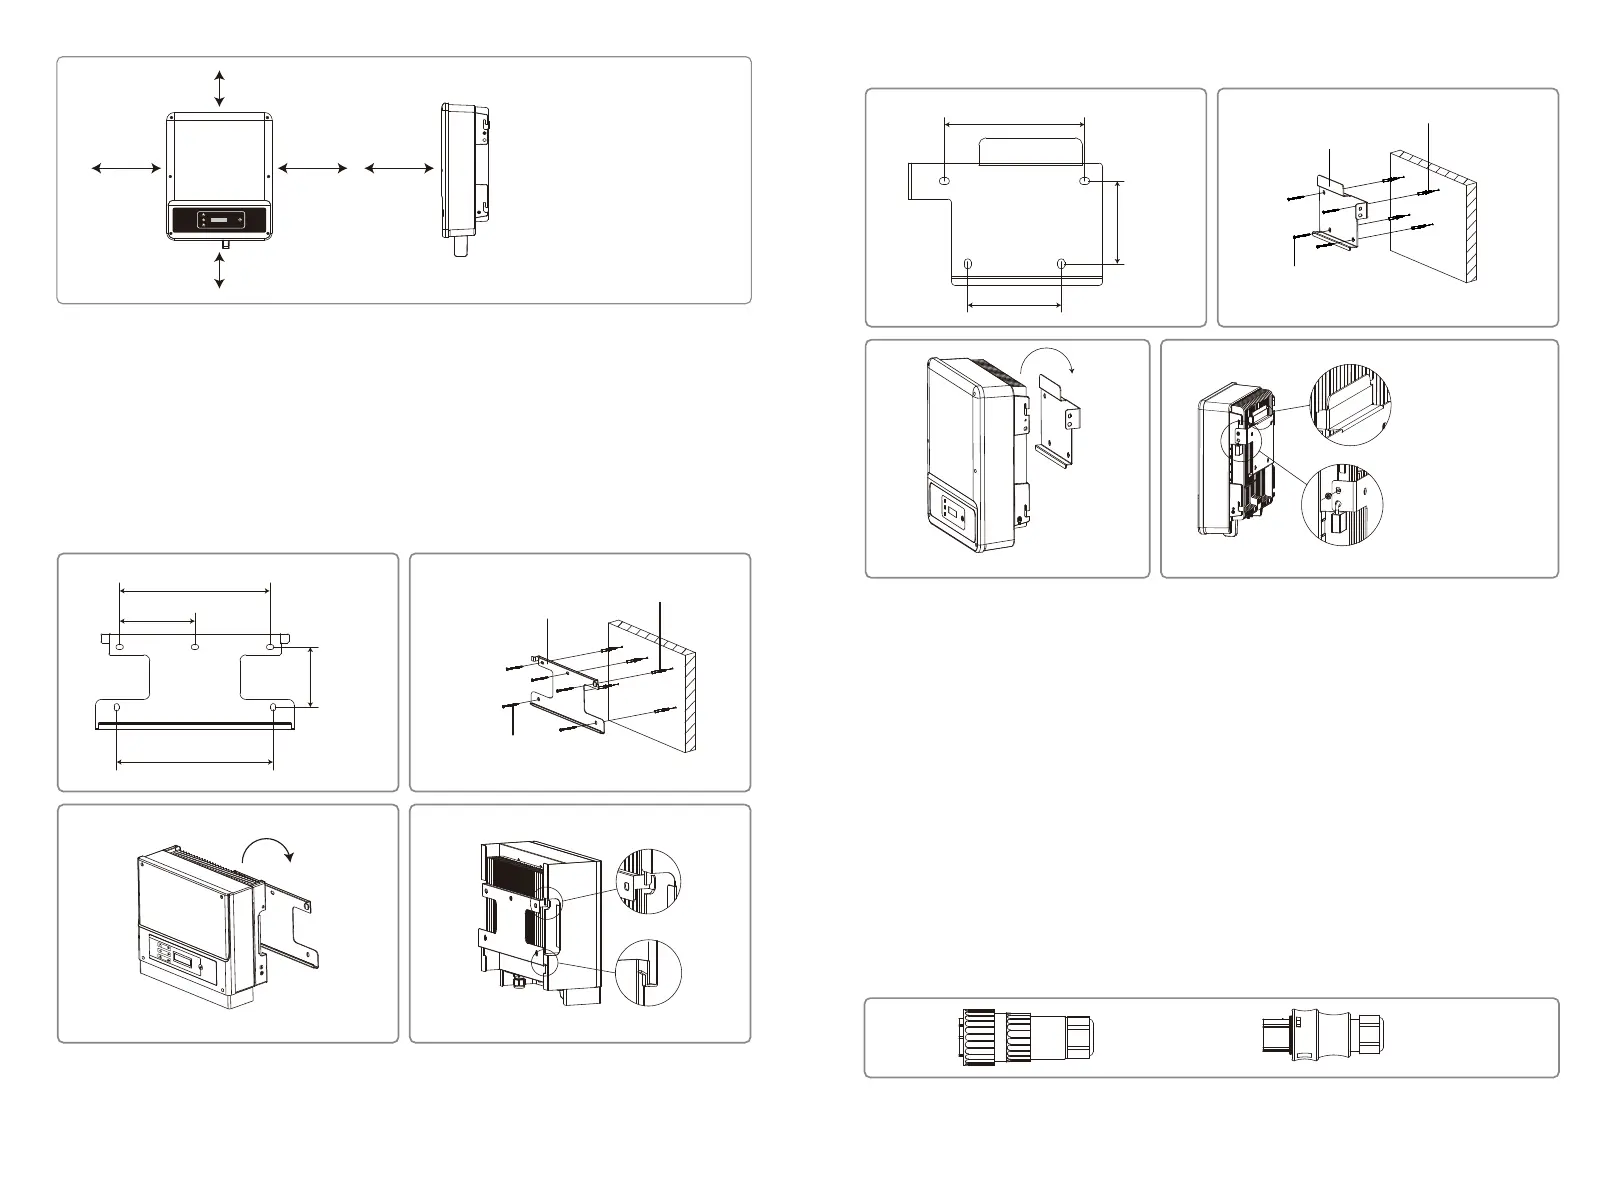
4.2.2 Mounting Procedure
1. Use the wall-mount bracket as a template and drill holes with 10mm in diameter and 80 mm
in depth on the wall.
2. Fix the wall-mount bracket on the wall with the expansion bolts in the accessories bag.
3. Hold the inverter by the side groove.
4. Mount the inverter onto the wall-mount bracket.
Mounting procedure for NS
250mm
130mm
125mm
260mm
Upward -------------- 300mm
Downward ---------- 500mm
Front ----------------- 300mm
Both sides ---------- 200mm
VACONN Series WIELAND Series
4.3 Electrical Connection
4.3.1 Connection To Grid (AC Side Connection)
1. Check the grid voltage and frequency for whether it complies with the required voltage and
frequency of inverter connection.
2. Add breaker or fuse to AC side, the specification should be more than 1.25 times of rated AC
output current.
3. The PE line of inverter should be connected to the earth, make sure the impedance of the
neutral wire and earth wire is less than 10 ohm.
4. Disconnect the breaker or fuse between the inverter and the utility.
5. Connect the inverter to the grid as follows:
There are 2 AC connector brands for inverter, VACONN and WIELAND.
6. The AC line construction shall be such that if the cord should slip from its anchorage, placing a
strain on conductors, the protective earthing conductor will be the last to take the strain. As
such, the PE line is longer than L and N.
Mounting procedure for DNS
The lock is not involved in
the package, need to be
prepared by customer
themselves if needed.
195mm
130mm
115mm
Wall-Mounting Bracket
Expansion Pipe
Self-tapping Screws
Wall-Mounting Bracket
Expansion Pipe
Self-tapping Screws
07 08
 Loading...