Page 8 For technical questions, please call 1-888-866-5797. Item 58892
SAFETY OPERATION MAINTENANCESETUP
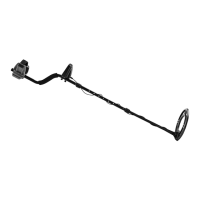
MEMORY Mode
Use this Mode to detect metal types
similar to a saved metal object.
1. Once a metal object is recovered and you
want to search for the same type metal object,
press MODE and select MEMORY.
< 40
50
60
70
80
90 +
MODE
COIN
DEPTH
S
E
N
S
PP
M
O
D
E
A-M
MEMORY
JEWEL RY
DISC
Si l ver
Figure F: MEMORY Mode - Object Saved In Memory
a. Sweep over the metal object so that its Target
Digital Value displays and its associated
Target ID Icon flashes. The first metal
object the unit identifies will be saved.
b. Once saved, the Target Digital Value will
disappear from the Display and the Target ID
Icon will stop flashing. “MEMORY” will be seen
on the Display. The unit will now only respond
to the same type of metal that was saved.
Note: In the MEMORY Mode, the Detector will
respond to all metals in the saved Target Icon range.
c. When the same type of metal is detected,
the tone will play, its Target Digital Value will
display and the Target ID Icon will flash.
d. Press MODE to clear the saved setting
and exit the MEMORY Mode or select
MEMORY to save a new metal object.
JEWELRY Mode
Use this Mode to detect non-ferrous (iron) metal types.
1. Press MODE then select JEWELRY. The
JEWELRY Mode ignores most nails and small
iron pieces but will detect jewelry, coins, and
other metals in those Target ID Icon ranges.
< 40
50
60
70
80
90 +
MODE
COIN
DEPTH
S
E
N
S
PP
M
O
D
E
A-M
MEMORY
JEWEL RY
DISC
Si l ver
Figure G: JEWELRY Mode - Non-Ferrous Metals
GENERAL OPERATING INSTRUCTIONS
1. Once all the tests and adjustments have been
made, the Metal Detector is ready for outdoor use.
2. Power the unit up, press MODE and
select the desired Mode.
Note: When first searching, it is recommended to
select A-M and set Sensitivity Level to maximum.
3. Adjust the Volume to minimum then put on the
headphones (if used). Once tone is played while
operating, adjust the Volume as desired.
4. If in a dark area, turn on the Display’s
Backlight. To save power, the Backlight will
automatically turn off after 10 minutes.
5. Slowly walk the detection area and slowly sweep
the Search Coil back and forth, keeping it level and
about 1″ to 3″ from the ground. Tilting or raising
the Search Coil during the sweep will produce false
readings. If needed, adjust the Sensitivity Level.
6. The Search Coil may be used under water.
Only the Search Coil is waterproof.
7. When a metal object is detected, a tone will
sound, the Target Digital Value will be seen
on the Display, the associated Target ID
Icon will flash, and the approximate Target
Depth of the object will be displayed.
8. Look at the flashing Target ID Icon to
determine what kind of metal it is and
whether you wish to dig it out.
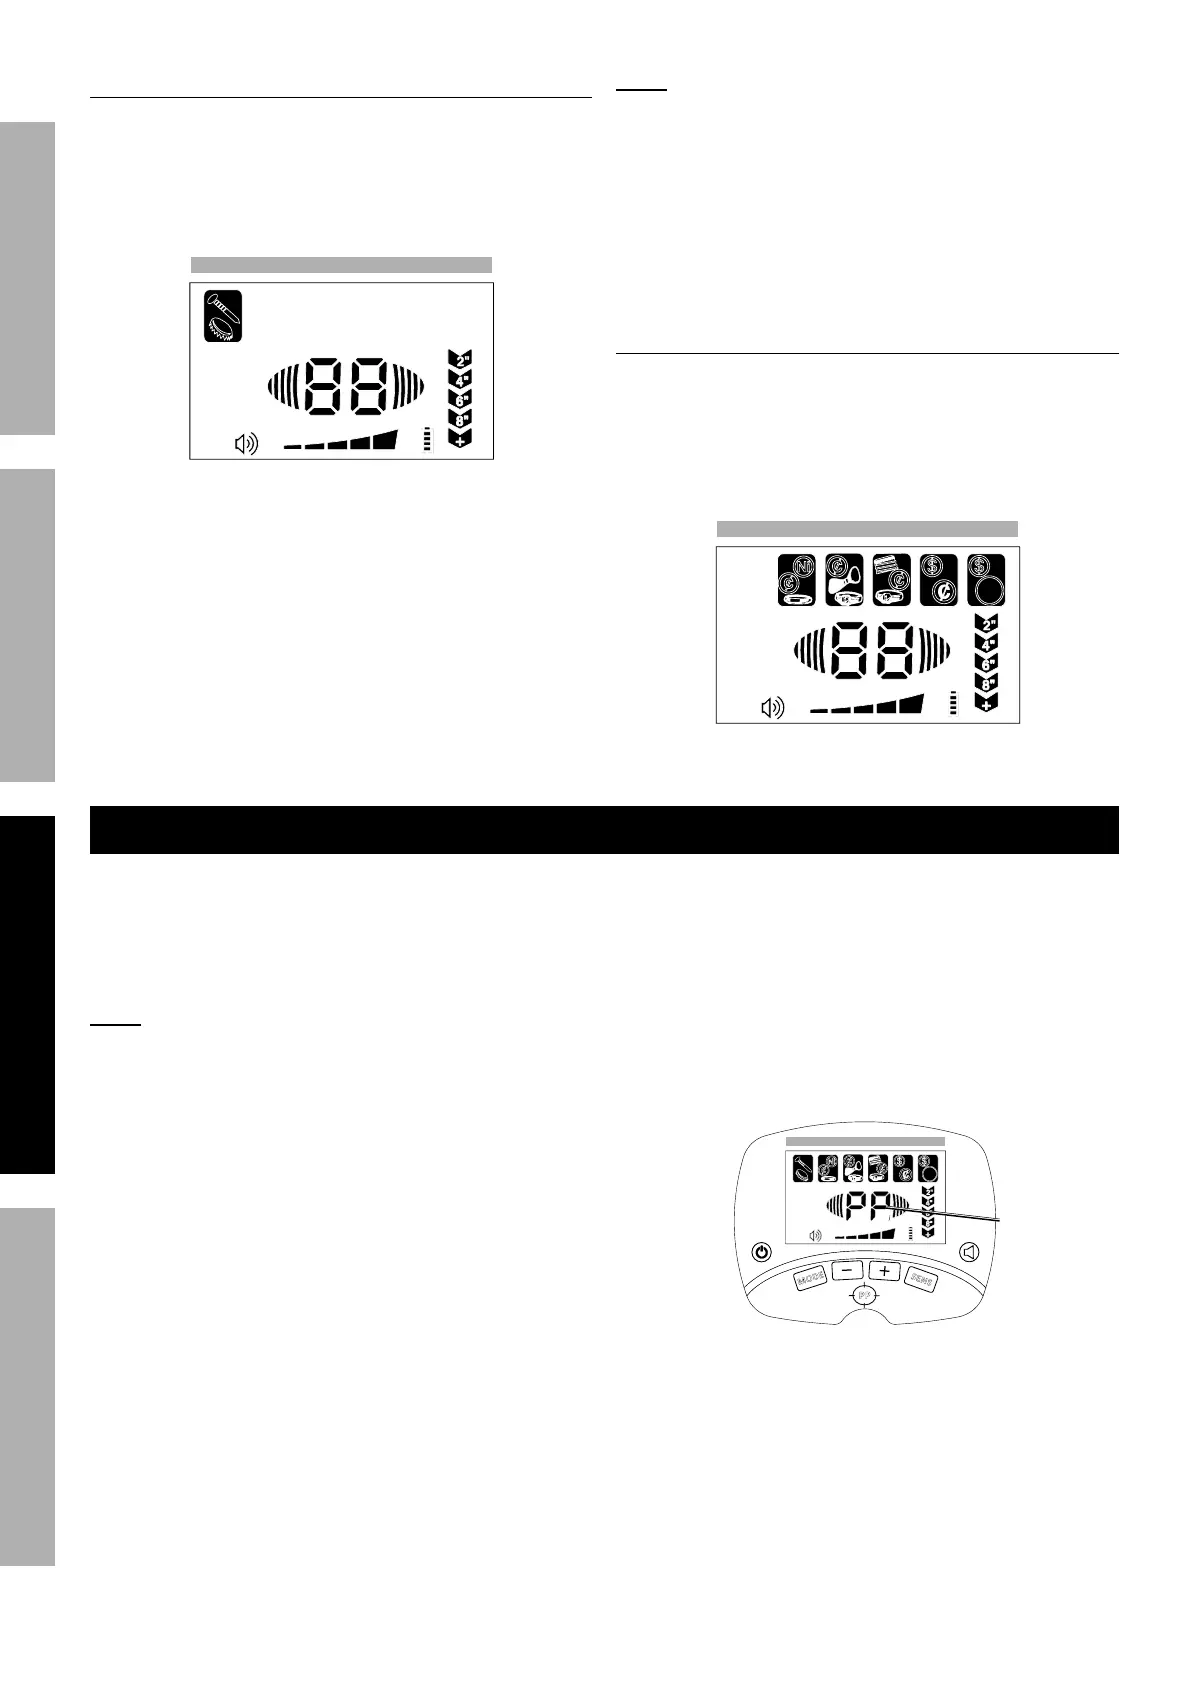
9. To Pinpoint an object’s location, press PP.
When “PP” is seen on the Display, slowly move
the Search Coil over the area that triggered the
unit. The tone will sound when the Search Coil
is near the object. The Target Depth indicator
will show the approximate depth of the object.
Figure H: Pinpoint Target Object
< 40
50
60
70
80
90 +
MO DE
COIN
DE PTH
S
E
N
S
PP
M
O
D
E
A- M
ME M O RY
JE WE L RY
DI SC
Sil ve r
Pinpoint
10. When finished and to prevent accidents, turn off
the tool and remove the batteries. Clean, then
store the tool indoors out of children’s reach.
 Loading...