EasyManua.ls Logo

Gorenje B 7580 E - User Manual

Gorenje B 7580 E
14 pages
Print Icon
To Next Page IconTo Next Page
Loading...
Instructions for use, installation and connection
34
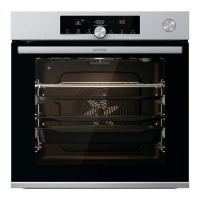
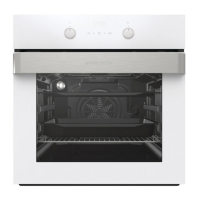
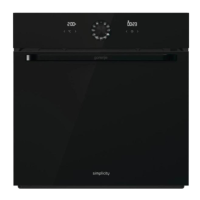
Electric oven GB IE MT
Dear Customer!
Congratulations on your purchase. See for yourself: our
products read reliability.
These ample instructions have been compiled in order to help
you learn how to handle the appliance. They will show you step
by step what your appliance is capable of, so please read them
carefully before you attempt to use your cooker for the first
time.
Safety warnings are listed on page 34.
The first thing to do is to check if your appliance has arrived
undamaged. In case you find any transport damages, please
report it immediately to your local dealer, or to the regional
warehouse which supplied the appliance. You will find their
phone numbers on the invoice or on the delivery note.
We hope your cooker will successfully serve its purpose for
many years.
Contents
Safety precautions ........................................................ 34
Intended use
Push-pull Knobs
Control Lamps
Cooling fan
Oven door delay switch
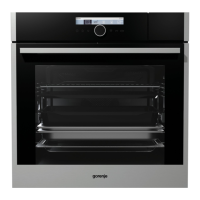
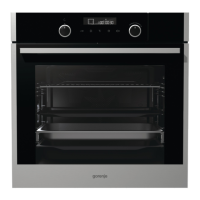
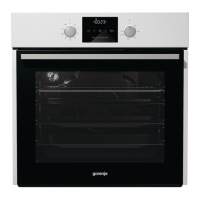
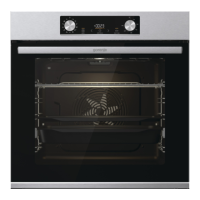
Description of the appliance ........................................ 35
Prior first use ................................................................ 36
Oven
Tips for the use of oven
Oven............................................................................... 36
Electronic program clock with temperature display
Setting the time of day
Semi-automatic mode with defined period of operation
Semi-automatic mode with preset end of operation
Automatic mode with preset period and end of operation
Timer
Deletion of any time-related program and/or temperature
Important warnings!
Operation
Setting the oven temperature
Modes of operation
Oven guide levels
Oven accessories
Telescopic slide guides
Grease filter
Baking pastry
Roasting
Grilling and browning (barbecue)
Preserving of fruit and vegetables
Defrosting
Cleaning and maintenance ...........................................42
Oven
Troubleshooting guide ..................................................44
Important!
Replacement of parts ....................................................44
Other accessories
Oven light bulb
Instructions for installation and connection ...............44
Safety precautions for installation
Installation of electric oven ..........................................45
Electric connection........................................................46
Technical information...................................................46
After sale service ...........................................................47
Repairs
Rating plate
Safety precautions
To avoid any possible hazard, the appliance may be
installed by qualified personnel only.
Any repairs by unqualified persons may result in electric
shock or short circuit. In order to avoid possible injuries to
your body or to the appliance, do not attempt any repairs by
yourself. Such work should be carried out by qualified
service personnel.
Warning! Never let small children in the vicinity of the
cooker; they are not yet aware of danger of burns. Older
children may use the appliance only under your surveillance.
Danger of burns! Oven and cooking accessories may
become very hot during operation. To avoid burns use
kitchen clothes and gloves when handling hot parts or
utensils.
Mains lead of adjacent appliances may be damaged by
hotplates or if stuck between the oven doors, and produce
short circuit, therefore keep them at safe distance from the
appliance.
Never clean the oven with the high-pressure steam cleaning
device, as it may provoke short circuit.
Oven door may become very hot during operation.
Therefore, some models are equipped with the third glass to
reduce the surface heat of the glass, as an extra protection
against burns.
The appliance is manufactured in compliance with the
relevant effective safety standards. Nevertheless, we
strongly recommend that persons with impaired physical,
motoric, or mental capacity, or persons with inadequate
experience or knowledge, do not use the appliance unless
attended by a qualified person. The same recommendation
applies when the appliance is used by persons of less-than-
legal age.
Intended use
This appliance is intended for use in your household. Never
use the appliance for any other purpose!
These instructions describe in detail all the particulars and
possibilities of its use.
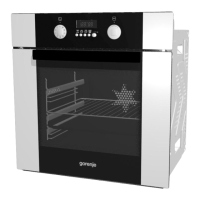
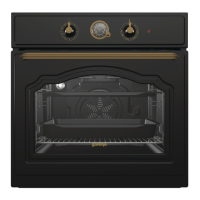
Push-pull Knobs
(certain models only)
In order to operate the knob, you first have to slightly press the
knob, until it jumps out and then select the settings for the
cooking zones, the temperature of the oven and the operating
mode. When the cooking zone or the oven is on, the ring
around the corresponding knob is illuminated. When finished
cooking, turn the knob to starting position and slightly push it
back.
WARNING!
Push-pull knob can be pulled out and pushed back only when
in non-operating, i.e. starting position.
Control Lamps
Illuminated dials
(certain models only)
The dial above the active knob is illuminated when the oven is
switched on.
Red Light
The red light comes on when the oven heaters are operating
and goes off when the preset temperature is reached.

Questions and Answers

Overview

This document describes the Gorenje Electric Oven, models EVP444-421E and EVP443-444E, providing comprehensive instructions for use, installation, and maintenance.

Function Description

The Gorenje Electric Oven is designed for household use, offering various cooking modes and features to facilitate baking, roasting, grilling, preserving, and defrosting.

Control and Display: The oven features an electronic program clock with a temperature display, allowing users to set the time of day, define periods of operation, and preset end times for automatic cooking. A timer function is also available for signaling purposes without switching off the oven. Temperature can be set within a 50-275°C range using a function knob. The display indicates the oven temperature, showing "---°C" below 50°C, then approximate temperature in 5°C increments, and finally the set temperature once reached. Push-pull knobs (on certain models) require a slight press to activate and illuminate when active, then push back to the starting position when cooking is finished. Control lamps include illuminated dials for active knobs and a red light that indicates when heaters are operating, turning off when the preset temperature is reached.

Cooking Modes: The oven offers several modes of operation to suit different cooking needs:

  • Oven Illumination: Independent lighting, with some models featuring two lamps (top rear wall and middle right-hand side wall), useful for cleaning or using residual heat.
  • Applying Upper and Lower Heater: Uniform heating from both top and bottom, suitable for baking and roasting at a single level.
  • Grill: Direct heat from an infrared heater at the oven ceiling, ideal for steaks, sausages, T-bones, and pork chops.
  • Grill with Ventilator: Simultaneous operation of infrared heater and ventilator, suitable for roasting and grilling larger meat or poultry chunks at one level, and for achieving crisp skin.
  • Lower Heater and Ventilator: Both lower heater and hot air ventilator are active, best for baking pizza, moist or heavy cakes, fruit cakes, or cheese soufflés at two levels.
  • Ventilator with Hot Air: Fan at the rear circulates hot air, suitable for roasting and baking at more than one level.
  • Defrosting: Air circulation without heaters, used for slow defrosting of food like frozen cream cake, biscuits, pastry, bread, rolls, and fruit. Meat and poultry should not be defrosted in the oven for hygiene reasons.
  • Applying Lower Heater/Aqua Clean: Heat applied only from the bottom, used for browning the bottom of food (heavy, moist pastry with fruit dressing) or for oven cleaning.

Cooling System: Certain models are equipped with a built-in cooling fan that cools the casing and control panel. The fan activates with any oven operation mode and, in some models, continues to run for a period after the oven is turned off to further cool the appliance.

Safety Features:

  • Oven Door Delay Switch: On certain models, the oven door is fitted with a special delay switch that turns off heating (only in hot air heating mode) when the door is opened and restarts heating when closed.
  • Safety Warnings: Emphasizes precautions against burns from hot surfaces and accessories, advises against using aggressive cleaners, and warns about potential damage from mains leads of adjacent appliances. It also highlights the importance of professional installation and repair.

Important Technical Specifications

  • Type-model: EVP444-421E, EVP443-444E
  • Dimensions of the appliance (height/width/depth): 588x555x548 mm
  • Dimensions for mounting (height/width/depth): 600x560x550 mm
  • Electric connection: AC 230 V, 50 Hz
  • Nominal voltage of heaters: 230 V, 50 Hz
  • Max. temperature: 275°C
  • Oven: Temperature regulator/function mode switch (1/1)
  • Guide levels: 5 (telescopic guides in 3 levels on certain models)
  • Top/bottom heater (kW): 0.9/1.1
  • Infrared heater/Infrared heater with fan (kW): 2.0/2.2
  • Oven illumination: top/side* (W): 25/25*
  • Function modes (kW):
    • Top/bottom heater: 2.0
    • Top heater: 0.9
    • Bottom heater: 1.1
    • Infrared heater: 2.0
    • Heater adjacent to the fan: 2.2
    • Fan motor adjacent to the heater: 35
    • Turnspit motor*: 4
    • Cooling ventilator motor*: 11
  • Total connected power (kW): 3.4
  • Oven total (kW): 3.4 * depending on the equipment of the appliance

Usage Features

Prior First Use: Before first use, all accessories should be removed and cleaned with warm water and mild detergent. The oven should be ventilated during the initial heating to dissipate any new product smell. Dark, silicone-coated, or enamel baking pans are recommended for their thermal conductivity. Preheating is only necessary if recommended by the recipe or baking chart.

Oven Accessories: The oven comes with various accessories, including an oven grid shelf, flat biscuit tray, and a dripping grease receptacle (deep tray). Telescopic slide guides (on certain models) are provided for easy insertion and removal of trays, located at three different levels. A grease filter (depending on the model) is inserted at the rear panel to protect the fan and heater from grease during roasting, but should be removed when baking pastry.

Baking Pastry: The most appropriate position for baking is with both upper and lower heaters, or hot air. The grease filter must always be removed for pastry baking. Baking tables provide recommended guide levels, temperatures, and baking times, which may vary. Tips are provided for checking if pastry is baked, preventing pastry from falling, and addressing pastry that is too light below.

Roasting: Best results are achieved with both upper and lower heaters or hot air. Light enamel, temperature-resistant glass, clay, or wrought iron dishes are recommended. Covering the roast or wrapping it in foil helps preserve juices and keeps the oven cleaner. Roasting tables provide suggested temperatures, guide levels, and roasting times, which depend on the type, size, and quality of meat. Large chunks of meat may cause excessive steaming and condensation on the oven door, which should be wiped clean after roasting.

Grilling and Browning (Barbecue): Grilling should be done with the oven door closed. The grill heater needs to be pre-heated for 3 minutes. The grill grid should be oiled before placing food to prevent sticking. Meat should be placed on the grid, which is then placed on the grease interception pan, and both inserted into the oven guides. Meat should be turned halfway through the roasting time. Broaching (on certain models) involves a revolving spike with forks to secure the roast, inserted into a special support in the fourth guide from below.

Preserving of Fruit and Vegetables: This mode uses the bottom heater with the fan. Up to six one-liter jars with glass covers and rubber gaskets can be used. Approximately one liter of water should be poured into the deep roasting pan for humidity. The jars are placed in the second guide from the bottom. The temperature regulation knob is set to 180°C.

Maintenance Features

Cleaning: The appliance must be switched off and cooled down completely before cleaning. Pressurized hot steam cleaners should not be used.

  • Front Side of the Casing: Clean with usual cleaning agents, avoiding aggressive ones that may cause scratches.
  • Stainless Steel Front (certain models only): Clean with mild detergent and a soft sponge.
  • Enamel Coated and Plastic Surfaces (certain models only): Clean knobs and handles with soft cloth and liquid cleaners.
  • Aluminum Coated Surfaces: Clean with liquid non-abrasive agents and a soft sponge. Avoid contact with oven cleaning sprays, as they can cause permanent damage.
  • Oven: Can be cleaned traditionally with oven cleaners and sprays. A recommended procedure involves placing 0.4 liters of water in a baking pan, inserting it into the bottom grid lead, and setting the oven to 50°C for 30 minutes to soften residues.
  • Catalytic Coating (certain models only): This rough enamel speeds up grease disintegration. Smaller stains usually disappear during subsequent oven use at temperatures above 220°C. Replacement of old coatings is suggested after a couple of years.
  • Wire and Telescopic Guide Grids: Can be removed for cleaning. Clean with conventional detergents. Telescopic guides should not be washed in a dishwasher or lubricated.
  • Oven Ceiling (certain models only): Some ovens have a foldable infrared heater to facilitate cleaning. Disconnect the appliance from the mains and ensure the heater is cooled before lowering it.
  • Oven Door: Can be removed for cleaning. For models with a single axe hinge, open the door completely, turn removable locks backward, then lift and pull the door from the hinge supports. For models with a different mechanism, open the door to the horizontal position, pull bottom hinge supports upwards, and lock them to the upper hinge latch, then close the door halfway and pull it out.
  • Accessories: Biscuit tray, oven grid, etc., are cleaned with hot water and detergent.
  • Special Enamel: The oven's interior door lining, baking tray, and grease interception pan are coated with special enamel for easy cleaning at room temperature.
  • Grease Filter: Clean after each use with a soft brush in hot water and detergent, or wash in the dishwasher.

Replacement of Parts:

  • Oven Light Bulb: The oven light bulb casing is under tension. Before replacement, switch off the cooker and disconnect it from the mains. The bulb specifications are E 14, 230 V, 25 W, 300°C. Unscrew the glass cover, replace the bulb, and screw the cover back. The bulb is considered a consumption material and is not covered by warranty.
  • Other Accessories: Oven grid, biscuit tray, etc., can be ordered from the service center by quoting the code and model of the appliance. Hotplate control knobs are removed by pulling them outwards and replaced by pushing new ones back in place.

Troubleshooting Guide: Provides simple advice for common issues like faulty program clock values, flashing display, signal lamp not turning on, fuses burning out, oven illumination not working, oven not heating up, and disappointing baking results. Users are advised to check these issues before contacting service personnel.

Installation: Installation must be carried out by qualified personnel. The electric installation must include a safety device to disconnect the appliance from mains in all wires. Panels and furniture lining of the kitchen cabinet must be temperature resistant (>75°C). The appliance should be pushed into the cabinet, ensuring screw guides fit into the oven frame holes. The mains lead should be at least 1.5 m long, and the earthing wire should be installed to be the last one pulled out in case of safety relief device failure.

Gorenje B 7580 E Specifications

General IconGeneral
BrandGorenje
ModelB 7580 E
CategoryOven
LanguageEnglish

Related product manuals