Do you have a question about the Gorenje ECD 620 EX and is the answer not in the manual?
This document provides comprehensive instructions for the use, installation, and connection of a glass-ceramic cooking hob, designed specifically for household use. The manual emphasizes safety, proper operation, and maintenance to ensure the longevity and efficient performance of the appliance.
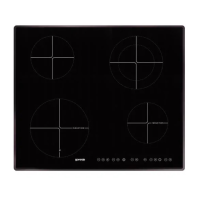
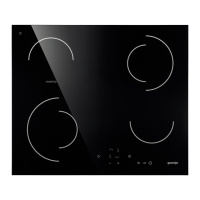
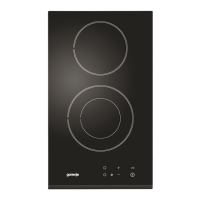
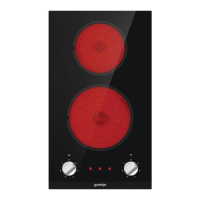
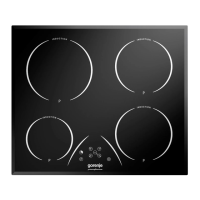
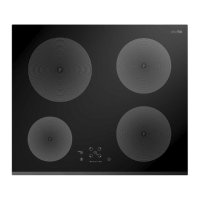
The glass-ceramic cooking hob is an electric cooking appliance featuring multiple cooking zones. It is designed to provide efficient and controlled heat for various cooking tasks. The hob's glass-ceramic surface is resistant to temperature changes and impacts, allowing for pans to be placed on it without immediate damage. The cooking zones are controlled by knobs located on the control panel, with symbols indicating which knob corresponds to each zone.
The heating power of the cooking zones can be set either continuously (from 1 to 9) or discretely (from 1 to 6), depending on the model. For models with stepless switches, the knob can be rotated in either direction to adjust power. For energy switches, clockwise rotation increases power, and anti-clockwise rotation decreases it. Some models feature double-ring cooking zones, where rotating the control switch normally activates the internal cooking zone. To activate the entire cooking zone, the knob must be rotated past the number signs until a 'click' sound is heard, then rotated back to the desired position. The entire cooking zone is switched off by returning the knob to the "0" position.
The appliance includes control lights to indicate operation. Whenever at least one cooking zone is switched on, a yellow LED illuminates. In some models, this function is indicated by a backlit dial above the activated knob. Additionally, some models are equipped with warning lights on the front panel. These lights illuminate when a corresponding cooking zone is hot, indicating a risk of burning. The warning light remains lit until the cooking zone cools down to below 50°C.
Before initial use, it is recommended to turn on the cooking zones for 3 to 5 minutes at maximum power. This process allows the protective cover on the hob to reach its maximum solidness, and some fumes may be discharged during this time.
For optimal energy saving and cooking efficiency, several guidelines are provided:
When using cookware, it is important to use high-quality pans with a flat and stable bottom for efficient heat transmission. For tempered glass (Pyrex) or porcelain cookware, follow the manufacturer's instructions. When using a pressure cooker, do not leave it unattended until the desired pressure is reached; start at maximum power and then reduce it as pressure builds. Always ensure there is enough water in cookware to prevent overheating, which can damage both the pan and the cooking zone. Highly reflective or thick-bottomed pans may extend cooking times. Clay cookware is not recommended as it can scratch the glass-ceramic hob.
Regular cleaning and maintenance are crucial for preserving the appearance and functionality of the glass-ceramic hob. After each use, allow the hob to cool down before cleaning to prevent food residues from burning onto the surface during subsequent use.
For routine cleaning, special conditioning agents are recommended. These agents form a protective layer, shielding the surface from dirt. Before each use, wipe away any dust or particles from the hob surface and pan bottoms to prevent scratches. Avoid using steel wool, abrasive sponges, or abrasive detergents, as these can scratch the surface. Aggressive sprays or improperly mixed liquid cleaning agents can also damage the glass-ceramic surface.
Light stains can be removed with a damp soft cloth, followed by drying the surface. Water stains can be cleaned with a mild vinegar solution, but avoid using this solution on the frame, as it may dull. Do not use aggressive sprays or decalcification agents.
Heavier stains require special agents and utensils designed for glass-ceramic hobs. Always follow the manufacturer's instructions for these products and ensure all cleaning agent residues are thoroughly removed, as they can damage the hob when it heats up. Stubborn and burnt residues can be removed with a scraper, but exercise caution to avoid injury.
Sugar and sugar-laden food can permanently damage the glass-ceramic surface if not removed promptly, even if the cooking zone is still hot. Any discoloration of the glass-ceramic surface, often caused by burnt food residues or cookware made of aluminum or copper, does not affect the hob's operation or stability. Such aesthetic issues are generally not covered under warranty.
Installation and connection of the appliance must be performed by a qualified technician in compliance with all relevant regulations and standards. The kitchen worktop into which the hob is built should be treated with heat-resistant glue (100°C) to prevent discoloration or deformation. The hob is designed for worktops with a width of 600 mm or more. After installation, the front two fastening elements must be freely accessible from below.
The distance between the cooking hob and any hanging or wall-mounted kitchen elements should be sufficient to avoid interference with the cooking process, with a minimum distance of 650 mm to a kitchen hood. A minimum distance of 40 mm should be maintained between the appliance edge and adjacent tall kitchen furniture.
Before inserting the appliance into the worktop opening, the supplied foam gasket must be attached to the lower side of the glass-ceramic hob, approximately 2-3 millimeters from the edge. The gasket should be attached along the entire length of the glass edge without overlapping at the corners. Ensure the glass does not come into contact with sharp objects during gasket installation. Some appliances may come with the gasket pre-installed.
The worktop must be installed completely horizontally, and cutoff surfaces should be protected. Fastening elements are attached to the side walls of the hob and the worktop cutoff using supplied screws.
For electrical connection, the appliance uses two connector plugs that attach to corresponding sockets on the oven frame. The plugs are designed to connect in only one way, ensuring a correct match. The appliance must be earthed using the yellow-green earthing wire, which is factory-fitted on the hob. The cable shoe of the earthing wire should be attached to the earthing clip on the oven frame using a star washer and a nut. The earthing clip is indicated by the earthing symbol. The electrical voltage must be 220-240VAC with a 50Hz frequency for proper operation. An omnipolar switch with at least 3 mm contact distance, such as fuses or current protection switches, should be included in the electric circuit.
| Number of Burners | 4 |
|---|---|
| Width | 60 cm |
| Color | Black |
| Number of Cooking Zones | 4 |
| Total Power | 7.2 kW |
| Residual Heat Indicator | Yes |
| Child Safety Lock | Yes |
| Timer | Yes |
| Power Boost Function | Yes |
| Surface Material | Ceramic Glass |
| Control Type | Touch |
| Material | Glass |
| Dimensions (W x D x H) | 595 x 520 x 54 mm |