Do you have a question about the Gorenje EIT 2600 P2 and is the answer not in the manual?
Crucial safety precautions for operating the induction hob, including fire hazards and general user safety.
Explanation of the nine power levels for controlling cooking intensity and their purposes.
Steps to turn the hob on and off, and initial readiness indicators.
Instructions for turning hotplates on, adjusting power levels, and turning them off.
How to activate and deactivate the child lock to prevent accidental operation and ensure safety.
Information on overheat safety sensors, error codes like 'Err 33', and flashing 'H' indicators.
Guidelines for connecting the hob to the mains power supply, including safety precautions.
This document describes the operation, installation, and maintenance of a ceramic glass induction hob.
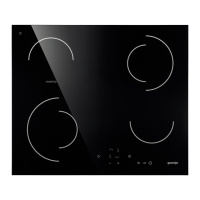
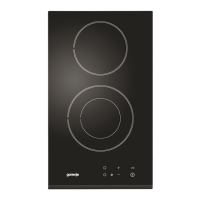
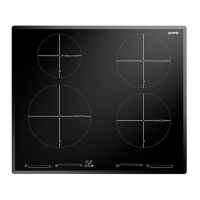
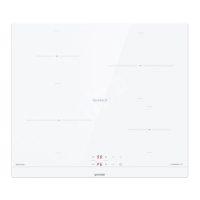
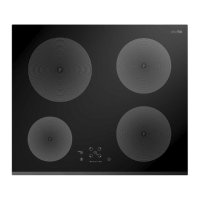
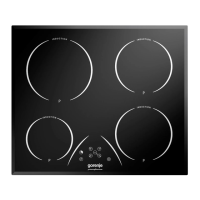
The ceramic glass induction hob is designed for household use and features three or four high-power induction hotplates. Unlike traditional heaters that rely on radiation, induction hotplates generate heat directly at the bottom of the dish through a magnetic field created by an induction coil underneath the ceramic glass surface. This method ensures efficient heating with minimal energy loss. The hob surface is completely flat and smooth, preventing dirt accumulation.
The hob is equipped with electronic sensors for control, which activate when touched for at least one second, accompanied by a sound signal. A key advantage of induction hotplates is "dish recognition." If no dish is present or the dish diameter is smaller than the hotplate, no thermal energy is lost. The power indicator displays "U" in such cases. When a suitable dish is placed on the hotplate within 10 minutes, it recognizes the dish and activates at the preset power. If a smaller dish is used, the hotplate adjusts energy consumption according to its size. Power is suspended when the dish is removed.
The hob also includes a safety device against overheating, which protects electronic components. If the hotplate temperature rises excessively, a two-stage fan activates. If this is insufficient, extra powerful heating is deactivated, and the safety device may reduce heating power or turn off hotplates completely until they cool down.
The hob offers nine different heating power levels, from 0 (off, using remaining heat) to 9 (start of cooking, roasting), with additional "A" for automatic initial setting and "P" for extra powerful setting (rear hotplates only).
Activating the Hob: To activate the hob, touch the ON/OFF sensor (A) for at least one second. All hotplate power indicators (B) will show "0," and the decimal dot (B1) will flash. If no further action is taken within 10 seconds, the hob will switch off automatically.
Turning Hotplates On: After activating the hob, select a hotplate within 10 seconds by touching its sensor (C). The power indicator will show "0," and the decimal dot (B1) will be on. Adjust the cooking power from 1 to 9 by touching the "+" (C) or "-" (E) sensors. Continuous pressing of these sensors will automatically increase or reduce the power level. Power can also be changed in steps by intermediate touches. Only one hotplate can be set at a time, indicated by the decimal dot (B1) being on.
Fast Deactivation: To quickly switch off a hotplate, ensure it is activated (decimal dot B1 on), then simultaneously press both the "+" (C) and "-" (E) sensors. The hotplate will turn off immediately.
Turning Hotplates Off: To turn off a selected hotplate, ensure it is activated (decimal dot B1 on), then set the power level to "0" using the "-" (E) sensor. The hotplate will turn off after 3 seconds.
Child Lock: The child lock prevents accidental operation. To activate, switch all hotplates off (set to "0"). Activate the hob by touching sensor (A), then simultaneously press sensors (D +/-). After a beep, press sensor (+) again. All displays will show "L" briefly, indicating the child lock is active. To deactivate, press sensor (A), then simultaneously press sensors (D +/-). After a beep, press sensor (-) again.
Remaining Heat Indicator: The hob features a "H" symbol to indicate remaining heat after a hotplate is switched off. This heat can be used for warming food or melting. Even after the "H" disappears, the hotplate may still be hot, so caution is advised.
Extra Powerful Setting ("P"): This setting provides extra power for fast cooking, especially for large quantities of food. It activates for ten minutes, then automatically reverts to maximum normal level 9. During this period, the power of other hotplates may be limited, indicated by intermittent display of the selected cooking level and limited power. To activate, select the hotplate, then press the "P" sensor. To turn off prematurely, touch the hotplate sensor and then the "P" sensor again.
Automatic Fast Heating: This mechanism allows hotplates to operate at full power initially, then return to a preselected power level (1-9). It's suitable for food that starts cold and needs high initial heat followed by extensive cooking at normal power without constant monitoring (e.g., stewed beef). It's not recommended for frying, roasting, simmering, or cooking dumplings/pastry with lots of liquid. To activate, set the hotplate to "0," touch sensor "E" (display shows 9), then press sensor "+" (C) of the hotplate (display shows "A"). Select the desired power level. The indicator will intermittently show "A" and the selected power setting until the fast heating period expires. If the power selection remains at "0" for three seconds after activation, the function switches off. If the dish is removed and returned within 10 minutes, the function resumes.
Timer Operation: The timer can set the hotplate operation period or function as an alarm.
Cleaning the Ceramic Glass Hob: The hob should be cleaned only when completely cooled down, preferably after each use, to prevent stains from burning onto the surface.
Installation: Installation must be performed by qualified personnel. Kitchen cabinet materials must be temperature-resistant (100°C). The hob is designed for building into a worktop above a kitchen element of 600 mm width or more. Ensure free access to fixing elements after installation. Maintain adequate distance between the cooktop and suspended kitchen elements (at least 650 mm from the hood). Hardwood decorative borders are allowed if minimum distances are maintained.
Installing the Foam Gasket: Before inserting the hob, attach the supplied foam gasket to the lower side of the glass ceramic, approximately 2-3 mm from the edge (as shown in the figure). The gasket must cover the entire glass edge without overlapping at corners. Ensure the glass does not contact sharp objects during installation. Some appliances may have the gasket pre-installed.
Connection to Power Supply: Connections must be carried out by a qualified technician in compliance with regulations. The earthing protection must be in line with standards. Connection terminals are accessible by removing the connection box cover. Verify that the voltage on the rating plate matches the home power supply (AC 230 V). The electric wiring must include a circuit breaker to isolate the appliance from the mains at all points, with a minimum 3 mm terminal distance in open position. The connection should match the mains charge capacity and fuse power. After installation, live wires and isolated cables must be protected from accidental touching. Switch on all hotplates for about 3 minutes to check proper functioning.
Basic Adjustment of Sensors: Upon each connection to the power supply, sensors automatically adjust to the environment. All displays illuminate briefly. During adjustment, sensors must be clear of objects; otherwise, the procedure will be interrupted. Regulation of the cooktop is impossible during this period.
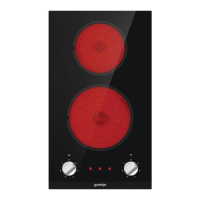
| Number of Cooking Zones | 2 |
|---|---|
| Control Type | Touch |
| Power Levels | 9 |
| Timer | Yes |
| Boost Function | Yes |
| Type | Induction |
| Safety Features | Child lock |
| Total Power | 3700 W |