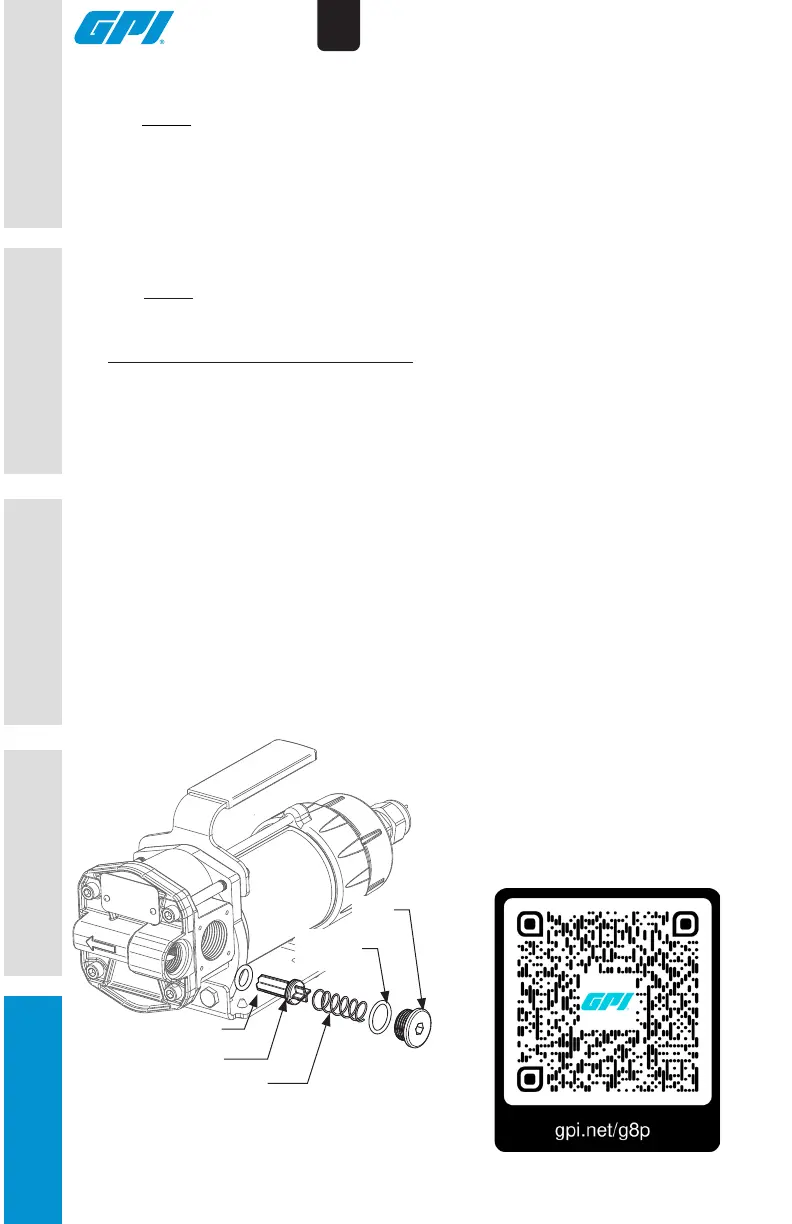
Figure 5
Poppet O-Ring
Poppet
Spring
Plug
O-Rings
Plug
ScantheQRcodeformore
maintenance, troubleshooting,
and repair resources
OPERATION
ASSEMBLY /
INSTALLATION
SAFETY /
SPECIFICATIONS
GETTING STARTED
10
EN
MAINTENANCE
NOTE: A kit containing O-rings, motor shaft seal and gears is available for this
pump. Refer to the Repair Parts List in the back of this manual to order the
replacement kit.
Inspect and Service Bypass Poppet
TocleanandservicetheBypassPoppet(seeFigure5):
1. Remove the bypass plug with O-ring, spring, and poppet with O-ring.
2. Wipe parts and poppet cavity with a clean cloth.
3. When inspecting O-rings, look for breaks, wear, and signs of deterioration,
such as swelling.
4. Replace O-rings as necessary.
5. Before seating, coat O-rings with light grease.
6. Make sure O-rings are well seated and reinstall bypass poppet assembly.
7. Installtheplugandtorqueto90-100in/lbs.
NOTE: This pump is designed for minimum maintenance. The motor bearings
are self-lubricating. Inspect the pump and components regularly for fuel leaks
and make sure the hose and power cord are in good condition. If damaged,
replace before use. Keep the pump exterior clean to help identify leaks.
IMPORTANT: Do not use this pump for water, chemicals or herbicides.
Dispensing any uid other than those listed in the owner’s manual may damage
the pump (see BEFORE YOU BEGIN: Fueling Compatibility Statement at front
of the owner’s manual). Use of the pump with unauthorized uids will void the
warranty.
 Loading...