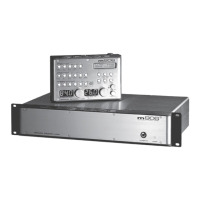
grace design m906
owner’s manual
18
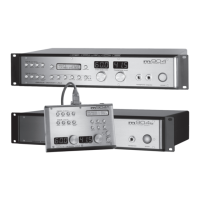
grace design m906
owner’s manual
19
when this mode is active. Also, it should also be noted that this mode does NOT affect any of the 5.1 speaker
output paths nor the xed level DAC output.
Headphone recommendations: Like everything else in your audio system, the higher quality
headphones you use with the m906, the better results you’ll achieve. If you don’t yet own a great set of
headphones, do yourself a big favor and audition some different models that will work well for you in
your particular working environment. Performing quality control via headphones, especially with the
reference headphone amp in the m906, is something we think you’ll really appreciate.
The Fixed Level 5.1 DAC Output
The DACs in the m906 are reference quality circuits which are suitable for the most critical monitoring,
mixing and mastering applications. As a bonus feature, we’ve included a xed level 5.1 DAC output
that lets you access the DACs with a xed output level. This is an extremely useful feature which allows
you to, for instance, send out a 5.1 channel audio stream to a 6 channel recorder for mastering or
archiving purposes.
This output is fed from whatever you currently have selected as your digital input source. Another
beautiful thing is that you can continue to monitor your control room source while a transfer from
this output is being made. For instance, if you leave the current digital input to listen to an analog
input, the previous digital input will continue to be sent to the xed level DAC outputs. If you select a
different digital source input, the xed level DAC will then be fed from that new source.
The lower line of the LCD display will indicate which digital input is active and its sample rate. The s-
Lock status is indicated by the presence of an asterisk (*) to the right of the sample rate.
The 5.1 DAC output level is set to 0dB as the default value on a new m906 system but this can easily be
changed in CAL mode (discussed later).
Mono Mode
Mono mode is used to sum the left and right channels of a stereo source to check for mono compatibility.
This switch only affects the Left and Right channels of the control room outputs but does provide a
mono version of whatever inputs are selected in the headphone outputs. The mono mode switch is
located immediately to the left of the dim switch. When pressed, mono mode becomes active and the
switch LED lights solid. When pressed again, the mode is exited and the switch LED is extinguished.
Dim Mode
The dim switch, located to the right of the mono switch, is used to dim, or reduce, the control room
output levels by a xed dB amount. The default value for this is -20dB but this value can be changed in
CAL mode (discussed below). Dim values can be set between -5 to -35 in 5dB steps. Dim will not affect
the audio feed to the headphone outputs.
When the dim switch is pressed, dim mode becomes active and the switch LED lights solid. When
pressed again, dim is exited and the switch LED is extinguished.
Mute All Mode
 Loading...