4
308–167
REPAIR
WARNING
Relieve
air and fluid pressure before servicing the
regulator.
To reduce the risk of serious bodily injury, fluid in-
jection, splashing in the eyes or skin, injury from
moving
parts, AL
WA
YS open the bleed–type mas
-
ter air valve (required) to relieve system air pres-
sure and trigger the gun or dispense valve and
open
any fluid drain valves to relieve fluid pressure.
If the regulator fails to operate, operates roughly, vi-
brates, etc., follow the WARNING above. Remove the
regulator
and service it as follows.
Disassemble
the regulator
. See the drawings on page 5.
Wash
the parts with household soap and water or
dena
-
tured alcohol. Wipe the parts dry with a clean, soft, dry
rag. Use compressed air to blow dirt and contaminants
out
of the regulator body
.
CAUTION
Do not use trichloroethylene, acetone or similar
solvents to clean the regulator. These solvents
could
damage the regulator parts.
Inspect
all parts for wear or damage. Replace damaged
parts.
Lubricate
the bearing area, adjusting screw threads, and
spring
ends with No. 2 lithium-base grease. Reassemble
the
regulator
.
When
installing the diaphragm, be sure the disc is firmly
in
place. Install the disc stem in the center hole
of the dia
-
phragm. Torque the spring housing to 45 in–lb
(51
N.m).
REPAIR
KIT CHART
This
chart identifies the available repair kits for the regulators covered in this manual.
The cutaway drawings shown on page 5 show the contents.
REP
AIR KITS
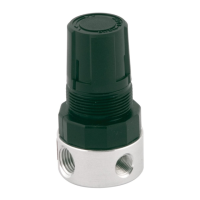
BARE
Part No.
REGULATOR
104-816
1/8" Knob
106-173
T-Handle
180-780
1/2" Diaphragm
180-781
1/2" Diaphragm
180-782
3/8" & 1/2"
Diaphragm
104-817
1/8" Diaphragm
223-164
1/8" & 1/4" Piston
104-695
1/2" Cap
104–266 X X X
104–267 X X X
171–937 X X X
110–234 X X
104–815 X X
110–341 X
111–804 X
110–318 X X