EasyManua.ls Logo

Graco 190 - User Manual

Graco 190
2 pages
Print Icon
To Next Page IconTo Next Page
Loading...
3A3093A
EN
Kit Instructions
190, 210, 290, 390 Fan Replacement Kit
Pressure Relief Procedure
1. Turn ON/OFF switch to OFF position.
2. Unplug sprayer.
3. Engage trigger lock.
4. Turn prime/spray knob (A) down to the
PRIME/DRAIN position.
Hold metal part of gun firmly to a grounded metal pail.
Pull gun trigger to relieve pressure.
Disassembly
1. Remove the two machine screws (12) that secure the
motor shield (23), save the screws.
2. Slide motor shield (23) off the motor and set aside.
3. Pry fan retainer (54b) off the motor shaft with a small
screwdriver.
4. Remove and discard old retainer(54b), washer (54c),
fan, and shaft adapter (54d). Shaft adapter Type A
requires a 5/64” hex key to loosen the setscrew.
IMPORTANT SAFETY INSTRUCTIONS
For detailed sprayer information and warnings,
see the Owners manual included with your
sprayer.
SKIN INJECTION HAZARD: This sprayer is capable of
producing 3000 psi (21 MPa, 207 bar) during use. Fol-
low this Pressure Relief Procedure whenever you
stop spraying and before cleaning, checking, servicing,
or transporting equipment to prevent serious injury.
To help prevent injection injuries, follow this procedure
when you stop spraying and before you service or
clean the sprayer, remove parts, or repair leaks.
ti26466a
12
23
ti26467a
54b
(Type A)
54b
(Type B)
54b
54c
54d
(Type B)
54d
(Type A)
ti26468a
WARNING
Question and Answer IconNeed help?

Do you have a question about the Graco 190 and is the answer not in the manual?

Overview

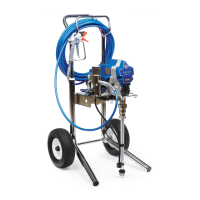
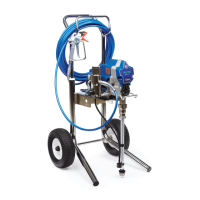
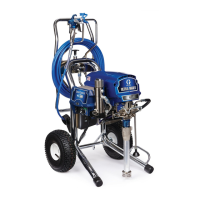
This document describes the Graco 190, 210, 290, 390 Fan Replacement Kit, identified by part number 3A3093A. It provides instructions for replacing the fan on compatible Graco sprayers, emphasizing safety procedures and detailed assembly steps.

Function Description

The kit's primary function is to facilitate the replacement of the cooling fan on specific Graco sprayer models (190, 210, 290, 390 series). The fan is a critical component for cooling the sprayer's motor during operation, preventing overheating and ensuring the longevity and reliable performance of the equipment. The replacement process involves disassembling the motor shield, removing the old fan and associated components, and installing new parts including a shaft adapter, wave washer, and a new fan, secured by a push nut.

Important Technical Specifications

While the document doesn't list specific technical specifications for the fan itself (e.g., RPM, material), it does provide crucial torque specifications for reassembly. The two machine screws (12) that secure the motor shield (23) must be torqued to 23-27 in-lb (2.6-3.1 N•m). This precise torque ensures that the motor shield is securely fastened without over-tightening, which could damage the components or lead to vibration issues. The shaft adapter (54d) for Type A motors requires a 5/64" hex key for loosening its setscrew, indicating a specific design for that motor type. The push nut (54b) is designed to be driven onto the motor shaft using a small or light hammer (8 oz./225g) and a 3/8" or 10mm socket, which compresses a wave washer (54c) to secure the fan assembly.

Usage Features

The fan replacement kit is designed for use with Graco 190, 210, 290, and 390 series sprayers. The instructions are presented in a clear, step-by-step manner, making the replacement process manageable for users. Key usage features include:

  • Detailed Safety Instructions: The document prominently features a "Pressure Relief Procedure" as an "IMPORTANT SAFETY INSTRUCTION" and a "WARNING" regarding "SKIN INJECTION HAZARD." This procedure is crucial and must be followed every time the sprayer is stopped, before cleaning, checking, servicing, or transporting. It involves turning the ON/OFF switch to OFF, unplugging the sprayer, engaging the trigger lock, turning the prime/spray knob to PRIME/DRAIN, holding the gun firmly to a grounded metal pail, and pulling the gun trigger to relieve pressure. This highlights Graco's commitment to user safety during maintenance.
  • Illustrated Steps: Each step of the disassembly and assembly process is accompanied by clear, labeled diagrams (ti26466a, ti26467a, ti26468a, ti26469a, ti26470a, ti26471a, ti26472a, ti26479a). These illustrations visually guide the user through component identification and correct placement, reducing ambiguity and potential errors.
  • Component Identification: Specific parts are clearly identified by number (e.g., 12 for machine screws, 23 for motor shield, 54b for fan retainer/push nut, 54c for wave washer, 54d for shaft adapter) and type (e.g., Type A and Type B for fan retainers and shaft adapters), ensuring that users can correctly identify and handle each component.
  • Tool Requirements: The instructions specify the tools needed for certain steps, such as a small screwdriver for prying off the fan retainer, a 5/64" hex key for Type A shaft adapters, and a 3/8" or 10mm socket with a small hammer for installing the push nut. This helps users prepare adequately before starting the replacement.
  • Disassembly and Assembly Sequence: The document provides a logical sequence for both disassembly and assembly. Disassembly starts with removing the motor shield, then prying off the fan retainer, and finally removing the old fan, washer, and shaft adapter. Assembly reverses this process, beginning with installing the new shaft adapter, then the fan and wave washer, followed by the push nut, and finally securing the motor shield.

Maintenance Features

The fan replacement kit itself is a maintenance item, designed to facilitate the repair and upkeep of Graco sprayers. The instructions are inherently maintenance-focused:

  • Preventive Maintenance: Regular inspection of the fan and motor area, as suggested by the need for a replacement kit, is crucial for preventing motor overheating and extending the life of the sprayer. While not explicitly stated as a maintenance schedule, the existence of the kit implies that the fan is a wear item that may need periodic replacement.
  • Component Replacement: The kit provides all necessary components (shaft adapter, wave washer, fan, push nut) to replace the worn or damaged fan assembly. The instruction to "Remove and discard old retainer(54b), washer (54c), fan, and shaft adapter (54d)" ensures that only new, functional parts are used in the replacement.
  • Troubleshooting Support: While not a troubleshooting guide, the clear instructions for fan replacement can help address issues related to motor overheating or unusual noises emanating from the fan area, which would typically prompt a fan inspection and potential replacement.
  • Safety-First Approach: The emphasis on the "Pressure Relief Procedure" before any servicing highlights a critical maintenance safety practice. This ensures that users are protected from high-pressure injection injuries during any maintenance activity, including fan replacement.
  • Documentation and Support: The document itself serves as a maintenance guide, providing the necessary information for a successful repair. It also directs users to the sprayer's Owners manual for "detailed sprayer information and warnings" and to www.graco.com/patents for patent information, and lists Graco's headquarters and international offices for further support, reinforcing a comprehensive maintenance ecosystem.

In summary, the Graco 190, 210, 290, 390 Fan Replacement Kit is a vital maintenance solution for specific Graco sprayers, ensuring the motor's cooling efficiency and the sprayer's operational reliability. The detailed, illustrated instructions, coupled with a strong emphasis on safety and precise assembly, make the replacement process accessible and effective for users.

Graco 190 Specifications

General IconGeneral
BrandGraco
Model190
CategoryPaint Sprayer
LanguageEnglish

Related product manuals