Repair
6 312792F
11. Remove the wet cup seal (27*) and the upper cylin-
der seal (28*).
12. Clamp the piston in a vice. Use a hex wrench to
remove the nut (17†) from end of piston.
• LW025A–LW050A: 7 mm (1/4 in.) hex
• LW075A–LW150A: 13 mm (1/2 in.) hex
13. Remove the o-ring (18†), seat (15†) and ball (16◆).
See F
IG. 5.
Reassembly
1. Clean and inspect all parts.
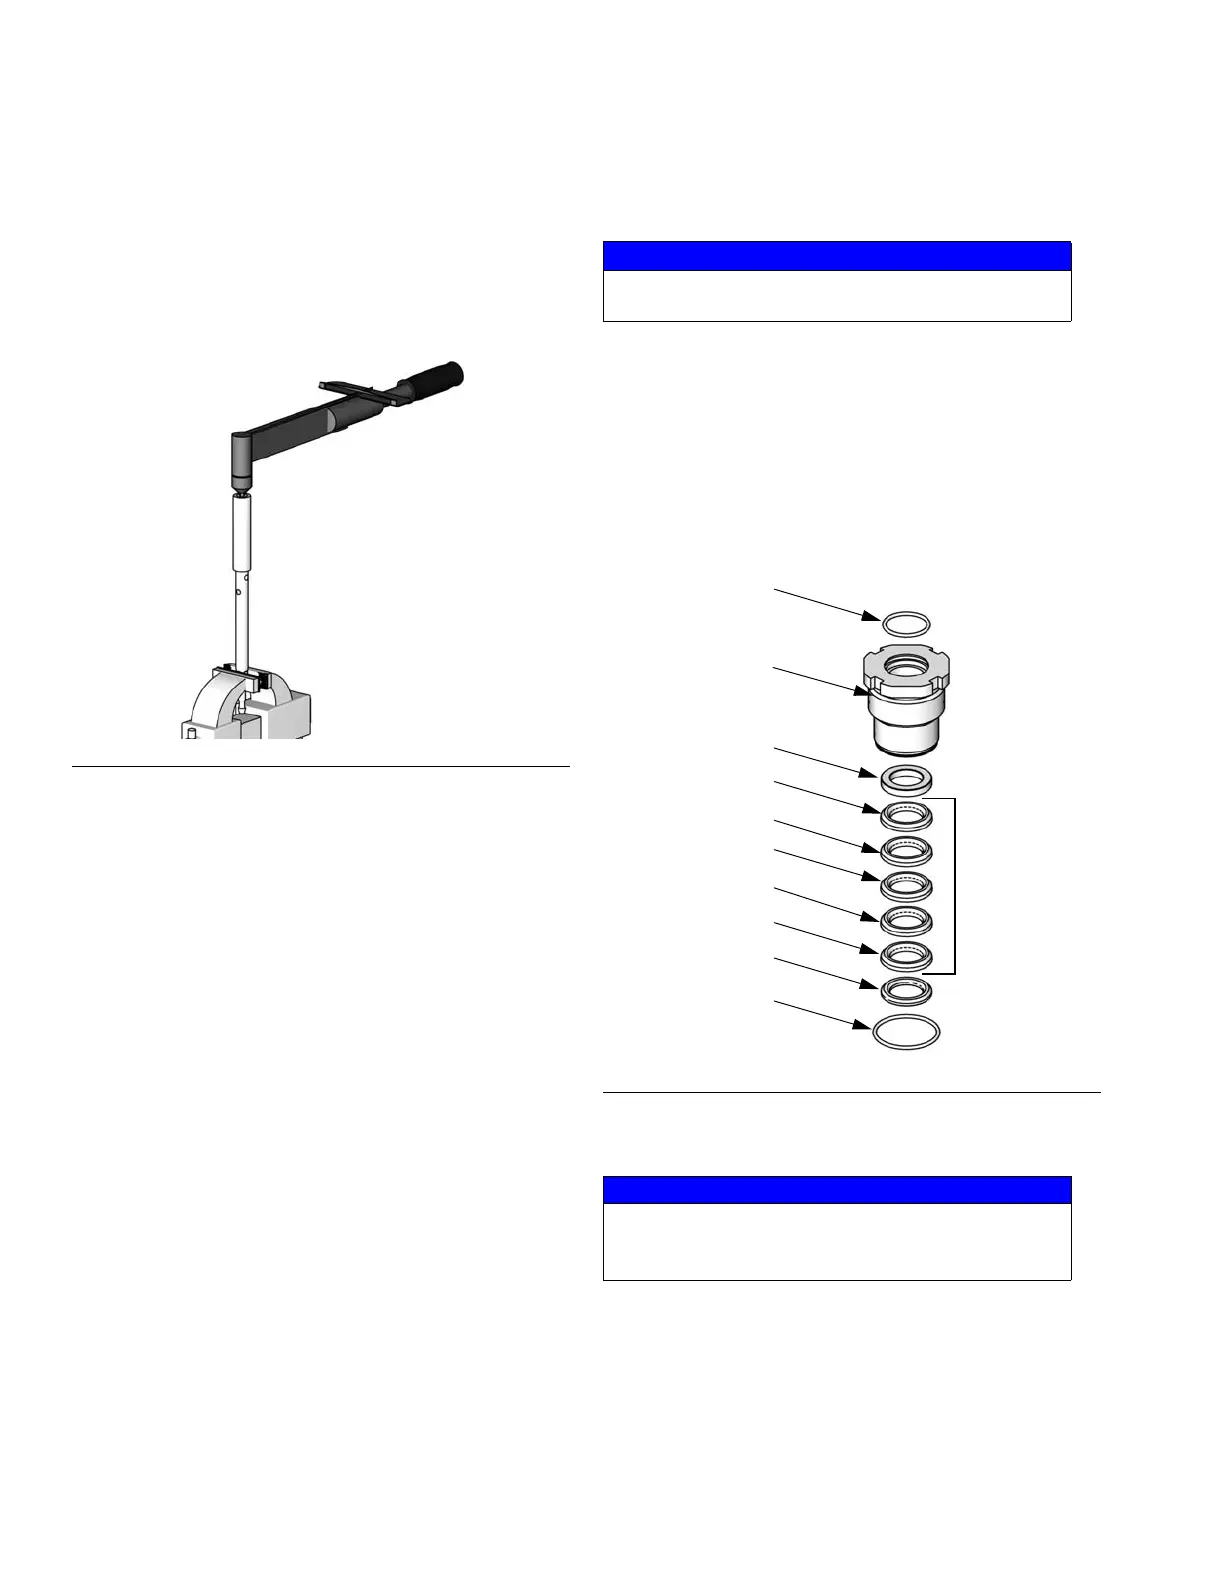
2. Lubricate and install new wet cup seal (27*) and
upper cylinder seal (28*).
3. Assemble the female gland (9*), v-packings (7*, 8*),
and male gland (6*), as shown. Alternate the
v-packings with the lips facing down. Lubricate the
packings. Install the packing stack into the wet
cup (5).
4. Install the spring (4*) in the top of the upper cylinder.
5. Lubricate the threads and screw the wet cup (5) into
the upper cylinder (1), hand tight.
F
IG. 2. Remove Flow-Through Nut
ti12782a
NOTICE
Replace all o-rings removed from the pump. Com-
pressed o-rings may cause the pump to leak.
F
IG. 3. Replace Throat Packings
NOTICE
All threads, packings, and seals must be well lubri-
cated. Use Lubriplate (Graco Part Number 285791)
or a similar product.
*28
*9
*7
*8
*7
*8
*7
*6
5
ti11691a
Lips must
face down.
*27
 Loading...