Repair
312792F 7
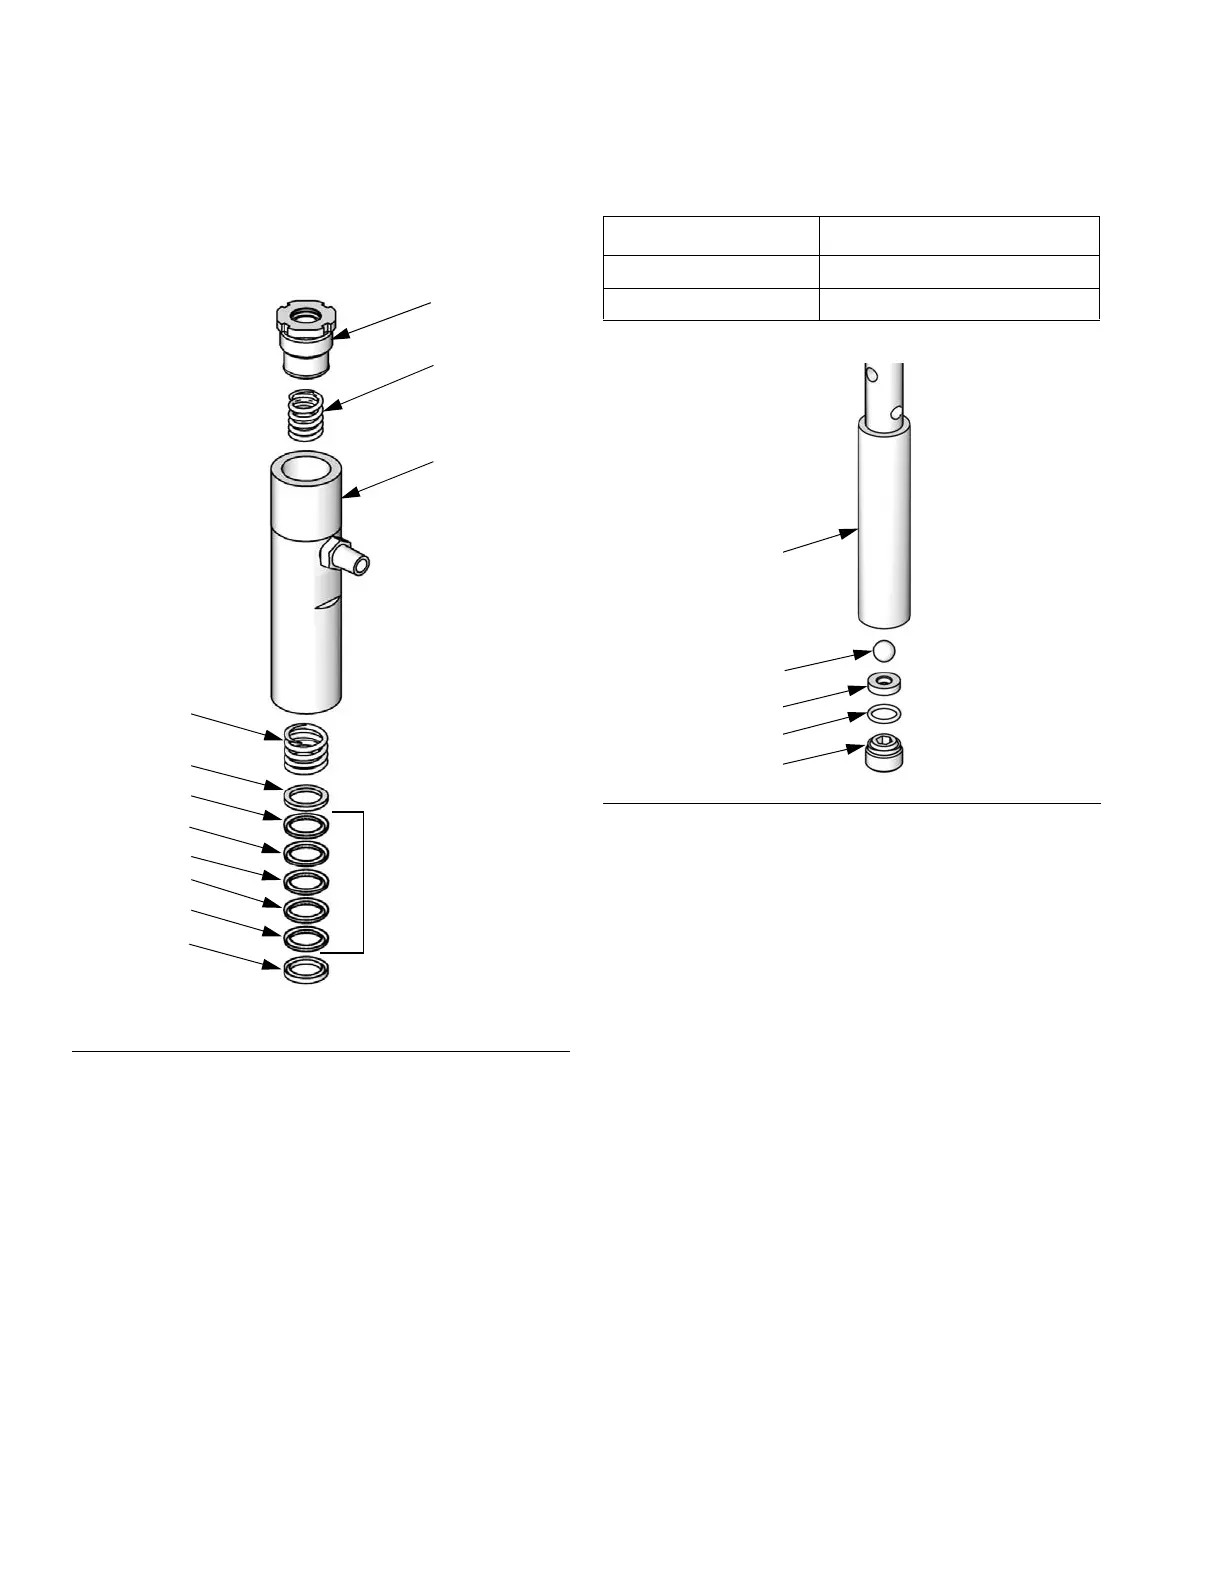
6. Assemble the male gland (11*), v-packings (12*,
13*), and female gland (14*), as shown. Alternate
the v-packings, with the lips facing up. Lubricate the
packings. Install the spring (10*) and packing stack
into the bottom of the upper cylinder (1).
7. Place the ball (16◆) in the piston body. Install the
seat (15†) and o-ring (18†). Lubricate the o-ring and
the threads of the flow-through nut (17†). Screw the
flow-through nut (17†) into the piston/rod
assembly (3).
8. Place piston in vice and torque flow-through nut
(17†) as specified in the following table.
9. Push the piston/rod assembly (3) into the upper
cylinder (1).
10. Lubricate and install the seal (21*) on the top of the
lower cylinder (2).
11. Lubricate the threads and screw the lower cylinder
(2) onto the upper cylinder (1). Torque to 95-105
ft-lb (128-142 N•m).
F
IG. 4. Replace piston packings.
ti11693a
10*
11*
12*
13*
12*
13*
14*
12*
5
4*
1
Lips must
face up
Displacement Pump Torque
LW025A–LW050A 58-62 ft-lb (78-84 N•m)
LW075A–LW150A 78-82 ft-lb (105-111 N•m)
F
IG. 5. Replace piston ball and seat.
3
◆16
†15
†18
†17
ti11692a
 Loading...