Repair
8 312792F
12. Lubricate and install the seal (25*†) on the bottom of
the lower cylinder (2).
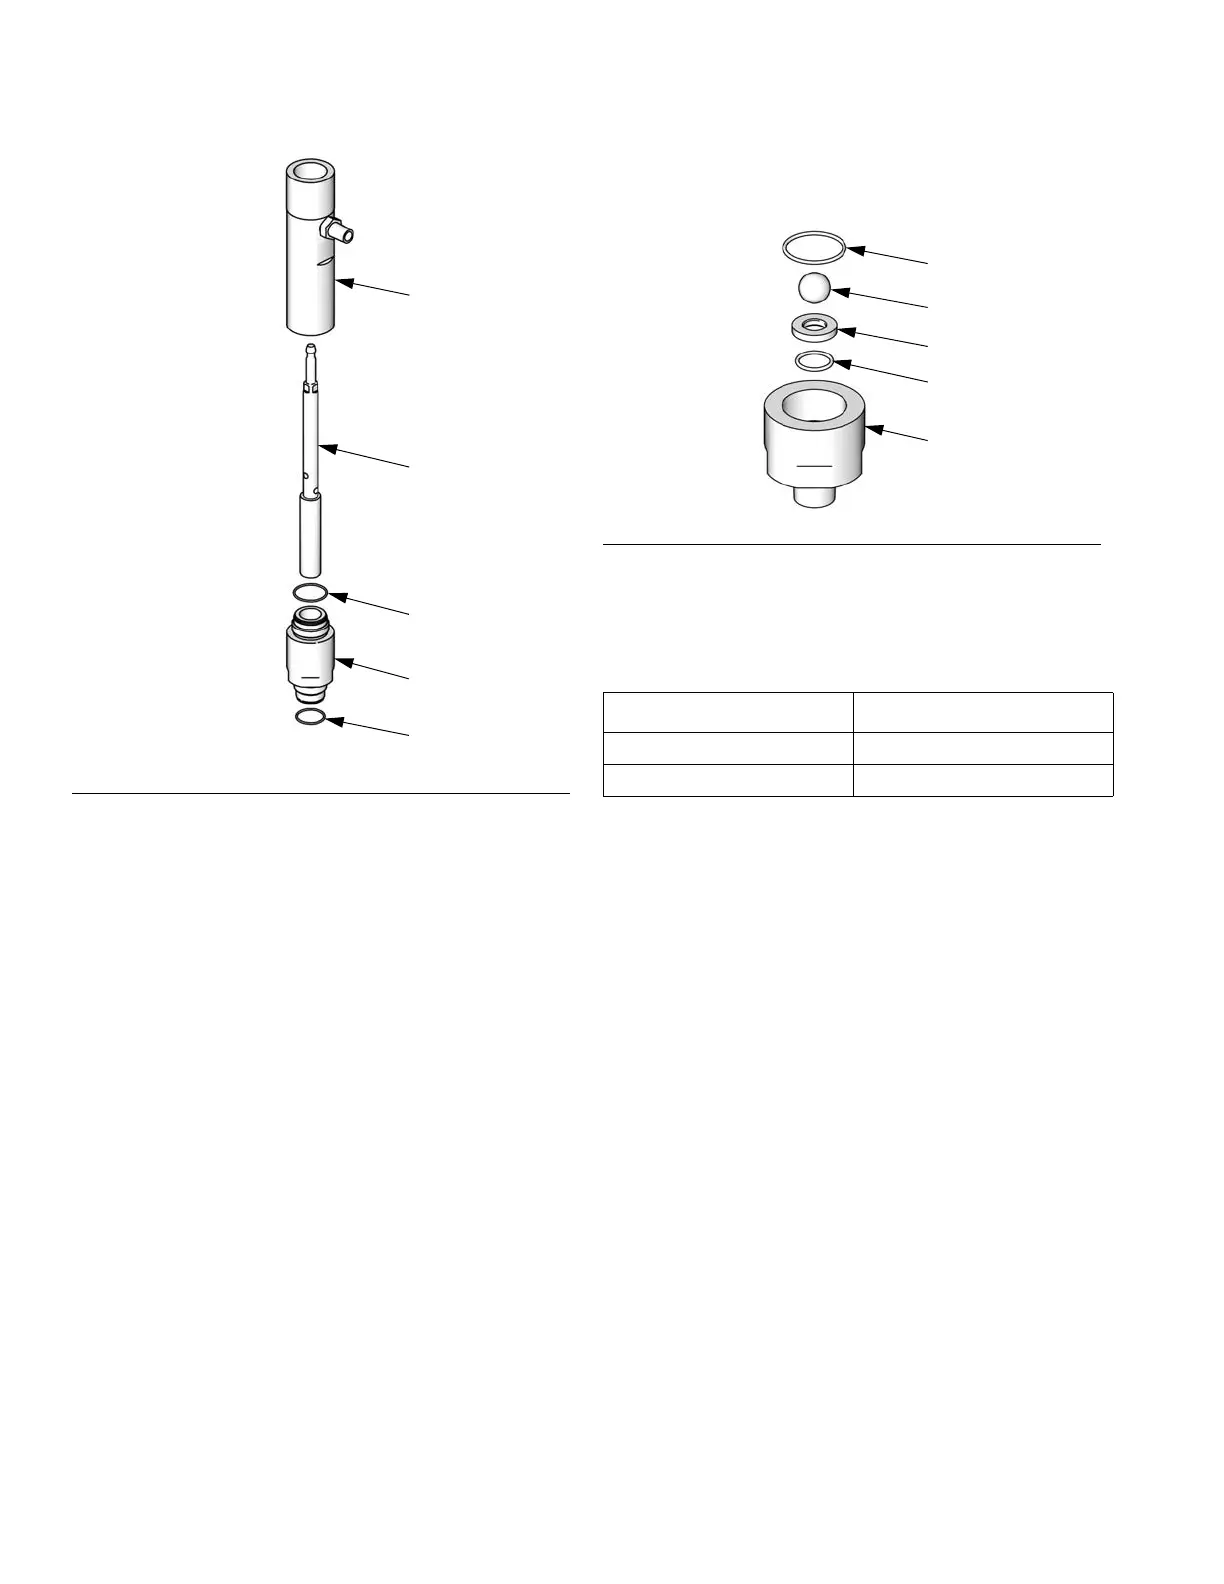
13. Install the o-ring (26†) and intake seat (22†) into the
top of the inlet housing. Lubricate the o-ring. The
seat (22†) is reversible. Turn over or replace as
needed.
14. Lubricate the seal (25*†) and threads of the lower
cylinder (2). Place the ball (24◆) on the seat (22†).
15. Keep upright to screw the housing (23) into the
lower cylinder (2) hand tight, so the seat remains
firmly in place. Then clamp the cylinder in a vice and
torque as specified in the following table.
16. Torque wet cup (5) to 58-62 ft-lb (78-84 N•m).
F
IG. 6. Assemble piston/rod assembly and cylinders.
1
3
21*
2
ti12414a
25*†
F
IG. 7. Replace intake ball and seat.
Displacement Pump Torque
LW025A–LW050A 58-62 ft-lb (78-84 N•m)
LW075A–LW150A 78-82 ft-lb (105-111 N•m)
25✓
24✓
22✓
26✓
23
ti11694a
 Loading...