GB - 26
4. Remove PTO belt from left mower deck
pulle
y.
5. Slowly release idler arm
until tension is
removed from idler spring.
6. Remove PTO belt from mower deck and
electric clu
tch.
Install
(Figure 23)
NOTE: D
o not install PTO belt on left mower
deck pulley in step 1.
1. Install PTO belt on electric clutch and
mowe
r deck.
2. Hook a puller into idler hole and pull idler
ar
m towards outside of unit until PTO
belt can be routed around left mower
deck pulley.
3. Slowly release idler arm until idler pulley
re
sts firmly against PTO belt.
4. Install belt covers on mower deck.
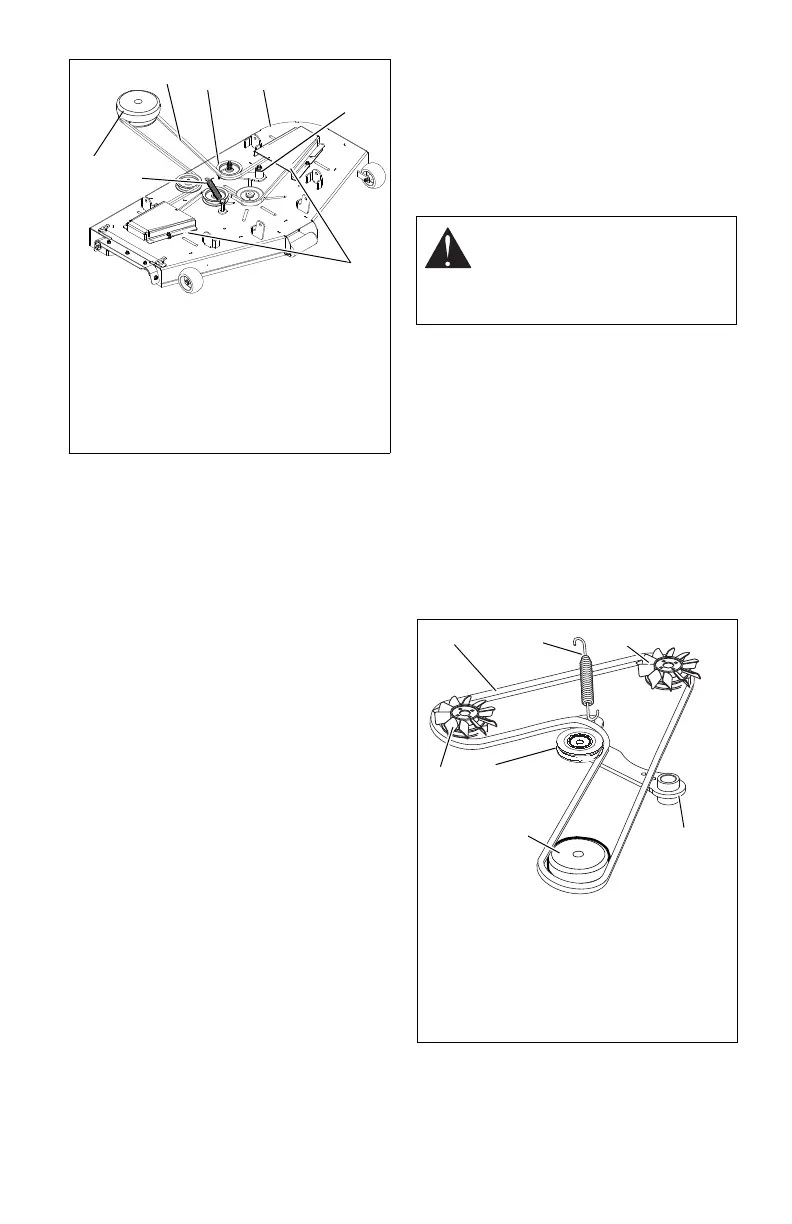
REPLACING HYDROSTATIC BELT
Remove
(Figure 24)
1. Remove PTO belt (see REPLACING
PTO BELT on
page 25).
2. Disconnect electric clutch
connector.
3. Remove clutch stop.
4. Disconnect idler spring.
5. Remove hydrostatic belt from
hydro
static transmission pulleys, pulley,
electric clutch, and idler.
Install
(Figure 24)
1. Install hydrostatic belt on idler, electric
clu
tch, pulley, and hydrostatic
transmission pulleys.
2. Connect idler spring.
3. Install clutch stop.
4. Connect electric clutch connector.
5. Install PTO belt (see REPLACI
NG PTO
BELT on page 25).
Figure 23
7
3
1
2
4
6
5
1. Idler Spring
2. Electric Clutch
3. PTO Belt
4. Idler Hole
5. Idler Pulley
6. Idler Arm
7. Belt Cover
CAUTION: Use care when
releasing idler spring tension.
Keep body parts well away from
idler when performing this
operation.
Figure 24
1
1. Hydrostatic Belt
2. Hydrostatic Transmission Pulley
3. Pulley
4. Electric Clutch
5. Idler
6. Idler Spring
2
5
2
4
6
3