DC Inverter Multi VRF System
9
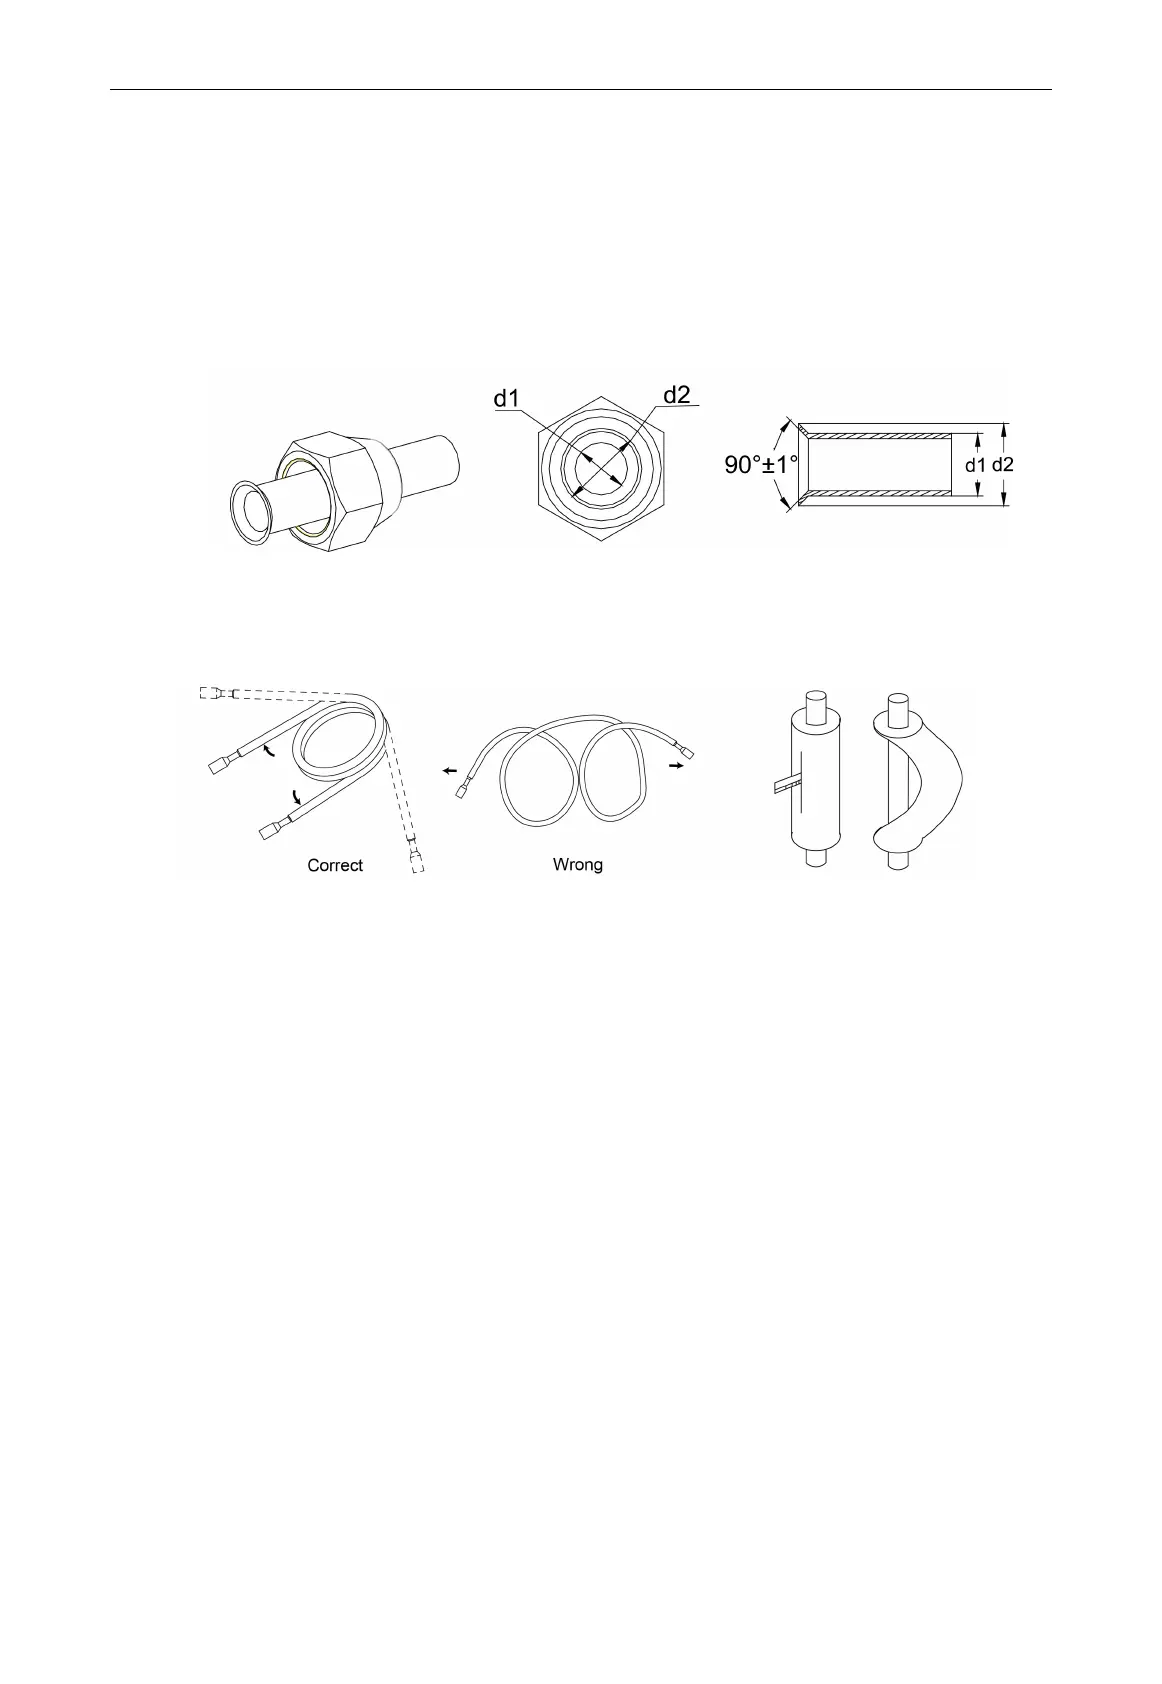
4.3.2 Flaring Process
(1) Use pipe cutter to cut the connection pipe in case it is unshaped.
(2) Keep the pipe downward in case cutting scraps get into the pipe. Clear away the burrs after
cutting.
(3) Remove the flared nut connecting indoor connection pipe and outdoor unit. Then use flaring
tool to fix the flared nut into the pipe (as shown in Fig.10).
(4) Check if the flared part is flaring evenly and if there is any crack.
Fig. 10
4.3.3 Pipe Bending
(1) Reshape the pipe by hand. Be careful not to damage the pipe.
Fig. 11 Fig. 12
(2) Do not bend the pipe over 90°.
(3) If pipe is repeatedly bent or stretched, it will get hard and difficult to bend and stretch again.
Therefore, do not bend or stretch the bend for over 3 times.
(4) In case that direct bending will open cracks to the pipe, first use sharp cutter to cut the
insulating layer, as shown in Fig.12. Do not bend the pipe until it is exposed. When bending
is done, wrap the pipe with insulating layer and then secure it with adhesive tape.
4.3.4 Indoor Pipe Connection
(1) Remove pipe cover and pipe plug.
(2) Direct the flared part of copper pipe to the center of screwed joint. Twist on the flared nut
tightly by hand, as in Fig.13 (Make sure indoor pipe is correctly connected. Improper
location of the center will prevent flared nut from being securely twisted. Thread of nut will
get damaged if the flared nut is twisted forcibly).
(3) Use torque wrench to twist on the flared nut tightly until the wrench gives out a click sound
(Hold the handle of wrench and make it at right angle to the pipe. as in Fig.14).
(4) Use sponge to wrap the un-insulated connection pipe and joint. Then tie the sponge tightly
with plastic tape.
(5) Connection pipe should be supported by a bearer rather than the unit.
 Loading...