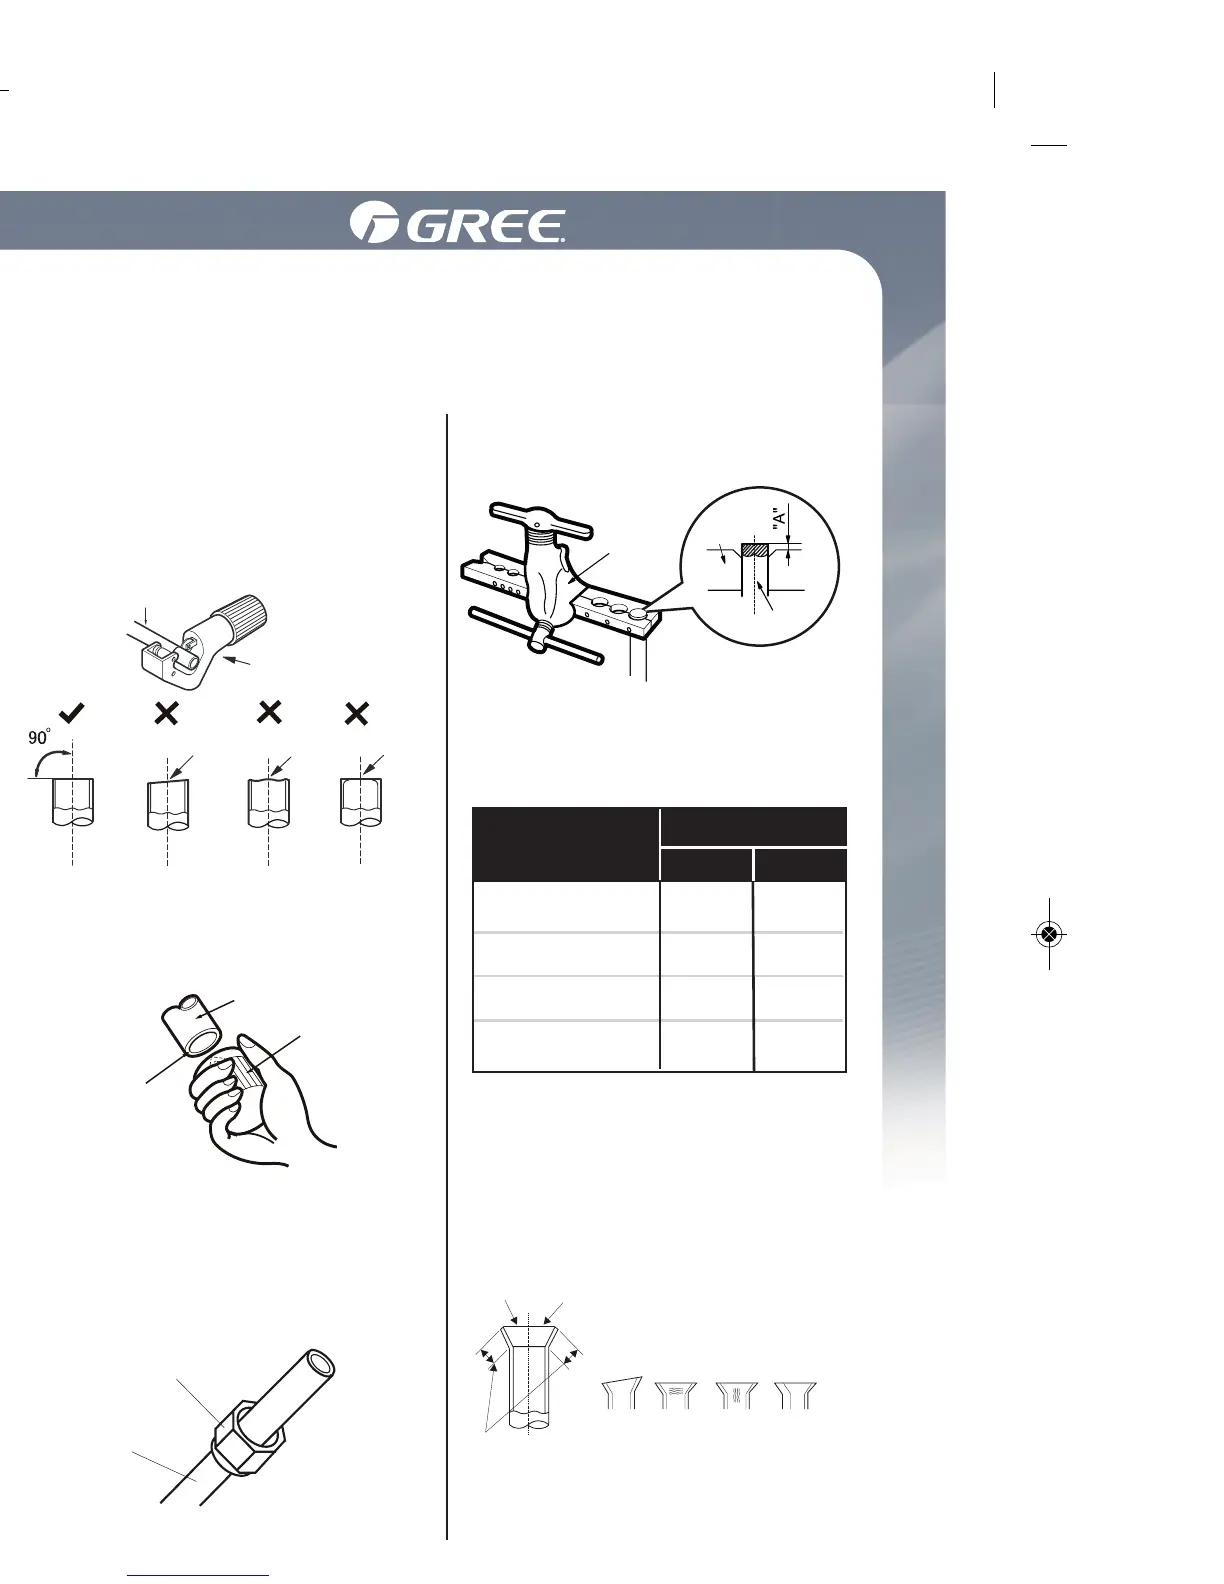
Méthode pour évaser un tuyau
Note:
Un tuyau mal évasé peut entraîner une fuite du liquide réfrigérant.
Évasez le tuyau en suivant les étapes suivantes:
A. Coupez le tuyau
• Calculez la longueur du tuyau selon
la distance entre les unités intérieure
et extérieure.
• Coupez le tuyau avec le coupe-tube.
E. Évaser le tuyau
• Évasez le tuyau avec le mandrin
F. Inspection
• Vérifiez si l'évasement est bien fait.
Si ce n'est pas lisse, reprendre les
étapes précédentes.
⌀6-6.35(1/4”)
Note:
• 'A' variera, selon le diamètre;
référez-vous au tableau ci-après:
B. Enlevez les bavures
• Enlevez les bavures avec un étau-
limeur et assurez-vous qu'elles
n'entrent pas dans le tuyau.
C. Posez un tube isolant approprié.
D. Pose de l'écrou-union
• Enlevez l'écrou-union du tuyau de
raccord et de la valve extérieure;
posez l'écrou-union sur le tuyau.
tuyau
mandrin
surface lisse
la longueur est
égale
évasement incorrect
en
biais
craquelure
surface
abîmée
épaisseur
inégale
tuyau
moule
rigide
coupe-tube
en biais
tuyau
étau-limeur
vers le bas
écrou-union
tuyau
inégal bavure
Diamètre
extérieur (mm)
A (mm)
Max Min
⌀6-6.35(1/4”)
1.3 0.7
1.6 1.0
1.8 1.0
2.4 2.2
⌀
9.52(3/8”)
⌀12-12.7(1/2”)
⌀15.8-16(5/8”)
Pipe expanding method
Note:
Improper pipe expanding is the main cause of refrigerant leakage.
Please expand the pipe according to the following steps:
A: Cut the pipe
• Confirm the pipe length according to
the distance of indoor unit and
outdoor unit.
• Cut the required pipe with pipe cutter.
E: Expand the port
• Expand the port with expander.
F: Inspection
• Check the quality of expanding
port. If there is any blemish, expand
the port again according to the
steps above.
⌀6-6.35(1/4”)
Note:
• "A" varies according to the
diameter, please refer to the
sheet below:
B: Remove the burrs
• Remove the burrs with shaper and
prevent the burrs from getting into
the pipe.
C: Put on suitable insulating pipe
D: Put on the union nut
• Remove the union nut on the indoor
connection pipe and outdoor valve;
install the union nut on the pipe.
pipe
expander
smooth surface
the length is equal
improper expanding
leaning crack
damaged
surface
uneven
thickness
pipe
hard
mold
pipe cutter
leaning
pipe
shaper
downwards
union pipe
pipe
uneven burr
Outer diameter
(mm)
A (mm)
Max Min
⌀6-6.35(1/4”)
1.3 0.7
1.6 1.0
1.8 1.0
2.4 2.2
⌀
9.52(3/8”)
⌀12-12.7(1/2”)
⌀15.8-16(5/8”)
00708_Owner's manual Lomo_Mise en page 1 15-03-03 14:51 Page41
 Loading...