This document is the owner's manual for the GREE Wired Controller models XK41 and XK47, designed for Commercial Air Conditioners. It provides detailed instructions for operation, installation, and troubleshooting.
Function Description
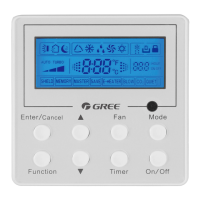
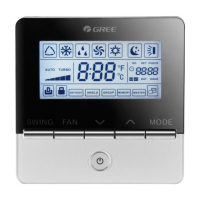
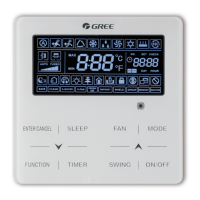
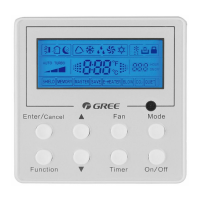
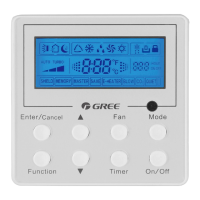
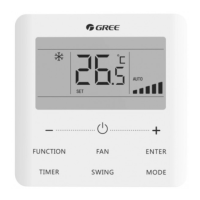
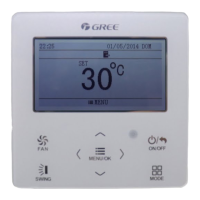
The GREE Wired Controller XK41 and XK47 serves as a central control interface for commercial air conditioning units. It allows users to manage various operational parameters, including power on/off, mode selection (Auto, Cooling, Dry, Fan, Heating), temperature adjustment, fan speed settings (High, Middle, Low, Auto), and timer functions (Timer On/Off). Additionally, it offers advanced features such as Swing, Sleep, Turbo, E-heater (auxiliary electric heating), and Blow functions. The controller features an LCD display that shows the current settings, operational status, and any error codes. It also includes a lock function to prevent unintended operations and a memory function that allows the unit to resume its previous settings after a power failure.
Important Technical Specifications
- Communication Distance: The standard communication distance between the main board and the wired controller is 8 meters, with a maximum allowable distance of up to 20 meters.
- Temperature Setting Range: In Cooling, Dry, Fan, or Heating modes, the temperature can be set between 16°C and 30°C. In Auto mode, the setting temperature is unadjustable.
- Timer Setting Range: The timer can be set from 0.5 hours to 24 hours, with adjustments in 0.5-hour increments.
- Power Recovery: The memory function ensures that the indoor unit resumes its original setting state (On/Off, Mode, set temperature, set fan speed, and Lock function) after power recovery if the memory function is activated. If memory is off, the unit defaults to the off state after power recovery.
- Signal Line: Shielded twisted pair lines are recommended for signal and communication lines, especially in environments with electromagnetic interference, to ensure proper communication.
- Installation: The controller is designed for embedded installation in a wall socket box, with specific screw types (M4X25 for soleplate, ST2.9X6 for front panel) and a requirement for a four-core twisted pair line for connection.
Usage Features
- On/Off Control: A single press of the "On/Off" button toggles the unit's power state.
- Mode Selection: The "Mode" button cycles through Auto, Cooling, Dry, Fan, and Heating modes.
- Temperature Adjustment: Up and down arrow buttons allow for precise temperature setting, with continuous pressing increasing or decreasing the temperature by 1°C every 0.5 seconds.
- Fan Speed Control: The "Fan" button adjusts the indoor unit's fan speed through Auto, Low, Middle, and High settings.
- Timer Functionality: The "Timer" button enables setting a timer for the unit to turn on or off. The LCD displays the set time, and the arrow buttons adjust it. Pressing "Timer" again cancels the setting, while "Enter/Cancel" confirms it.
- Swing Function: Activated via the "Function" button, the swing function allows for automatic airflow direction adjustment. Confirmation is done with "Enter/Cancel."
- Sleep Mode: Accessed through the "Function" button, Sleep mode adjusts the temperature gradually over two hours (increases by 1°C twice in Cooling/Dry, decreases by 1°C twice in Heating) to optimize comfort and energy efficiency during sleep.
- Turbo Mode: This function, also accessed via "Function," maximizes fan speed for rapid cooling or heating to quickly reach the desired room temperature.
- E-heater Function: In Heating mode, the "Function" button can activate the auxiliary electric heating (E-heater) for improved efficiency. This function may also turn on automatically in Heating mode.
- Blow Function: Available in Cooling or Dry modes, the "Blow" function runs the indoor fan at low speed for 2 minutes after the unit is turned off to evaporate water from the evaporator, preventing mildew. This function is unavailable in Fan or Heating modes.
- Lock Function: Pressing the up and down arrow buttons simultaneously for 5 seconds activates a lock, disabling all other button presses. Repeating the action unlocks the controller.
- Memory Function: Activated by pressing "Mode" and the up arrow button simultaneously for 5 seconds while the unit is off, this function stores the last operational settings for automatic restoration after a power outage.
- LCD Display: The LCD provides clear visual feedback on the current mode, temperature, fan speed, timer status, and active functions (e.g., SHELD, MEMORY, MASTER, SAVE, E-HEATER, BLOW, CO2, QUIET, AUTO TURBO).
Maintenance Features
- Error Display: The controller displays error codes on the LCD if a system malfunction occurs. If multiple errors are present, their codes will be displayed in a circular sequence.
- Troubleshooting: In the event of an error, the manual advises turning off the unit and contacting professionally skilled personnel. A comprehensive table of error codes and their meanings is provided to aid in diagnosis.
- Installation Guidelines: The manual emphasizes critical installation steps to ensure proper functioning and prevent issues, including:
- Cutting off power supply before installation.
- Proper routing and connection of the four-core twisted pair signal line.
- Securing the soleplate and front panel with specified screws.
- Maintaining a minimum separation of 20cm between signal/communication lines and power cords to avoid electromagnetic interference.
- Using shielded twisted pair lines for signal and communication in electromagnetically noisy environments.
- Disassembly Instructions: The manual includes diagrams illustrating the steps for disassembling the wired controller, which may be necessary for maintenance or replacement.