®
Fabra Hood Gravity Ventilator 1
Document 471321
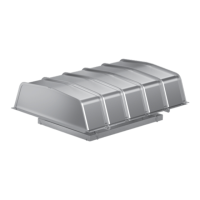
Model FGI and FGR with Birdscreen
Fabra Hood Gravity Ventilator
Installation, Operation and Maintenance Manual
Please read and save these instructions for future reference. Read carefully before attempting to assemble, install,
operate or maintain the product described. Protect yourself and others by observing all safety information. Failure
to comply with these instructions will result in voiding of the product warranty and may result in personal injury
and/or property damage.
General Safety Information
Only qualified personnel should install this fan.
Personnel should have a clear understanding of these
instructions and should be aware of general safety
precautions. Improper installation can result in electric
shock, possible injury due to coming in contact with
moving parts, as well as other potential hazards. Other
considerations may be required if high winds or seismic
activity is present. If more information is needed,
contact a licensed professional engineer before
moving forward.
Receiving
Upon receiving the product check to ensure all items
are accounted for by referencing the delivery receipt or
packing list. Inspect each crate or carton for shipping
damage before accepting delivery. Alert the carrier
of any damage detected. The customer will make
a notation of damage (or shortage of items) on the
delivery receipt and all copies of the bill of lading which
is countersigned by the delivering carrier. If damaged,
immediately contact your local representative. Any
physical damage to the unit after acceptance is not the
responsibility of the manufacturer.
Unpacking
Verify that all required parts and the correct quantity of
each item have been received. If any items are missing,
report shortages to your local representative to arrange
for obtaining missing parts. Due to availability of
transportation and truck space all items for the unit may
not be shipped together. Confirmation of shipment(s)
must be limited to only items on the bill of lading.
Handling
Lifting the fans must be done with care to avoid
damaging the housing. Fans are to be rigged and
moved by the optional lifting brackets provided or by
the skid when a forklift is used. Location of brackets
varies by model and size. Handle in such a manner
as to keep from scratching or chipping the coating (if
applicable). Damaged finish may reduce the ability of
the ventilator to resist corrosion.
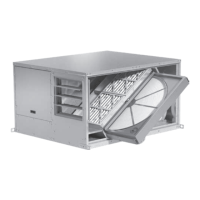
Fabra Hood Gravity Ventilator
Single section with birdscreen, throat length less
than or equal to 72 inches
Fabra hood gravity ventilators are designed for intake
(model FGI) or relief (model FGR) applications with
natural gravity or negative pressure systems. Units
feature a low-silhouette, fabra hood-style housing offing
superior load bearing strength, weather-resistance,
dimensional flexibility and appearance.
IMPORTANT:
For Standard Assembly, follow instructions on pages 2-5.
For High Wind Assembly, follow instructions on pages 6-11.
For Typical Installation, refer to page 12.