This document is an owner's manual for the Greenworks Pro 60V Cordless String Trimmer, model ST60L01. It provides comprehensive instructions for assembly, operation, and maintenance, along with important safety information and warranty details.
Function Description
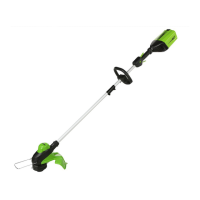
The Greenworks Pro 60V Cordless String Trimmer is a battery-powered gardening appliance designed for trimming grass and light vegetation. It operates cordlessly, offering freedom of movement without the need for an electrical outlet. The trimmer utilizes a nylon line for cutting, which is advanced using a bump feed mechanism. The cutting line is continuously trimmed by a cut-off blade on the guard to maintain a consistent and efficient cutting diameter. The device is powered by a 60V brushless motor, providing reliable performance for various trimming tasks. It is specifically designed for use with Greenworks 60V Lithium-Ion battery packs (LB60A00, LB60A03, LB60A01, LB60A02) and charger (CH60A00). The string trimmer is not intended for use with brush cutter attachments.
Usage Features
The string trimmer is designed for ease of operation and control. It features a rear handle with an ergonomic overmold for improved comfort and grip, and an auxiliary handle for enhanced control and to prevent loss of control during operation. The variable speed trigger allows for added precision, while a safety lock button prevents accidental starting.
To begin operation, the battery pack must be properly installed by aligning it with the battery opening and inserting it until an audible "click" is heard. To remove the battery, the release button on the back of the pack is depressed, and the battery is pulled out. Starting the trimmer involves pressing the lock-off lever and then squeezing the switch trigger. Releasing the switch trigger stops the unit.
When operating the trimmer, it is crucial to hold it away from the body, maintaining clearance between the body and the cutting head to prevent serious personal injury. The recommended grip involves placing the right hand on the rear handle and the left hand on the auxiliary handle, maintaining a firm grip with both hands. The trimmer should be held at a comfortable position, with the rear handle approximately at hip height. For effective trimming, it is advised to cut tall grass from the top down to prevent grass from wrapping around the shaft housing and string head, which could lead to overheating and damage. If grass does become wrapped, the battery pack should be removed, and the grass cleared.
The trimmer's cutting line advances automatically through a bump feed mechanism. When the cutting line wears down and shortens, bumping the head on the ground while it is rotating will advance additional line. The integrated cut-off blade on the guard ensures the line is trimmed to the proper length, maintaining an accurate cutting swath. The cutting swath can be adjusted from 14 inches to 16 inches by rotating the line cut-off blade 180 degrees after removing the battery pack and loosening the blade screws.
For optimal cutting, the trimmer should be tilted towards the area being cut. It cuts most effectively when passed from right to left, which also helps to avoid throwing debris at the operator. Users should utilize the tip of the string for cutting and avoid forcing the string head into uncut grass. Caution is advised around wire and picket fences, stone and brick walls, curbs, and wood, as these can cause accelerated string wear and breakage, and potentially damage trees and shrubs.
Maintenance Features
Regular maintenance is essential for the safe and efficient operation of the string trimmer. The manual provides a maintenance schedule, recommending various checks at different intervals: each time the machine is used, every two hours, each week, after use, and annually or when required.
General maintenance involves keeping the machine clean and stored in a dry enclosure with a charged battery. Plastic parts should be cleaned with clean cloths to remove dirt, dust, lubricant, and grease, avoiding solvents that could cause damage.
Specific maintenance tasks include:
- Visual check of safety systems: This involves inspecting the distancing device, carrying eye, and safety casing for any issues.
- Trigger safety system functions: The functionality of the trigger safety system should be checked.
- Blade sharpness: The sharpness of the line-cutting blade on the guard should be checked and sharpened if necessary, or replaced with a new blade if dull.
- Visual check of the tool: The tool should be inspected for cracks or deformation.
- Visual check of the shaft attachment: The shaft attachment should be checked for deformations or wear.
- Battery level: The battery level should be checked regularly.
- Inspection by an approved dealer: An annual inspection by an approved dealer is recommended.
The manual also provides detailed instructions for spool replacement. This involves pressing the tabs on the side of the trimmer head to remove the cover and spool. Any remaining line should be removed, and all parts cleaned of dirt and debris. The spool should be replaced if worn or damaged, or new 0.080 inch (2.0 mm) diameter line (15 feet/4.6 meters) can be wound onto an existing spool. When winding new line, it should be bent at the midpoint, inserted into the slot in the center rim of the spool, and then wrapped evenly and firmly around the spool in a clockwise direction, with a finger between the lines. The lines are then positioned in the guide slots, and the ends inserted through the line exit holes in the cover before reinstalling the spool and cover onto the trimmer head until it snaps into place.
Replacing the bump knob also involves removing the battery pack, then pressing the tabs on the trimmer head to remove the cover and spool. The old bump knob is firmly pulled out with a wrench while holding it, and a new bump knob is pushed into the spool housing.
The manual emphasizes the importance of using only identical manufacturer's replacement parts and accessories to avoid hazards or product damage. It also warns against modifying the product or creating unrecommended accessories. Before any servicing, cleaning, or material removal, the battery should be removed or disconnected.