Do you have a question about the GreenWorks 2101000 and is the answer not in the manual?
Always wear safety glasses with side shields; consider face mask if dusty.
Wear heavy long pants, long sleeves, boots, and gloves; avoid loose clothing and jewelry.
Keep children/pets 50 ft away; clear debris; avoid poor lighting and wet conditions.
Use polarized plugs/cords; avoid contact with grounded surfaces and wet conditions.
Use outdoor-rated, properly gauged cords (W-A, W); inspect for damage.
Use correct tool, do not overreach; maintain footing and balance.
Ensure switch is off before plugging in; do not carry with trigger engaged.
Inspect for damage, use OEM parts, keep handles clean, ensure guards are attached.
Maintain firm grip, keep head below waist level; avoid overreaching.
Store unplugged in dry place, keep cord clear of obstacles and heat.
Use appropriate gauge for length; avoid cords over 100 ft.
Do not abuse cord, handle plug with dry hands, return damaged units for service.
Know the tool, read manual, inspect unit before each use for damage.
Keep bystanders 50 ft away; avoid dangerous environments like wet locations.
Stay alert, maintain balance, keep body parts away from moving parts.
Use only manufacturer-recommended attachments and parts.
Operate with deflector in place; maintain firm grip; keep head below waist.
Clear work area of debris before use; save and refer to instructions.
Symbols indicate safety alerts, manual reading, and eye/hearing protection.
Symbols indicate bystander safety, ricochet hazard, no blade use, and wet conditions.
Indicates imminently hazardous situations (DANGER) or potentially hazardous situations (WARNING).
Indicates potentially hazardous situations resulting in minor injury or property damage.
Call GREENWORKS customer service for assistance if you do not understand manual warnings.
Servicing requires qualified technicians; use only identical replacement parts.
Chart provides minimum wire size (AWG) based on cord length and ampere rating.
Use outdoor-rated cords; inspect for loose wires, cuts, or worn insulation before use.
Familiarize yourself with operating features and safety rules before use.
Cord retainer prevents unplugging; lock-out button reduces accidental start-up.
Carefully remove product, check for damage, verify all packing list items are included.
List includes Power Head, Front Handle, Grass Deflector, Trimmer Head, and Manual.
Do not use if parts are missing/damaged; do not modify; connect power only after assembly is complete.
Loosen knob, push button, align shafts, slide together, and tighten knob securely.
Read attachment manuals; do not install/remove while power head is running.
Attach front handle for comfortable operation; secure with bolt, washer, and wing nut.
Align guard holes, insert bolt, and secure with nut; ensure it is fastened before use.
Read manual, stay alert, do not allow familiarity to cause carelessness.
Carelessness can lead to serious injury; do not use unfamiliar attachments without reading manual.
Always wear safety goggles with side shields; hearing/head protection may be needed.
Use only manufacturer-recommended attachments/accessories to prevent injury.
Use cord retainer to secure extension cord; plug power head into cord.
Depress lock-out button before pulling switch trigger to start.
Squeeze trigger with lock-out engaged to start; release trigger to stop.
Hold with right hand on rear, left on front handle; keep unit on right side, clear of body.
Motor housing may become hot; avoid contact; do not operate with motor above waist level.
Keep trimmer head below waist level; maintain clearance between body and cutting head.
Cut-off blade on deflector trims line; replace string when efficiency diminishes.
Tilt trimmer towards cut; cut from right to left; use string tip; avoid fences and trees.
Use identical replacement parts for servicing; wear safety goggles when operating.
Insert screwdriver into locking hole, turn spool head counterclockwise to remove.
Align hole, turn spool head clockwise until tightened; ensure screwdriver locking hole is used.
Press spool retainer tabs on both sides to release spool cover.
Place spool in cover, feed line through eyelets, secure line in notch, press cap until it clicks.
Bend line, hook in location 'd', wind spool halves in direction of arrow, use slot 'c' and 'b'.
Use extreme care with blade attachments; never use brush cutter attachment with this power head.
Use identical replacement parts; wear eye/hearing protection during servicing.
Shut off motor, wait for parts to stop, disconnect cord before inspecting/cleaning.
Use clean cloths; avoid solvents on plastic parts; remove dirt, dust, grease.
Avoid contact of brake fluids, gasoline, etc., with plastic parts; chemicals can damage plastic.
Do not use strong detergents; store unplugged in a well-ventilated, inaccessible place.
Addresses motor failure to start due to power cord or tripped circuit breaker.
Covers defects in materials/workmanship for 4 years on personal use units; excludes misuse, wear, maintenance items.
Available by calling toll-free helpline; Monday-Friday, 9am-5pm EST.
Purchaser is responsible for transportation charges for warranty submissions.
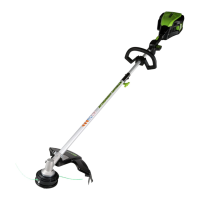
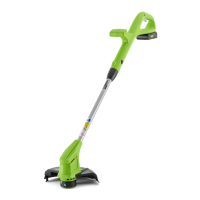
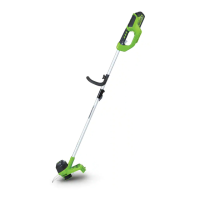
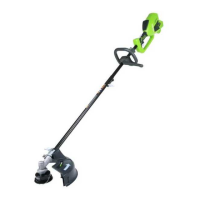
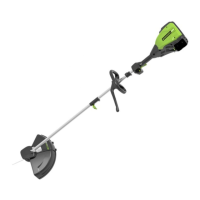
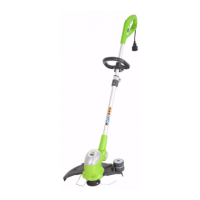
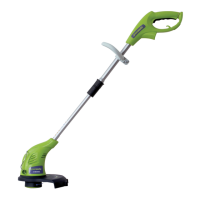
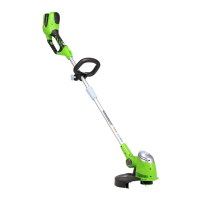
This document outlines the operation and maintenance of a Greenworks Top Mount Curved Shaft Trimmer, model 2101000. It is designed to provide users with the necessary information for safe and effective use of the tool.
The Greenworks Top Mount Curved Shaft Trimmer is an electric-powered gardening appliance primarily designed for trimming grass and light vegetation. Its main function is to cut unwanted growth in areas that are difficult to reach with a lawnmower, such as around fences, trees, and garden edges. The "top mount" design refers to the placement of the motor, which is located at the top of the shaft, contributing to balance and maneuverability. The "curved shaft" design is ergonomic, intended to provide a more comfortable and natural operating posture for the user, reducing strain during extended use. The trimmer utilizes a flexible, non-metallic line (string) that spins at high speeds to cut vegetation. This string is fed from a spool head, which is designed for easy replacement and rewinding of the cutting line. The unit is equipped with a grass deflector, an essential safety feature that helps protect the operator from flying debris generated during trimming.
The trimmer is designed with several features to enhance user experience and safety. It includes a rear handle and a front handle assembly, allowing for a firm, two-handed grip during operation, which is crucial for maintaining control and balance. The front handle can be adjusted along the power head shaft to a position that allows for comfortable operation, accommodating different user heights and preferences.
A key safety feature is the lock-out button, located on the handle above the switch trigger. This button must be depressed before the switch trigger can be pulled, reducing the possibility of accidental start-up. The lock-out mechanism resets each time the trigger is released, ensuring that the user must intentionally engage it before restarting the trimmer.
The trimmer is designed to be connected to a power supply via an extension cord. To prevent accidental unplugging during use, a cord retainer is integrated into the design. Users are instructed to form a loop with the end of the extension cord, insert it through an opening in the bottom of the rear handle, and place it over the cord retainer, then pull the loop against the retainer to remove slack before plugging the power head into the extension cord. This simple yet effective feature helps maintain continuous power and prevents interruptions during trimming tasks.
When operating, the trimmer is most effective when tilted toward the area being cut, and it cuts best when passed from right to left. This technique helps direct debris away from the operator, enhancing safety. Users are advised to use only the tip of the string for cutting and to avoid forcing the string head into uncut grass, which can lead to inefficient cutting and increased string wear. Caution is also advised around wire and picket fences, stone and brick walls, curbs, wood, trees, and shrubs, as these can cause rapid string wear, breakage, or damage to the string and the objects themselves.
The trimmer is designed for use with specific attachment models as outlined in the operator's manual. The attachment shaft features a button that aligns with a guide recess on the power head coupler. Once aligned, the shafts slide together, and the button locks into a positioning hole, securing the attachment. The knob on the coupler must then be tightened securely. Users are warned against using other attachment models, brush cutters, or any non-recommended accessories, as this could lead to serious personal injury or property damage.
Maintaining the Greenworks trimmer involves several simple steps to ensure its longevity and safe operation. Regular cleaning is emphasized, with instructions to clean dirt and debris from the power head using a damp cloth with a mild detergent after each use. Users are specifically warned against using strong detergents, aromatic oils (like pine and lemon), or solvents (like kerosene) on the plastic housing or handle, as these chemicals can damage, weaken, or destroy plastic parts, potentially leading to serious personal injury.
The string head is a consumable part that requires attention. If the string head becomes cracked, chipped, or damaged, it must be replaced to ensure proper performance and safety. The manual provides detailed instructions for removing and installing the spool head. This involves inserting a screwdriver into a spindle locking hole to prevent the spindle from turning, then turning the spool head counterclockwise to remove it. Installation is the reverse process, ensuring the spool head is turned clockwise until fully tightened.
Instructions are also provided for replacing and rewinding the cutting line. To replace the spool, the motor must be stopped, and the power source disconnected. The spool cover is released by pressing retainer tabs on both sides. For rewinding, users are instructed to bend an 8-foot length of line in the middle, hook it in a specific location, and then wind both halves of the line onto the spool in the direction of an arrow, ensuring each side lays in designated slots. The line is temporarily retained using a notch before the spool is placed back into the spool cover, with the line aligned with metal eyelets. Finally, the spool cap is pressed onto the retainer until it clicks securely into place.
Before each use, users are advised to inspect the unit for loose fasteners and damaged or missing parts, correcting any issues before operation. Extension cords should also be checked for damage, and any damaged cords must be replaced immediately to prevent electrical shock. For any repairs beyond the described adjustments, the power head should be serviced by an authorized service dealer. Proper storage is also covered, recommending that the power head be stored indoors in a dry, locked, well-ventilated place, inaccessible to children, and away from corrosive agents like garden chemicals and de-icing salts.
| Type | String Trimmer |
|---|---|
| Battery Voltage | 40V |
| Cutting Width | 12 in |
| Weight | 6.4 lbs |
| Voltage | 40V |
| Power Source | Battery |
| Line Diameter | 0.065 inches |
| Runtime | Up to 30 minutes |
