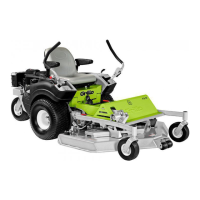
- 36 -
2) Unhook the two red cutting deck blocking levers (fig. 12, ref. A);
3) Tilt the foot rest platform until it is stuck in the corresponding rubber buffers (fig. 13, ref.
A);
4) Keep the deck lifting switch pressed (fig. 1, no. 4) until the complete tilting of the cutting
deck (fig. 22). The switch has to be pressed in the direction that approaches the cutting
deck to the ground;
5) Release the switch.
6) Turn the engine off.
7) ATTENTION! Connect the security locks as per fig. 23 and remove them only once
maintenance has been carried.
It is not necessary to unhook the PTO belt.
Attention! It is possible to tilt the cutting deck also with the machine's engine turned off.
However, we do not recommend this operation in order to allow the alternator integrated on
the engine to compensate the current absorption during the tilting. When you tilt the cutting
deck with running engine the battery will live longer and the tilting will be quicker.
A blunt blade pulls at the grass giving it an unsightly appearance, the cutting edges of the
blades must therefore be kept sharp at all times. As the blades wear they lose their cutting
efficiency and tend to become unbalanced, causing the lawnmower to vibrate; sharpen all
three blades evenly.
When you replace the blades, it is compulsory to replace also the screw and the respective
disc spring (fig. 22, ref. B).
To remove a blade, hold it firmly using safety gloves and unscrew the central screw
clockwise. Replace the blade, make sure to screw the fixing screw tightly.
Caution! Always replace damaged or bent blades; never try to repair them!
ALWAYS USE ORIGINAL BLADES!
Once the maintenance is completed, press the deck lifting switch again (fig. 1, no. 4) to put
the cutting device into the working position. When it is parallel to the ground, lower the
mobile foot rest platform (fig. 13, ref. B) and fix the cutting deck with the corresponding red
blocking levers (fig. 14, ref. A).
Note: If the red locking levers should be hard to insert:
- check that the red light of the switch behind the machine seat (fig. 17, ref. D) is off. If the
light is on, turn the light switch off.
- check that the cutting deck has finished the tilting phase and is parallel to the ground;
- check that the red blocking levers are well lubricated with grease;
- increase the load on the spring for the cutting deck floating by screwing the adjustment
knob (fig. 1, no. 8).
If this does not give a result:
- loosen the four bolts on the tilting hinges (fig. 15, ref. A) and adjust the concentricity of the
holes of the blocking levers until they are inserted. When the operation is completed,
screw the tilting hinge bolts tightly.
ADJUSTING THE CUTTING DECK
An even deck is essential for achieving a uniform cut over the whole lawn.
With the lawnmower on a flat surface, check the tyre pressures, check the cutting deck's
edge distance from the ground and act on the tie rod (fig. 16, ref. A) and on the adjusting
screw (fig. 15, ref. B) if necessary to put it parallel to the ground. Before acting on the
adjusting screw (fig. 15, ref. B), loosen the corresponding fixing screws (fig. 15, ref. C). If a
satisfactory parallel set-up cannot be achieved, contact an Authorised Service Centre.
HOW TO REMOVE THE CUTTING DEVICE
To remove the cutting device, please follow this procedure: