- 27 -
Button Sewing:
Remove the zigzag foot .
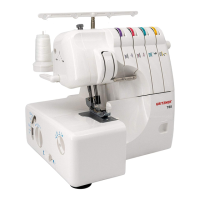
Set the machine as
illustrated and install the
darning plate. (1)
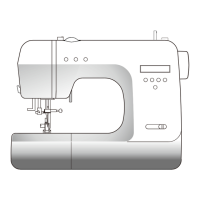
Position the work under the
presser foot holder. Place
the button in the desired
position, lower the presser
foot lifter, this holds the
button in place. Set pattern
selector dial on zigzag stitch
“B”. Adjust the stitch width to
“3” – “5” according to
distance between the two
holes of the button. Turn the
handwheel to check that the
needle enters into the left
and right holes of the button.
Set the pattern selector dial
on straight stitch “A” , and
sew a few securing stitches.
Set the pattern selector dial
on zigzag stitch “B”, and
slowly sew on the button
with about 10 stitches. Set
the pattern selector dial on
straight stitch “A” , and sew a
few securing stitches. (2)
Note:
To sew 4 holes button: First sew the 2 front holes and pull the fabric forward,
then sew the 2 rear holes as it was described in above.
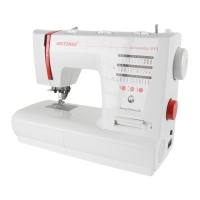
Buttons with stems:
Insert the clear view foot. Release the foot holder but before you do so, place a
match stick or darning needle on top of the button and sew a few zigzag stitches
and leave the extra thread about 15 cm, then wrap the stem you have just created
with the extra thread and knob the end of it.E.
1
2 3
 Loading...