CHANGING THE BLADES
BEFORE COMMENCING TO CHANGE THE
CUTTER BLADE SWITCH THE ENGINE OFF.
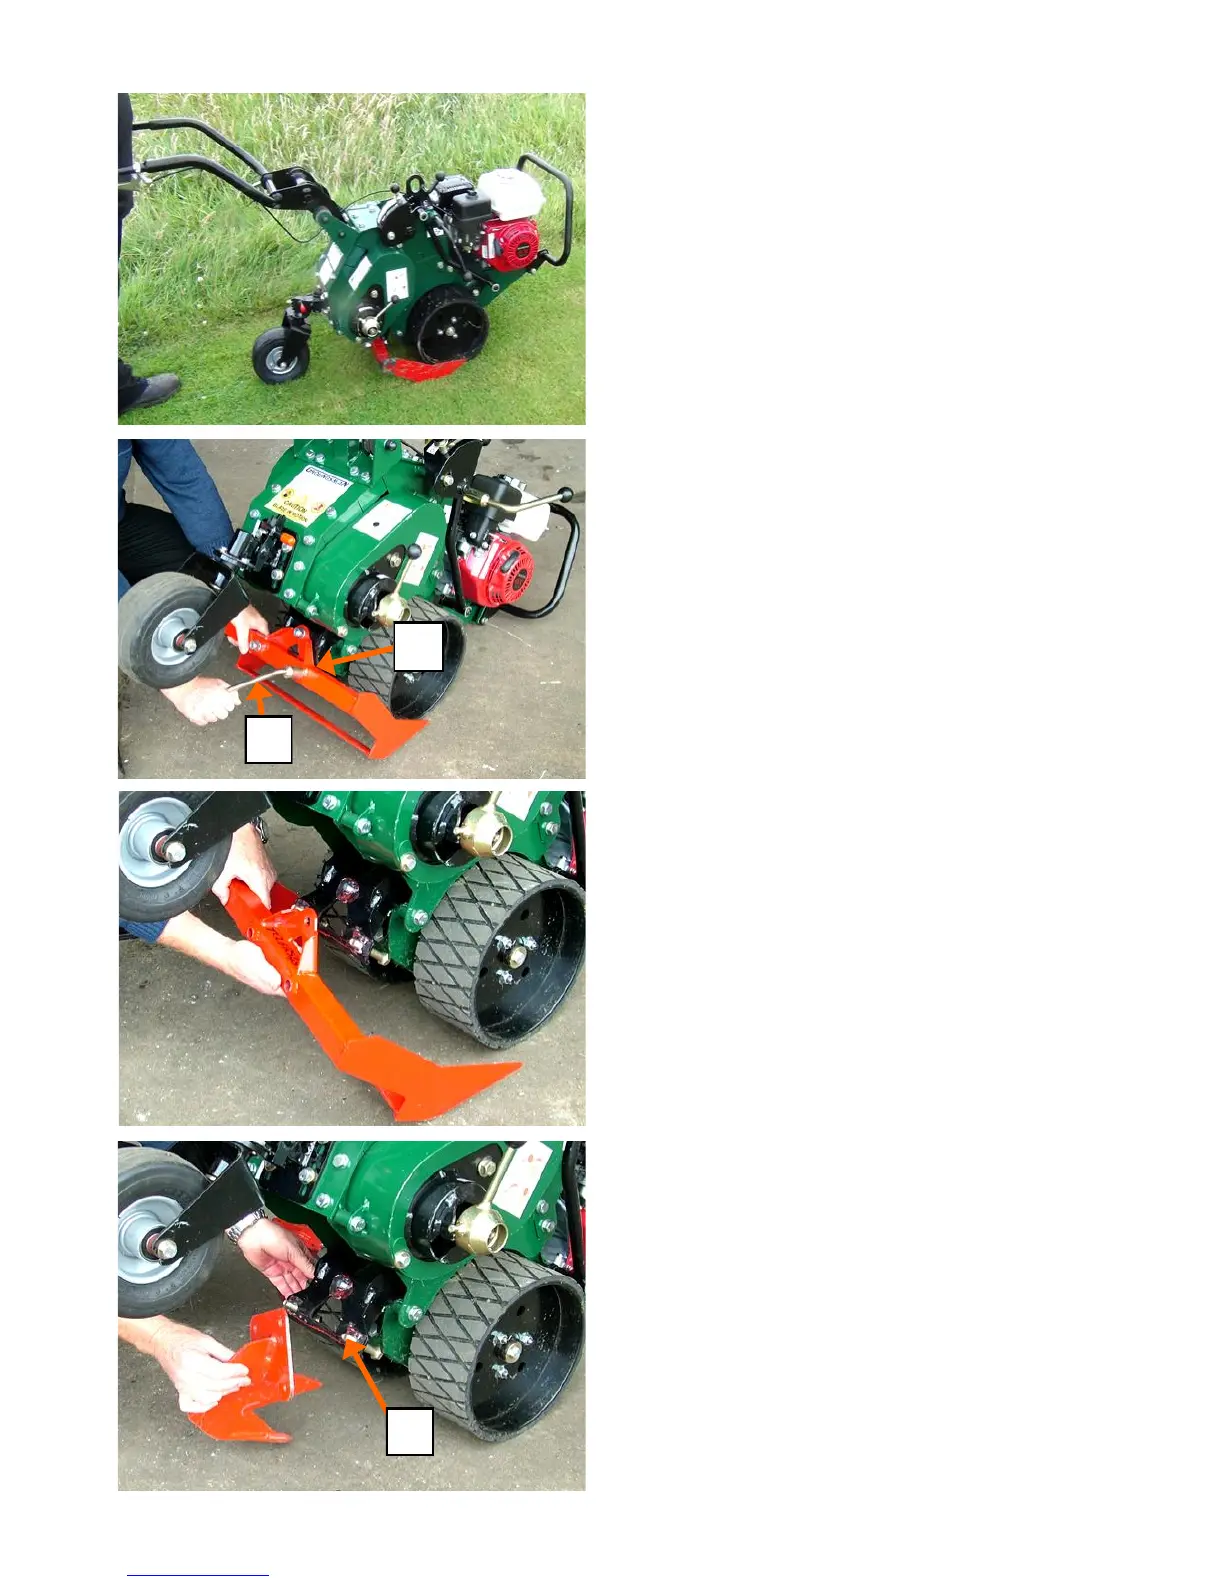
Remove and fitting the cutter blade
Tilt the machine forward to rest on the chassis
nose to raise the blade clear of the ground.
Set the cut to full depth with the caster wheel
locked facing away from the blade. Using the
Tee Wrench supplied with the machine, re-
move the three blade mounting nuts and
heavy washers then remove the blade. The
two longer bolts are located in the lower two
holes and the shorter bolt at the top. Ensure
that the heavy washers are in place when re-
fitted the blade. Before tightening the nuts,
align the blade by tapping on either side to
ensure a consistent thickness of sod across
the width of the cut. Tightened the three nuts
FIRMLY.
DO NOT ALLOW the blade mounting bolts to
work loose, re-check that the nuts are tight
periodically when in use.
Fitting the De-compactor, Mole-drain and
Trench Blades
Alternative blades are fitted in the same man-
ner and with the same precautions as with the
sod cutting blade described above. PLEASE
NOTE that the two longer bolts ’A’ are not
used, all three bolts are the shorter ones for
these types of blades.
NOTE
See Blades and Accessories on page 19
OPERATING THE MACHINE IN WORK
Follow the instructions to set the depth then
engage the blade cutter drive. Ensure that the
ground wheel drive is also engaged. Start the
engine and grasping the throttle lever pull up-
ward to engage the main drive. Apply a gentle
downward pressure to the operators handles
to enter the cutter blade in the ground then
relax the handles and allow the machine to do
the work. To exit the cut, tilt the machine for-
ward while the drive is still engaged until the
cutter blade clears the ground.
A
B
A
Page 14
Basic Setup and Operating Instructions