English (GB)
4
3. Installing the product
3.1 Mechanical installation
3.1.1 Mounting the product
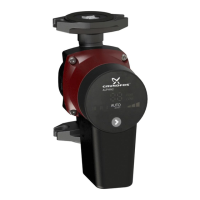
Fig. 1 Mounting ALPHAx
The arrows on the pump housing indicate the flow direction
through the pump. See fig. 1, pos. A.
See section 10.2 Dimensions, ALPHAx XX-40, XX-50, XX-60,
XX-80 or section 10.3 Dimensions, ALPHAx 25-40 A, 25-60 A.
1. Fit the two gaskets when you mount the pump in the pipe. See
fig. 1, pos. B.
2. Install the pump with a horizontal motor shaft. See fig. 1, pos.
C. See also section 3.2 Control box positions.
3. Tighten the fittings.
3.2 Control box positions
Fig. 2 Control box positions
Always install the pump with a horizontal motor shaft.
• Pump installed correctly in a vertical pipe. See fig. 2, pos. A.
• Pump installed correctly in a horizontal pipe. See fig. 2, pos. B.
• Do not install the pump with a vertical motor shaft. See fig. 2,
pos. C and D.
3.2.1 Positioning of the control box in heating and domestic
hot-water systems
You can position the control box in position 3, 6 and 9 o'clock.
See fig. 4.
Fig. 3 Control box positions, heating and domestic hot-water
systems
TM05 3057 0612
TM05 2919 0912TM05 3146 0912
 Loading...