Reassembly Procedures CR, CRN 32•45•64•90
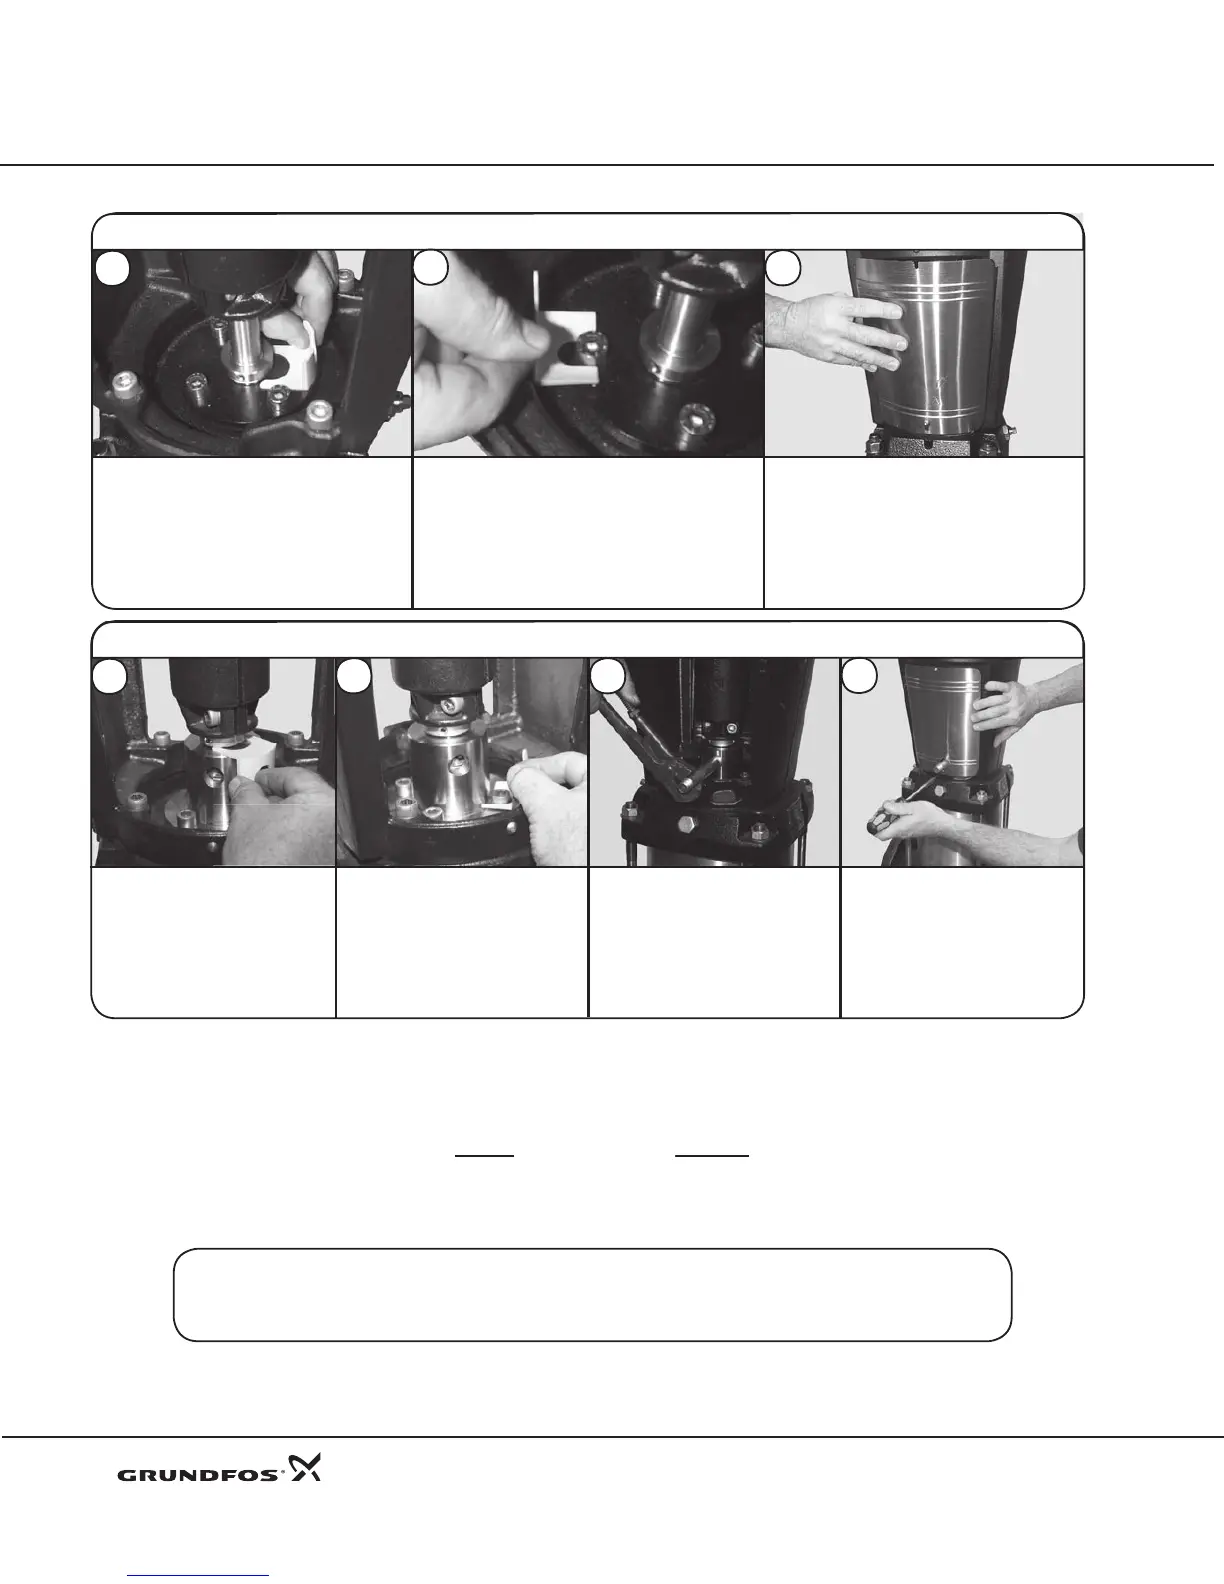
For storage, place the adjusting fork around
one of the seal holder allen screws. Check
rotation by turning the coupling by hand. If
the shaft is tight or will not rotate, disassemble
and begin the assembly procedure again.
22
Remove the adjusting forks
Fit Coupling Guard (Pos. 7) over screws
(Pos. 7a). Torque to 6 ft.-lbs./8Nm.
Remove the adjusting fork.
For storage, place the adjusting
forks around two of the seal
retaining screws. Check rotation
by turning the coupling by hand.
If the shaft is tight or will not
rotate, disassemble and begin
the assembly procedure again.
Install system piping to
the tandem seal housing.
Fit the coupling guard and
screws. Torque screws to
6 ft.-lbs./8Nm.
Tandem Seal
66
6867
69
63
64
65
Standard, Cool Top®, & Back-to-Back Seal Units
THE PUMP IS
NOW COMPLETELY
REASSEMBLED.
Return the pump to the system and install it following the Installation and Operation instructions.
If the unit was not removed from the system, open the isolation valves in the system piping to fully
vent the pump. Con rm proper electrical connections before restoring power supply.
 Loading...


