3
Dismantling Procedures CR, CRN 32•45•64•90
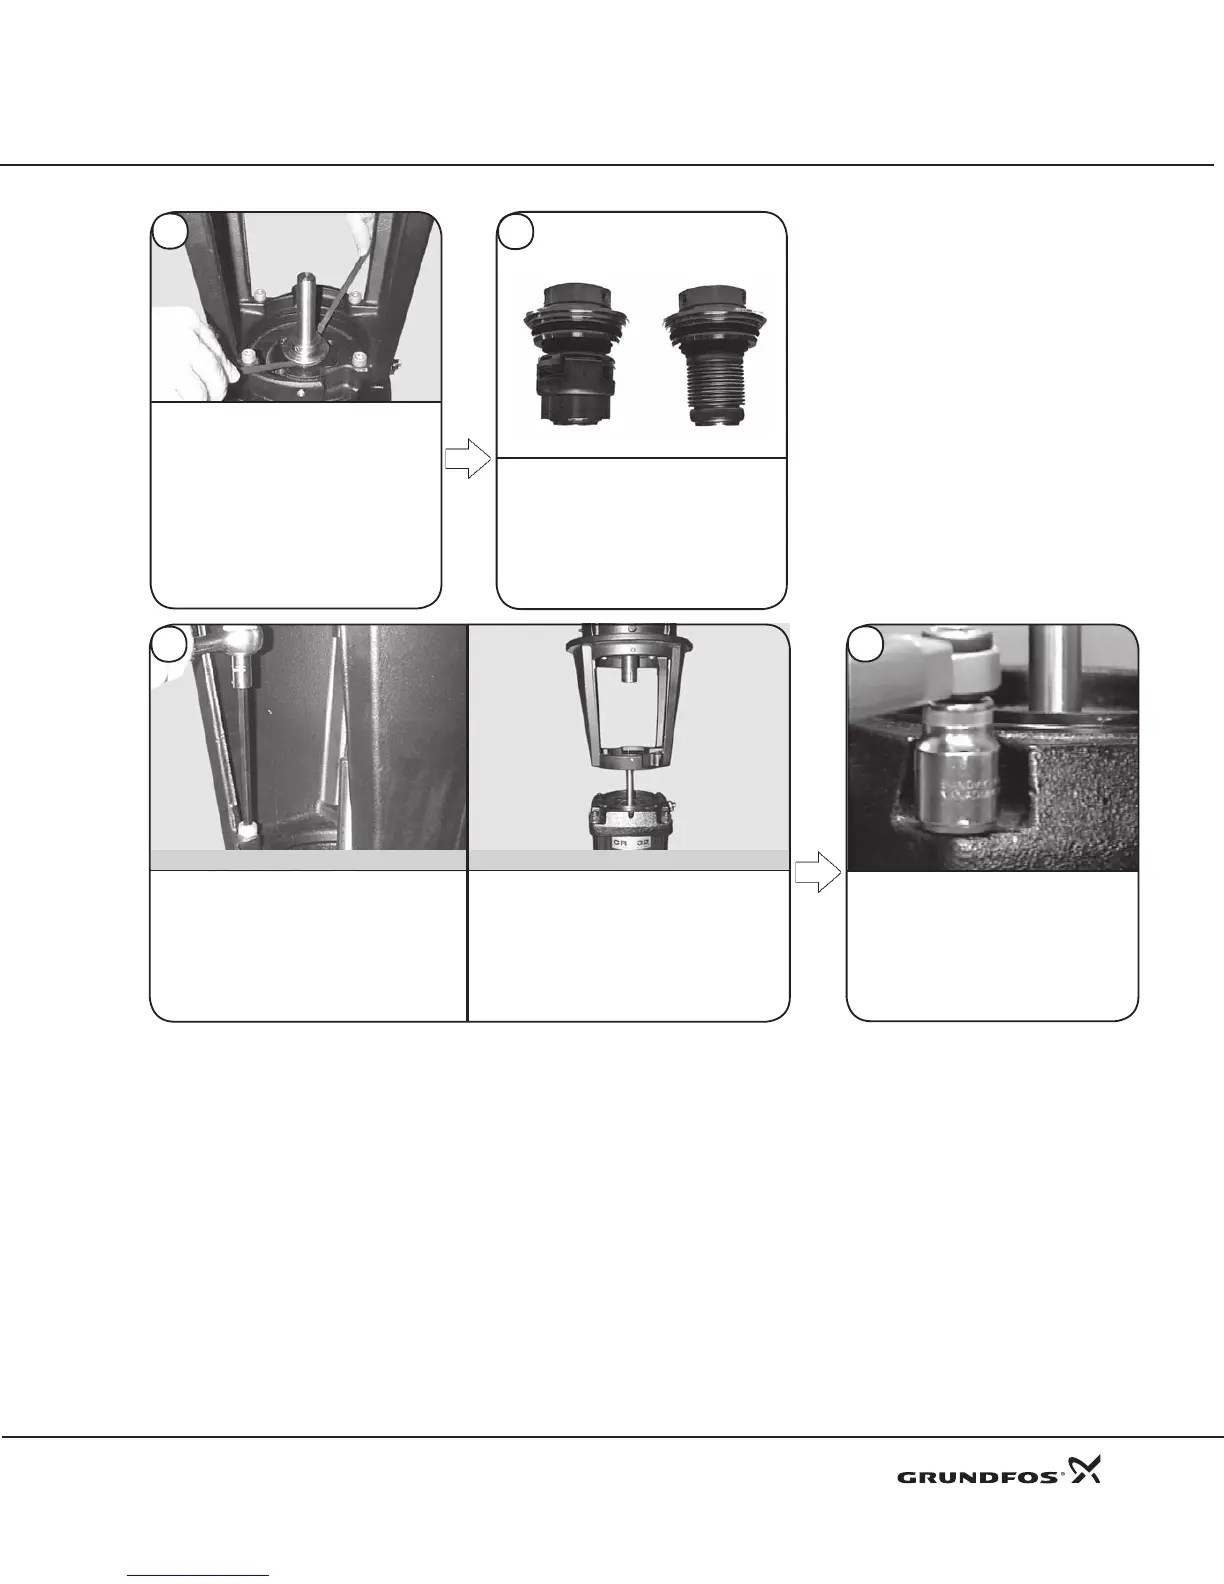
11
Loosen and remove the 24 mm
Staybolt Nuts (Pos.36) and Washers
(Pos. 66a). For Standard pumps, skip
to dismantling step 50. For Cool Top
units, continue with steps 12 to 20.
For Back-to-Back units, continue with
steps 21 to 34.
Pos. 105
9
Cartridge Seals
Will lift out as a complete assembly.
Loosen and remove the 8 mm hex socket
Allen Screws (Pos. 28) connecting the
motor stool to Pump Head (Pos. 2).
To remove the Motor Stool (Pos. 1a):
Loosen the allen screws connecting the
motor stool to the pump head. Leave the
motor stool attached to the motor and/or
bearing ange to protect the motor shaft
and bearing ange shaft.
10
8
Use two at/slot blade screwdrivers
to pry the seal loose. Lift the seal
(Pos. 105) completely off of the shaft
(Pos. 51). For seal change only on
Standard and Cool Top pumps, go to
the Reassembly section step 47. For
STACK® (Pos. 80) replacement, Back-
to-Back Inboard Seal (Pos. 105b) and
Cool Top Connecting Pipe (Pos. 149)
removal, continue with step 10.
15 HP and UP
3 - 10 HP
 Loading...


