English (GB)
40
9.10.7 Calibrating the sensor after the sensor has been
replaced
Once a sensor has been replaced, the new sensor must be
calibrated to the ambient pressure.
Prepare the pump for the calibration:
1. Before screwing in the sensor, check that no dosing liquid is
left in the place where the pressure sensor will be screwed in!
2. Screw in the new sensor with the correctly fitting O-ring.
3. Screw the sensor plug into socket 2.
4. Unscrew the suction valve.
Calibration of sensor
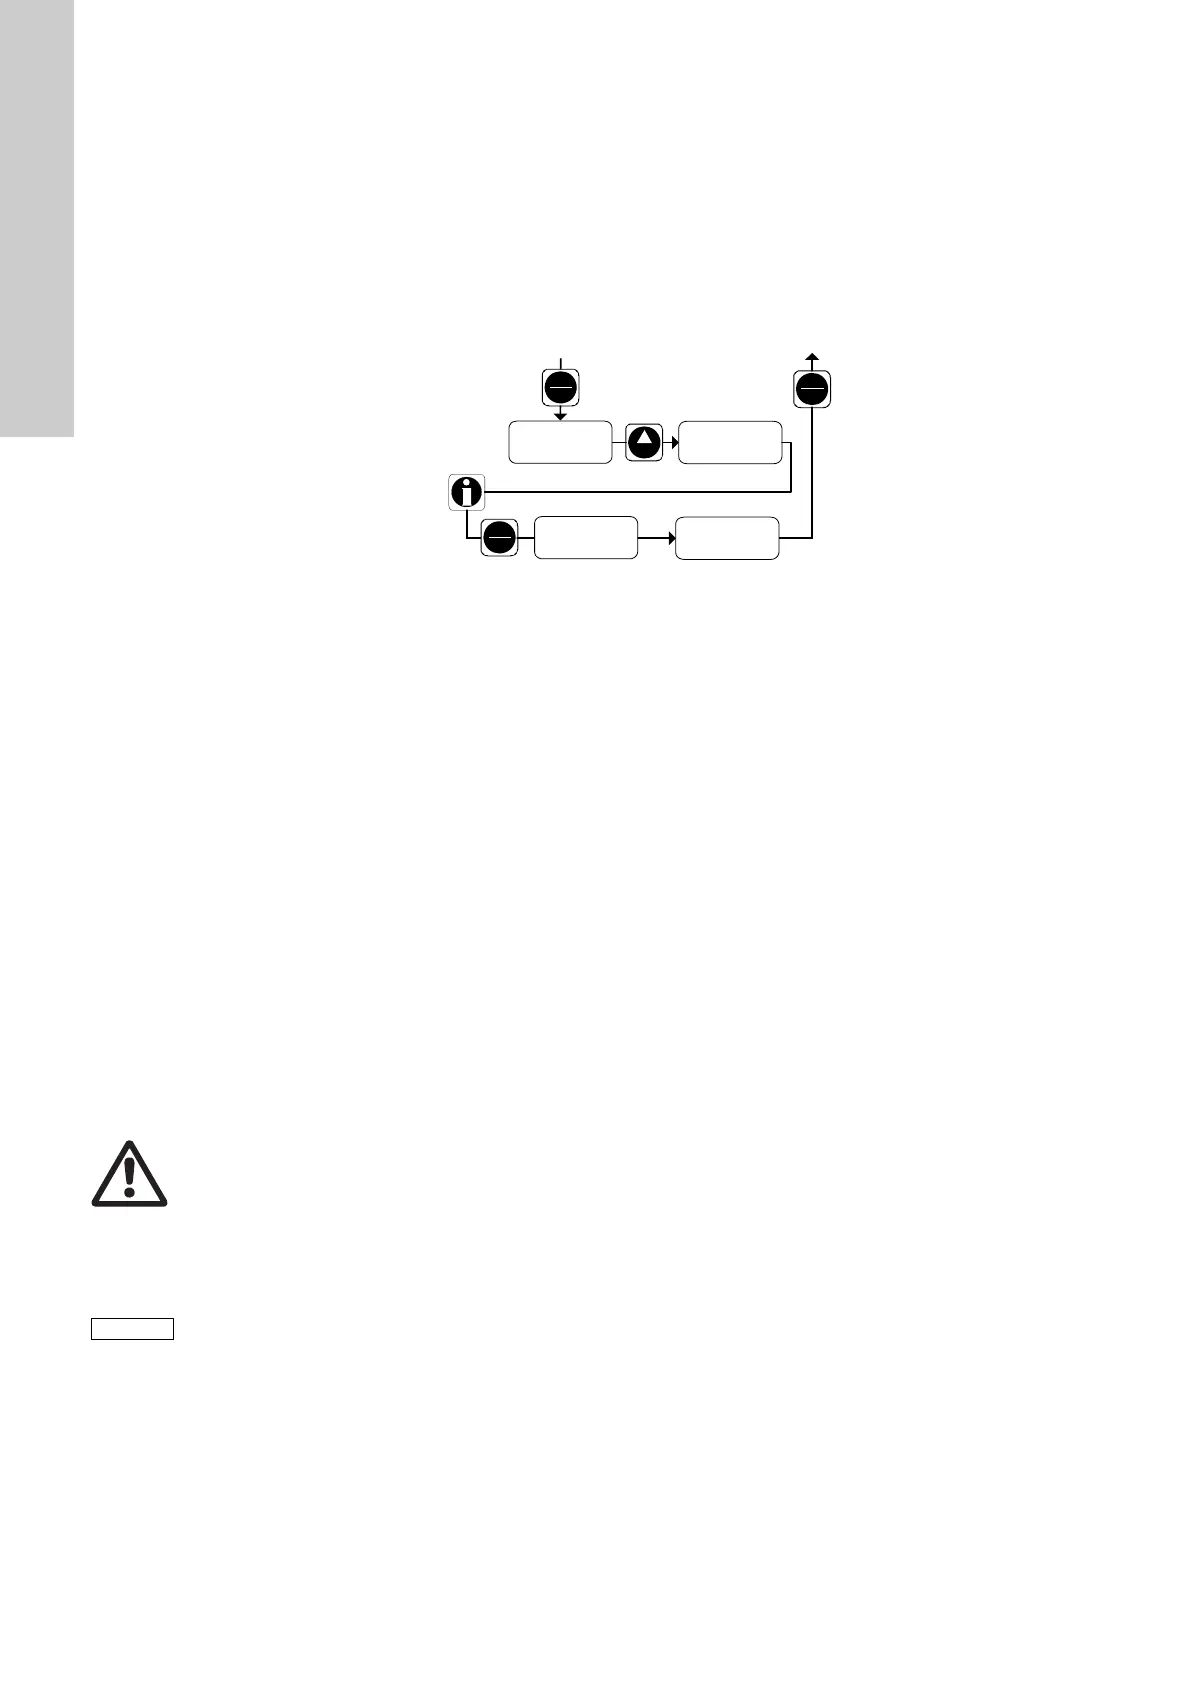
Fig. 50
Calibration of pressure sensor
1. Open the service level.
2. Repeatedly press the "Menu/Info" button to navigate in the
service level until you reach menu item "P" (calibration of
pressure sensor).
– "P:OFF" appears in the display.
3. Press the "Up" button to prepare the calibration.
– "P:ON" appears in the display.
When the pump is prepared for the calibration, calibrate the
pressure sensor:
1. Press the "Start/Stop" button.
– "P:- - -" is displayed for approximately 2 seconds.
– "P:CAL" appears in the display.
– The pressure sensor has been calibrated.
2. Press the "Start/Stop" button
– to confirm the new settings
– to exit the service level
– to open the first function level.
3. Fit the pump back on.
4. Screw in the suction valve.
TM03 6581 4506
Up
Stop
Start
Stop
Start
P:OFF
CAL
P:ON
CAL
P:- - -
CAL
P:CAL
CAL
Menu
Info
Calibration of pressure sensor
Prepare the pump first!
Wait approximately 2 seconds
Service level
Warning
Risk of chemical burns!
Wear protective clothing (gloves and goggles)
when working on the dosing head, connections or
lines!
Do not allow any chemicals to leak from the
pump. Collect and dispose of all chemicals
correctly!
The O-rings must be correctly placed in the
specified groove.
Observe the flow direction (indicated by an
arrow)!
Only tighten the valve by hand.

 Loading...