English (GB)
16
9.3 Hydro Multi-E in system without inlet pressure
When you have carried out the mechanical and electrical
installation described in section 6. Installation, proceed as
follows:
1. Check that Hydro Multi-E corresponds to the order and that no
single parts have been damaged.
2. Check that the precharge pressure in the diaphragm tank is
0.7 times the required outlet pressure (setpoint).
3. Connect water and power supplies to the system.
4. Open all pump inlet valves.
5. Close all pump outlet valves, and prime all pumps and the
inlet pipe.
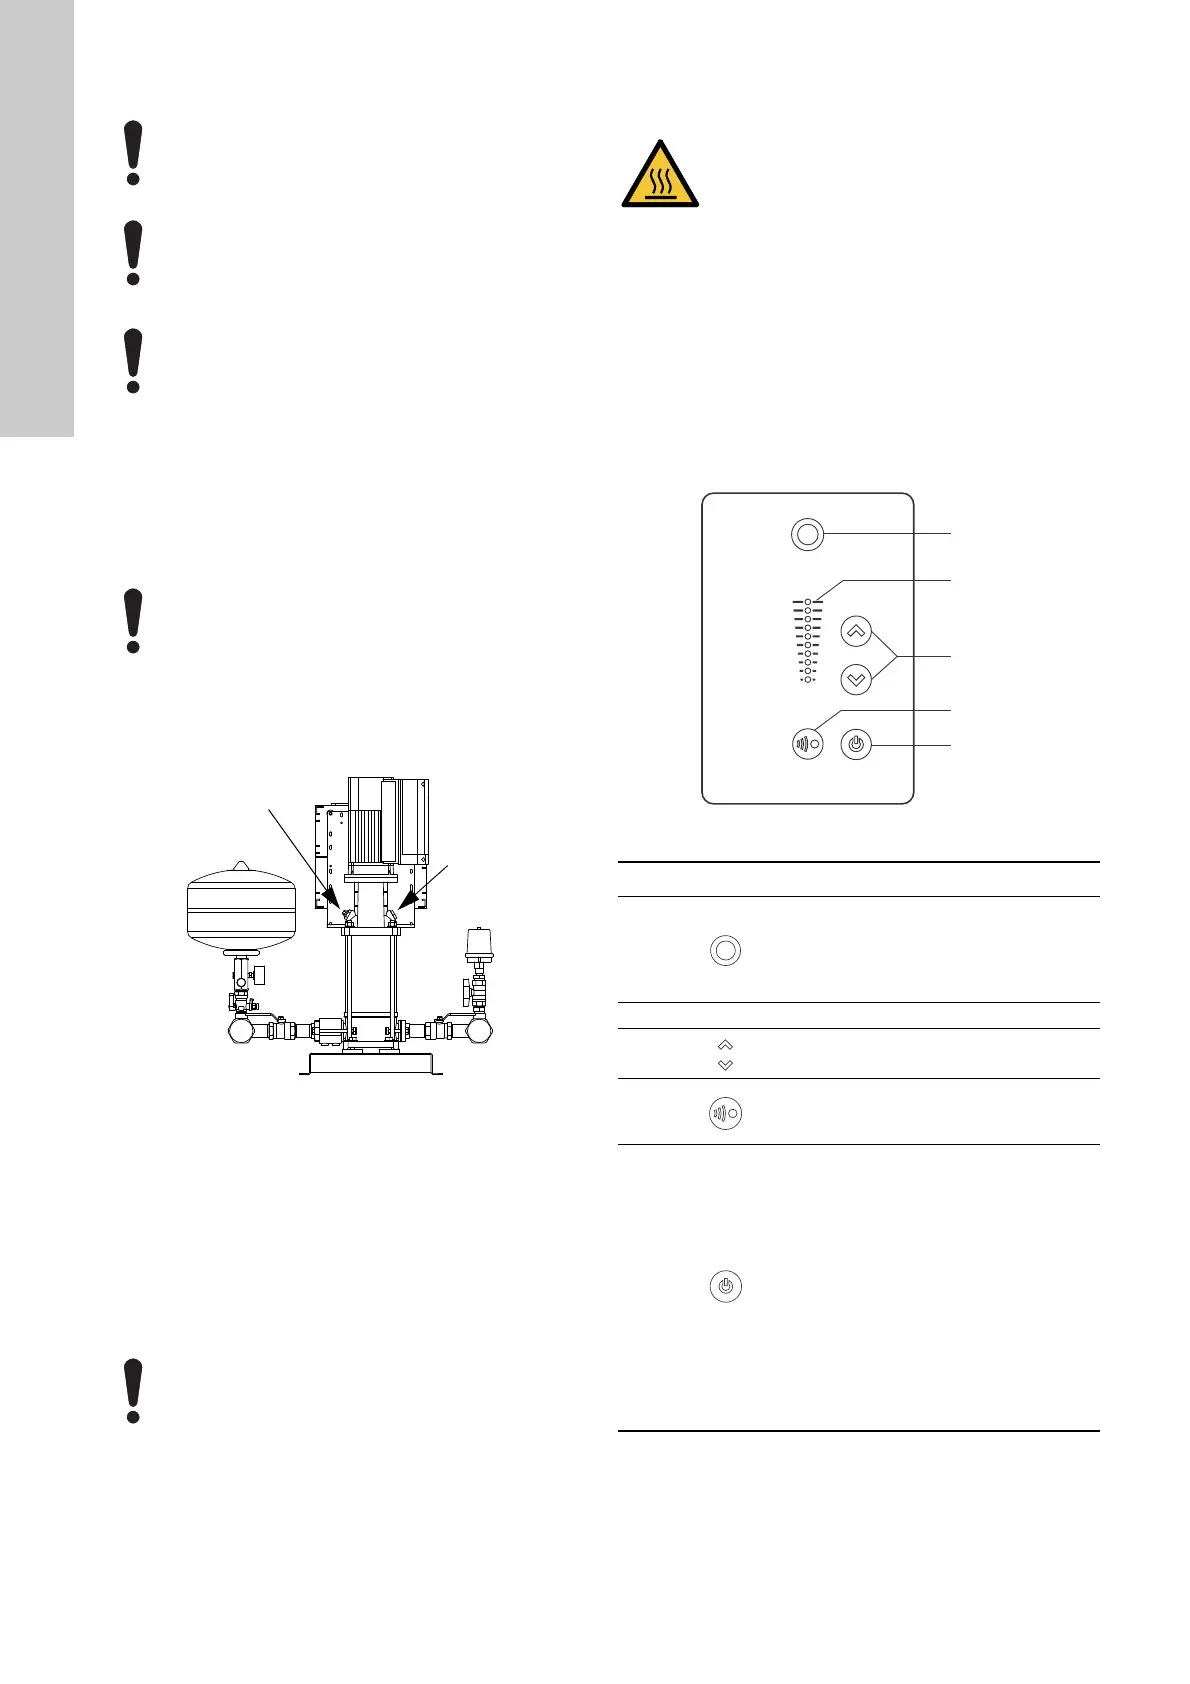
Fig. 27 Position of vent screw and filling screw
6. Switch on the power supply with the main switch.
7. Start pump 1 by pressing the start/stop button on the pump
control panel.
8. Vent pump 1 using the vent screw.
9. Slowly open the outlet valve approximately 50 %.
10.Repeat steps 9 and 11 for the other pumps in the system.
11. Slowly fully open all pump outlet valves.
12. Wait for a few minutes.
13. Set the desired outlet pressure.
14.Check that the pumps are cutting in and out, thus adjusting
the performance to the demand.
Hydro Multi-E is now in automatic mode and ready for operation.
The standard settings can be changed using Grundfos Go
Remote, see section11. Multimaster function or advanced control
panel.
10. User interfaces
You can configure pump settings using the following user
interfaces:
• Standard control panel
See section 10.1 Standard control panel.
• Advanced control panel
See section 10.2 Advanced control panel
• Grundfos GO Remote.
See section 11. Multimaster function.
If the power supply is switched off, the settings will be stored.
10.1 Standard control panel
Fig. 28 Standard control panel
Make sure that the power is switched off on the main
switch and the circuit breakers.
Do not start the pumps until they have been filled
with liquid.
Hydro Multi-E systems with CME pumps require a
positive inlet pressure during startup and operation.
The following startup procedure therefore only
applies to Hydro Multi-E systems with CRE or CRIE
pumps.
Measure the precharge pressure while the system is
pressureless.
TM05 2009 1717
If you change the outlet pressure, change the
diaphragm tank precharge pressure accordingly.
WARNING
Hot surface
Death or serious personal injury
- Only touch the buttons on the display as the
product may be very hot.
TM05 4848 3512
Pos. Symbol Description
1
Grundfos Eye
Shows the operating status of individuals
pump.
See section 17. Grundfos Eye for further
information.
2 - Light fields for indication of setpoint.
3
Changes the setpoint and resets alarms
and warnings.
4
Enables radio communication with
Grundfos GO Remote and other products of
the same type.
5
Makes the pump ready for operation or
starts and stops the pump.
Start:
If the button is pressed when the pump is
stopped, the pump will only start if no other
functions with higher priority have been
enabled. See section 16. Priority of
settings.
Stop:
If the button is pressed when the pump is
running, the pump will always be stopped.
When the pump is stopped via this button,
the "Stop" text next to the button will
illuminate.
 Loading...