RR 710 CD / RR 750 CD Allgemeiner Teil / General Section
GRUNDIG Service 1 - 7
Playing a CD
Searching for a passage during play
• Hold ∞/5 down to search backwards to the
beginning.
• Hold 6/§ down to search
forwards to the end.
Note:
This function can be described as 'audibly'
searching for a title.
During the search, volume is reduced and returns to
its adjusted level as soon as the button is released.
Random
• Press the RANDOM button.
– 'RANDOM' lights up on the display.
• Press PLAY/PAUSE 2;.
– The tracks are played in random order until all of
them have been played once.
• By pressing RANDOM during playback, random
play starts from the end of the playing track.
• The function is deactivated by pressing STOP 9
(in which case the CD stops) or RANDOM; in this
case the remaining tracks are played in their
normal order.
• The random function is not possible during
playback of a programme.
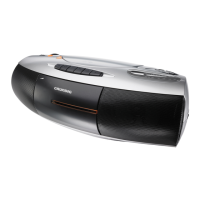
Intro
• Press INTRO to play only the first 10 seconds of
each title.
– 'INTRO' lights up on the display.
After the last title, the CD player stops.
• The function is deactivated by pressing STOP 9
(in which case the CD stops) or INTRO; in this
case the remaining tracks are played back in the
normal way.
Repeat
Repeating the CD
• By pressing REPEAT once, all tracks are
repeated.
– 'REPEAT' lights up; the CD will now be repeated
continuously.
Repeating a track
• By pressing REPEAT twice, one track is repeated.
– 'REPEAT' starts flashing; the track will now be
repeated continuously.
• To switch the repeat mode off, press REPEAT one
more time, or press STOP 9.
Programming
By programming the player you can play up to 20
tracks in any desired order. If you exceed the
maximum of 20 tracks, the programme function will
start again from the beginning.
Storing a programme
• In STOP mode, press MEMORY.
'MEMORY' and 'TRACK' start flashing.
•
Select the first desired track using ∞/5 or 6/§.
• Store this track by pressing MEMORY again.
• Select and store in this way all desired titles.
CD PLAYER
Compact cassettes
– Copyright: Recording is permissible insofar as
copyright or other rights of third parties are not
infringed.
• For recording, use a NORMAL (IEC type
I)
cassette on which the tabs are not broken out.
– This deck is not suited for recording on CHROME
(IEC II) or METAL (IEC IV) cassettes.
• For playback, any cassette type may be inserted.
– At the very beginning and end of the tape, no
recording will take place during the few seconds
when the leader tape passes the recorder heads.
• To prevent the accidental erasure of a recording,
keep the cassette side to be safeguarded in front
of you and break out the left tab.
Now, recording on this side is no longer pos-
sible.
• To render this safeguard ineffective, cover the
hole with a piece of adhesive tape.
• Do not expose the cassettes to rain, moisture,
sand, or to excessive heat. (E.g. from heating
equipment or in motor cars parked in the sun)
• Do not store cassettes near strong magnetic fields
(for example, TV sets, speakers, engines, etc.).
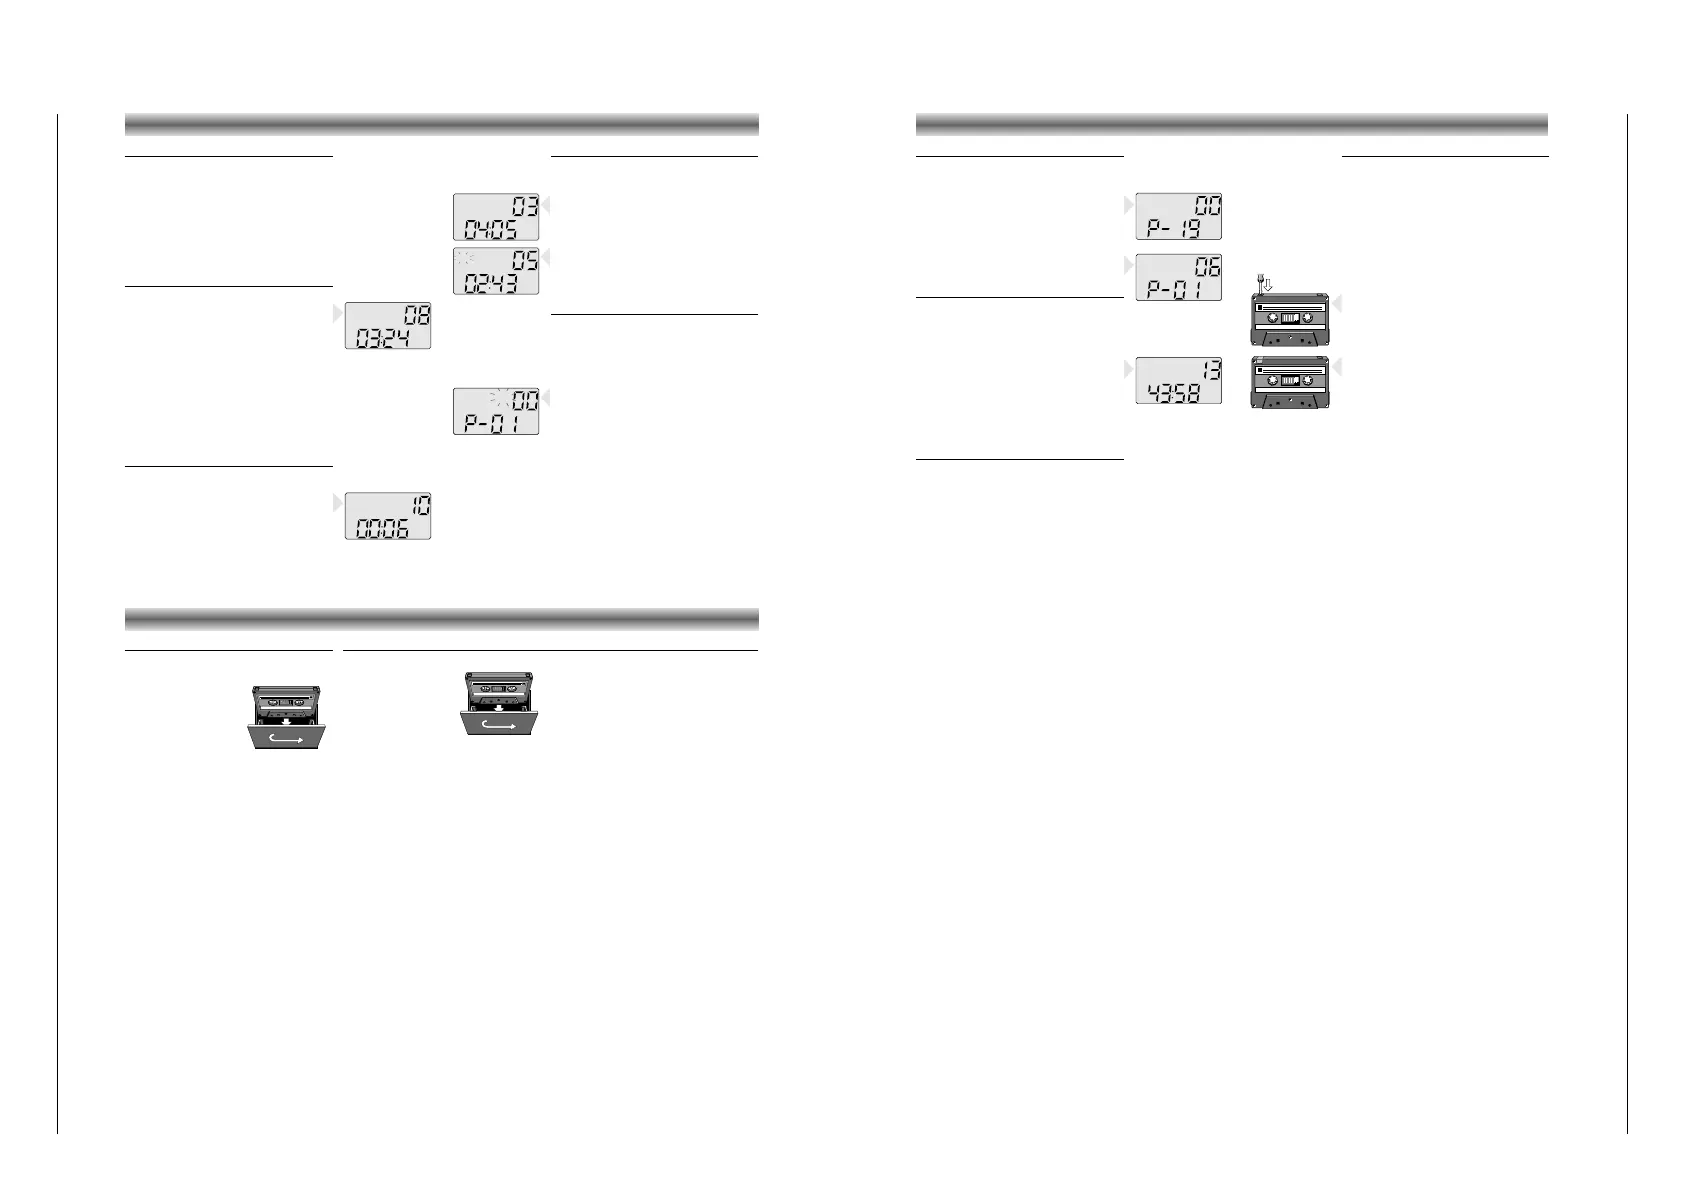
Checking the programme
• In STOP mode, press MEMORY repeatedly.
– The display shows in sequence all programmed
track numbers.
– Then, 'MEMORY'/'TRACK'/ 00 / P-...
appears again.
• At this point you can also add more tracks to the
programme (up to 20).
• Press MEMORY one more time.
– The display will show the first track of the
programme again.
Playing a programme
• Press MEMORY once to show the first track of the
programme.
• Press PLAY/PAUSE 2;.
– Play starts with the first track of the programme.
– After the last track playback stops.
– The CD's total playing time and number of tracks
appear on the display.
Note:
• Press STOP 9 to stop playback.
• While playing a programme, it is possible to use
∞/5 or 6/§ to select the desired
programmed tracks.
Erasing a programme
• To clear the programme, press the MEMORY
button and afterwards STOP 9 twice.
– You can only erase the programme when the CD
player is stopped.
• The programme is also erased:
– by opening the CD door using OPEN/CLOSE;
– if you move the FUNCTION selector;
– if the batteries are exhausted or if the power
supply is interrupted in another way.
CASSETTE DECKCD PLAYER
Cassette playback
• Set the FUNCTION switch to TAPE.
• Press 9// to open the cassette holder.
• Insert a recorded
cassette.
• Adjust the sound using the
VOLUME, TONE
(only
RR 710 CD)
, UBS and
SURROUND SOUND
(only
RR 750 CD)
controls.
• You may connect stereo headphones having a
3.5 mm plug to the jack
p.
– Inserting the plug will disconnect the speakers.
• Press B and playback will start.
• For brief interruptions, press
;.
• To restart playback, press this button once more.
– When the end of the tape is reached the B
button is released.
• To stop, press 9//.
On pressing again, the cassette holder will open.
Winding the tape
• Press R to search forward to the end of the
tape.
• Press Q to search backward to the beginning
of the tape.
CASSETTE DECK
Cassette recording
• Press 9// to open the cassette holder.
• Insert the cassette.
• When monitoring during
recording, adjust the
sound using the controls VOLUME, TONE
(only
RR 710 CD)
, UBS and SURROUND SOUND
(only RR 750 CD)
.
These controls do not affect the recording.
• Start recording by pressing 0.
(the B button is automatically also pressed).
– When the end of the tape is reached, the
recorder buttons are released.
• To interrupt recording, press
;.
• To continue recording, press ; again.
• Press 9// if you want to stop recording before
the end of the tape.
On pressing again, the cassette holder will
open.
Recording from the CD player
(CD synchro recording)
• Set the FUNCTION switch to CD.
• It’s not necessary to start the CD player se-
parately: by pressing 0 the CD player starts
automatically.
– If the CD player is in STOP position, recording
will start from the beginning of the CD (or from
the beginning of the programmed selection).
• To start a recording in the middle of a track,
play the CD in the normal way.
• As soon as the desired passage is reached,
pause the CD and then start recording by
pressing 0.
Recording from the radio
• Set the FUNCTION selector to RADIO.
• Select the wave band using the BAND button.
• Select the desired station with the 3/4 or MEM
UP buttons.
• In case of FM radio recordings, set the
FM MONO/STEREO switch to the desired
position.
• If during the recording of an MW/LW station,
a whistling sound is heard, this sound can be
suppressed by setting the BEAT CUT switch to
another position.
Mono recording from the built-in microphone
• Set the FUNCTION switch to TAPE
• Set the VOLUME control to the minimum volume
level (during microphone recording, monitoring
is not possible).
• To ensure a clear recording, the distance to
microphone should be 30 – 100 cm.
 Loading...