Allgemeiner Teil / General Section RR 710 CD / RR 750 CD
1 - 6 GRUNDIG Service
GB
Operating Instructions
Note: This chapter contains excerpts from the operating instructions. For further particulars please refer to the
appropriate user instructions the part number of which is indicated in the relevant spare parts list.
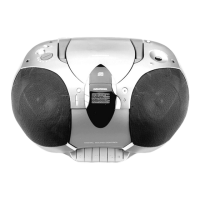
CONTROLS
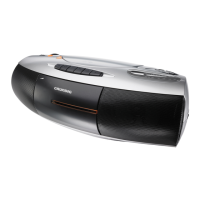
Top and front panel
(the illustration shows: RR 750 CD)
VOLUME –to adjust the volume.
UBS –to switch the U
LTRA BASS SYSTEM on
and off
TONE –to adjust the tone
(only RR 710 CD)
FUNCTION
– CD: to switch to CD mode
– TAPE: to switch to TAPE mode
– RADIO: to switch to RADIO mode
SURROUND
SOUND –to switch the surround sound
effect
on and off
(only RR 750 CD)
REMOTE
SENSOR – to receive the remote signals
(only RR 750 CD)
OPEN/CLOSE
–to open the CD door
STAND BY 6– lights up when the unit is on
MIC –built-in microphone under the
speaker grill
p –connection for headphones
STAND BY –to switch the unit on and off
Cassette Control
(FUNCTION switch in position TAPE)
0 –to start recording
B –to start cassette playback
Q –fast rewind
R –fast forward
9// –to stop and eject the cassette
; –to interrupt playback/recording
Radio Control
(FUNCTION switch in position RADIO)
MEMORY –to store the radio stations
34 –to tune to a radio station
MEM-UP –
to select the memory positions
BAND –to select between FM, MW,
and LW waveband
Back panel
BEAT CUT / FM MONO/STEREO:
– For eliminating possible whistle tones during
MW/LW recordings and reduce noise caused
by weak FM stereo stations.
AC MAINS: Socket for mains lead.
CD Control
(FUNCTION switch in position CD)
PLAY/PAUSE 2; –to start and interrupt playback
STOP 9 –to stop playback
RANDOM –to play the titles of a CD in
random order
INTRO –to play only the first 10
seconds of each title
MEMORY –to programme track numbers in
the memory
REPEAT –to repeat one/all tracks
∞/56/§ –to skip and search
(SKIP/SEARCH) backward/forward
C
D
S
Y
N
C
H
RO ST
ART R
E
C
O
R
D
I
N
G
R
R
7
5
0
C
D
R
A
D
IO
C
A
S
S
ETTE
R
E
C
O
R
D
E
R
W
I
T
H
C
D
OPEN/
CLOSE
PLAY/PAUSE
TUNER/CD
MEMORY
BAND
REMOTE
SENSOR
PLAYBACK/
RECORD
REMOTE CONTROL
R
R
7
5
0
C
D
RADIO
CASSE
T
T
E
R
E
C
O
R
D
E
R
W
IT
H
C
D
CD TAPE RADIO
/OFF
U
LTR
A
B
AS
S
SY
S
TE
M
UBS
SU
RRO
UND
S
OUND
VOLUME
M
IN
RANDOM
INTRO
STAND BY
UP/FWD
DOWN/REW
REPEAT
MEM-UP
SKIP / SEARCH
L
O
W
-
TO
NE
-
HI
G
H
STOP
STAND BY
VOLUME
UBS
FUNCTION
SURROUND SOUND
REMOTE SENSOR
OPEN/CLOSE
Display
p
CD Control
Cassette Control
TONE
Radio Control
STAND BY
MIC
STAND BY 6
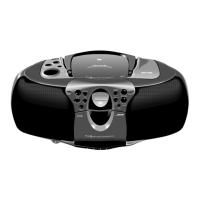
Display
The display indicates:
RANDOM: during the RANDOM function
REPEAT: repeat all
REPEAT
(flashing): repeat one
INTRO: during the INTRO function
MW/FM/LW: indicates the selected waveband
ST: lights up when receiving FM stereo
stations
MEMORY: programming or programme play-
back (CD) or storing stations (radio)
TRACK: indicates the CD track
CH: indicates the radio memory channel
88 track number (CD) or memory
channel (radio)
88
:
8
.
85: playing time (CD) or station
frequency (radio)
MHz/kHz: for FM reception the frequencies are
indicated in MHz and for MW/LW
reception in kHz
RANDOM
REPEAT
INTRO
MW FM ST
LW
MEMORY
TRACK
CH
MHz
kHz
CONTROLS
Remote control
(only RR 750 CD)
The buttons on the remote control
have the same functions as the
corresponding buttons on the unit.
Note:
When using battery supply, the y
button can only be used to switch
the unit off.
To switch the unit on when using
battery supply, use the STAND BY
button on the set
(see 'Switching on and off').
Changing batteries
If the range of your infrared remote control seems to
decrease, or if certain functions can no longer be
carried out, you should replace the batteries.
Two mignon 1.5 Volt LR03, size AAA batteries are
required.
To change the batteries, open the compartment on
the back of the remote control. Ensure that the
batteries are inserted properly (note the markings in
the compartment).
STOP
PREV./DOWN NEXT/UP
PLAY
VOLUME
MEM. UP
REPEAT
Volume
• Adjust the volume to the desired level with the
VOLUME control.
Tone
(only RR 710 CD)
• The TONE control allows you to adjust the bass
and treble values to the desired level.
UBS (Ultra Bass System)
• Press UBS to enhance the bass response:
w UBS OFF
x UBS ON
Surround Sound
(only RR 750 CD)
This feature creates an additional 3-D effect from
stereo sound which is relayed by the speakers.
• Press SURROUND SOUND to switch this effect on
and off
w SURROUND SOUND OFF
x SURROUND SOUND ON
Stereo headphone socket p
• You may connect stereo headphones having a
3.5 mm plug to the jack p.
– Inserting the plug will disconnect the speakers.
SOUND CONTROL
Radio aerials
–
For FM, pull out the telescopic aerial. To improve
FM-reception, incline and turn the aerial.
Reduce its length if the FM-signal is too strong
(very close to a transmitter).
– For MW/LW, the set is provided with a built-in
aerial, so the telescopic aerial is not needed.
Direct the aerial by turning the whole set.
Radio reception
• Set the FUNCTION switch to RADIO.
• Adjust the sound using the VOLUME, TONE
(only
RR 710 CD)
, UBS and SURROUND SOUND
(only RR 750 CD)
controls.
• You may connect stereo headphones having a
3.5 mm plug to the jack p.
– Inserting the plug will disconnect the speakers.
• Select the wave band using the BAND button.
• Start the automatic station search by holding the
3 or 4 button down for one or two seconds, and
then releasing it.
– The tuner automatically searches for the first
station with sufficient signal strength.
• Repeat this step to search for other stations.
• To tune to a weak station, briefly press the 3/4
buttons several times until the correct frequency is
displayed, or until reception is best.
– When 'ST' appears on the display, you are
receiving an FM stereo transmitter.
• A disturbing noise, due to a weak FM stereo
signal, can be suppressed by setting
FM MONO/STEREO to FM MONO.
– The 'ST' indication goes out and you will hear the
FM station in mono.
Storing stations
You can store a maximum of 25 stations
(10 x FM, 10 x MW and 5 x LW).
• Select the wave band using the BAND button.
• Select the desired station with the 3/4 buttons.
• Press the MEMORY button.
– 'MEMORY' starts flashing on the display.
• Select the channel you wish to assign to this
station with MEM UP.
•
While 'MEMORY' is flashing
, press MEMORY to
store this station.
– 'MEMORY' disappears from the display.
The display now indicates the station's assigned
channel, its frequency and waveband.
• If you assign a station to a channel that had been
previously assigned to a different station, the old
station is deleted and replaced by the new one.
Selecting stations
• Select the wave band using the BAND button.
• Select the desired memory channel with the
MEM UP button.
– The display indicates the selected channel, the
station frequency and waveband.
Last station memory
LAST STATION MEMORY means that the unit
'remembers' the last station that was tuned to.
This function ensures that the station which was
selected before the radio was switched off is
automatically selected again when your radio is
switched back on.
RADIO
FM ST
MHz
CH
FM ST
MHz
MEMORY
CH
FM
MHz
FM ST
MHz
LW
CH
kHz
Playing a CD
• Press PLAY/PAUSE 2; to start playback.
– The display shows the current track number and
its elapsed playing time.
• Adjust the sound using the VOLUME, TONE
(only
RR 710 CD)
, UBS and SURROUND SOUND
(only RR 750 CD)
controls.
• For brief interruptions, press PLAY/PAUSE 2;.
– The playing time indication starts flashing.
•
To resume playback, press PLAY/PAUSE 2; again.
• To stop playback, press STOP 9.
– The total playing time and number of tracks will
then appear on the display.
– The CD player also goes to position STOP:
– by pressing OPEN/CLOSE;
– when the end of the CD is reached;
– if the FUNCTION switch is moved to another
position
– if the batteries run down or if the power supply
is interrupted.
• To take out the CD, open the CD door by pres-
sing OPEN/CLOSE.
• Open the CD door only if the CD player is in
position STOP.
Selecting another track during play
• Press ∞/5 or 6/§ until the required track
number appears in the display.
– The selected track begins to play.
Starting with a particular track
• Press ∞/5 or 6/§ until the required track
number appears in the display.
• Press PLAY/PAUSE 2;.
– Play starts from the selected track.
OIOIOI OI OIOIOI OIOIOIOI
OIOI OIOIOIOI OIOI
OIOIOO OIOI
OIOI OIOIO OIOI
OIOIOIOOIO OIOI OI
CLASS 1
LASER PRODUCT
6
. O
Y
E
M
I C
A
N
T
O
(H
e
a
r
M
y
V
o
ic
e
)
7
. D
O
N
'T
W
A
N
N
A
L
O
S
E
Y
O
U
8
. G
E
T
O
N
Y
O
U
R
F
E
E
T
9
. Y
O
U
R
L
O
V
E
IS
B
E
D
F
O
R
M
E
1
0
. C
U
T
S
B
O
T
H
W
A
Y
S
1
1
. O
Y
E
M
I C
A
N
T
O
(
S
p
a
n
is
h
V
e
r
s
io
n
)
1
2
. S
I V
O
Y
A
P
E
R
D
E
R
T
E
E
P
C
4
6
5
1
4
5
2
B
I
E
M
/
S
T
E
M
R
A
S
T
E
R
E
O
A
ll rig
h
ts o
f th
e
p
ro
d
uc
e
r a
nd
o
f th
e ow
ne
r of th
e
re
co
rd
ed
w
o
rk re
se
rve
d
. U
n
a
u
th
o
rise
d
c
o
p
yin
g
,
p
u
b
lic
p
e
rfo
rm
a
n
c
e, b
ro
ad
c
astin
g
, h
irin
g
or re
n
ta
l o
f th
is
re
c
o
rd
ing
p
ro
h
ib
ited
. M
a
d
e
in A
ustria
1
. A
Y
, A
Y
, I
2
. H
E
R
E
W
E
A
R
E
3
. S
A
Y
4
. T
H
IN
K
A
B
O
U
T
Y
O
U
N
O
W
5
. N
O
T
H
IN
' N
E
W
C
O
M
P
A
C
T
D
I
G
I
T
A
L
A
U
D
I
O
1
2
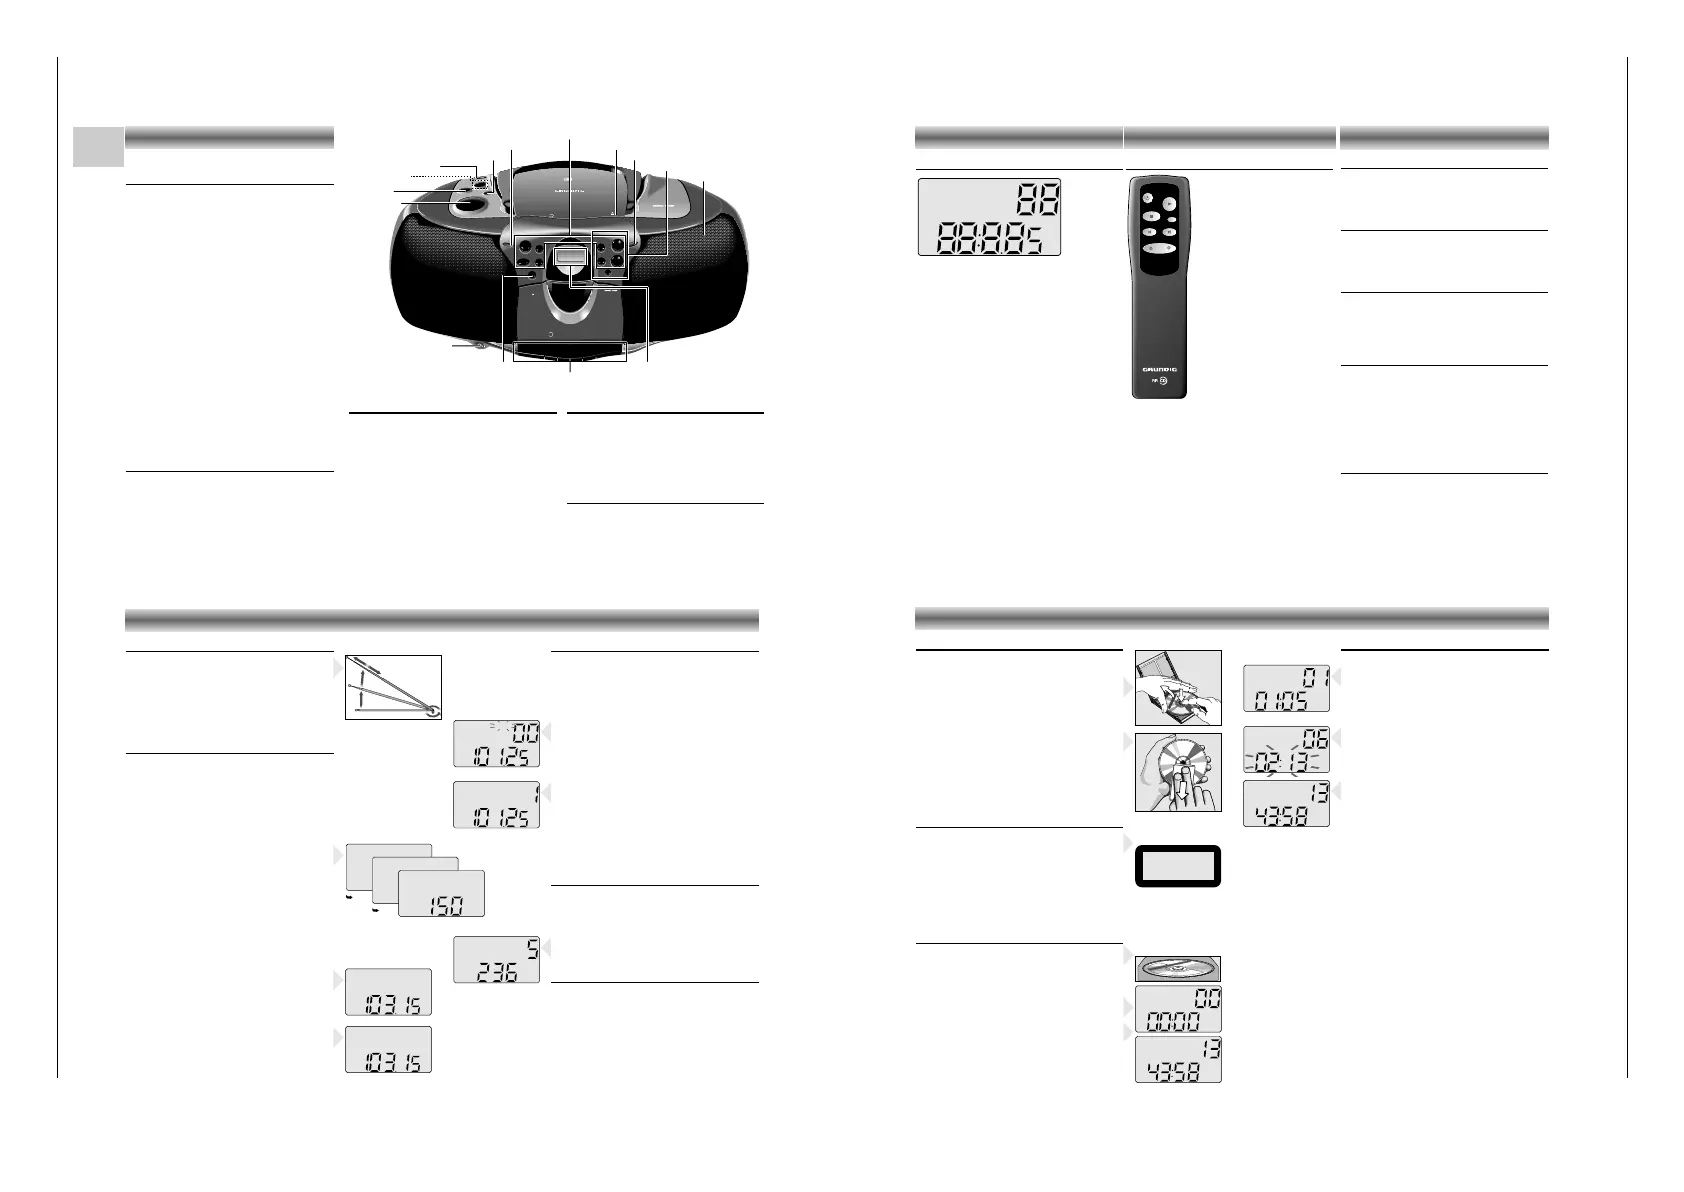
CD handling
• Use only Digital Audio CDs which have the
symbol
+
.
• To take the CD out of its box easily, press the
centre spindle while lifting the CD.
•
Never write on a CD or attach any sticker to the CD.
• Always hold the CD at the edge and always
store it in its box after use with the label facing up.
• To remove dust and dirt, breathe on the CD and
wipe it with a soft, lint-free cloth in a straight line
from the center towards the edge. Cleaning
agents may damage the CD.
• Do not expose the CD to rain, moisture, sand, or
to excessive heat. (E.g. from heating equipment
or in motor cars parked in the sun).
Warning
CLASS 1 LASER PRODUCT means that the laser´s
construction makes it inherently safe so that the
legally prescribed maximum permissible ratiation
values can never be exceeded.
CAUTION: Using any equipment or devices other
than those described and specified in these opera-
ting instructions, or tampering with the unit in any
way, can result in dangerous exposure to radiation.
Inserting a CD
• Set the FUNCTION switch to CD.
• Press OPEN/CLOSE to open the CD door.
• Insert the CD, printed side facing up. Place CD
singles (8 cm) in the depression in the compartment.
• Close the cover.
– The CD player scans the contents list of the CD.
After that, the total number of tracks and the total
playing time appear on the display.
CD PLAYER
 Loading...