Unpacking~
Your shipping carton contains the following parts:
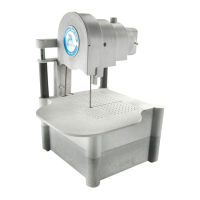
• Top Assembly
• Bottom Assembly with Guide Holder installed
• Platform
• Blade (coiled in box)
• Upper Blade Guide Holder
• 3 Guides
• Two Sponges
• Spare Lower Adjustment Screw and two nuts*
• These Instructions
DO NOT turn either Adjustment Screw.
These are preset for your Blade at
the factory.
The use of these Adjustment Screws is
explained further on in this booklet.
Assembly~
Assembly is very simple.
Refer to the drawing on this page.
• Remove tape used in packing.
• Insert Slides on Top Assembly into
Posts on Bottom Assembly as shown.
• Push Top Assembly down as far as
it will go (note that the Adjustment
Screw controls
how far down
the Top Assembly
will go). Do not
turn the Upper
Adjustment Screw
yet.
• Remover Cover
by sliding it straight up.
Blade Installation~
• Remove coiled Blade from box.
• Uncoil the Blade gently. Do not bend or kink the Blade.
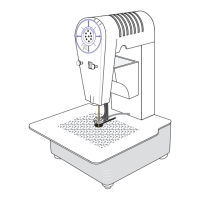
• Place Blade under Lower Wheel with diamond side towards the front of the saw.
• Place Blade at 9 O’clock position on Upper Wheel and rotate Upper Wheel by hand clockwise to wrap the
blade over the Upper Wheel. Blade should pass through slot in Guide.
• Turn Upper Wheel by hand until the Blade walks to the back of the Upper Wheel.
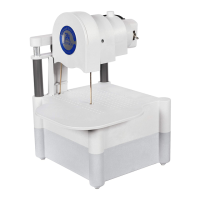
Bottom Assembly
D
i
a
m
o
n
d
B
a
n
d
S
a
w
M
a
d
e
i
n
U
S
A
®
Slide
Top Assembly
Cover
Blade
Platform