10. Service
58 PNEG-1717 CE Approved GSI/FFI Portable Dryer Manual
Installing the Fan Blade Assembly (Continued)
7. Find the applicable torque for the bushing in the chart on Page 59. The bushing type is etched into
the face of the bushing.
8. Torque the bushing gradually to evenly seat it inside the hub and onto the motor shaft. Set the torque
wrench to 1/3 of the required torque setting and tighten each bolt in a circular pattern three (3) times.
Increase the torque setting on the wrench to 2/3 of the required torque and tighten each bolt in a
circular pattern three (3) times. Increase the setting on the torque wrench to the final required torque
setting and tighten each bolt in a circular pattern three (3) times.
9. If there is a safety washer present, install the washer, lock washer and bolt.
10. Turn the fan blade assembly by hand to make sure there is freedom of movement and uniform
clearance around the inlet.
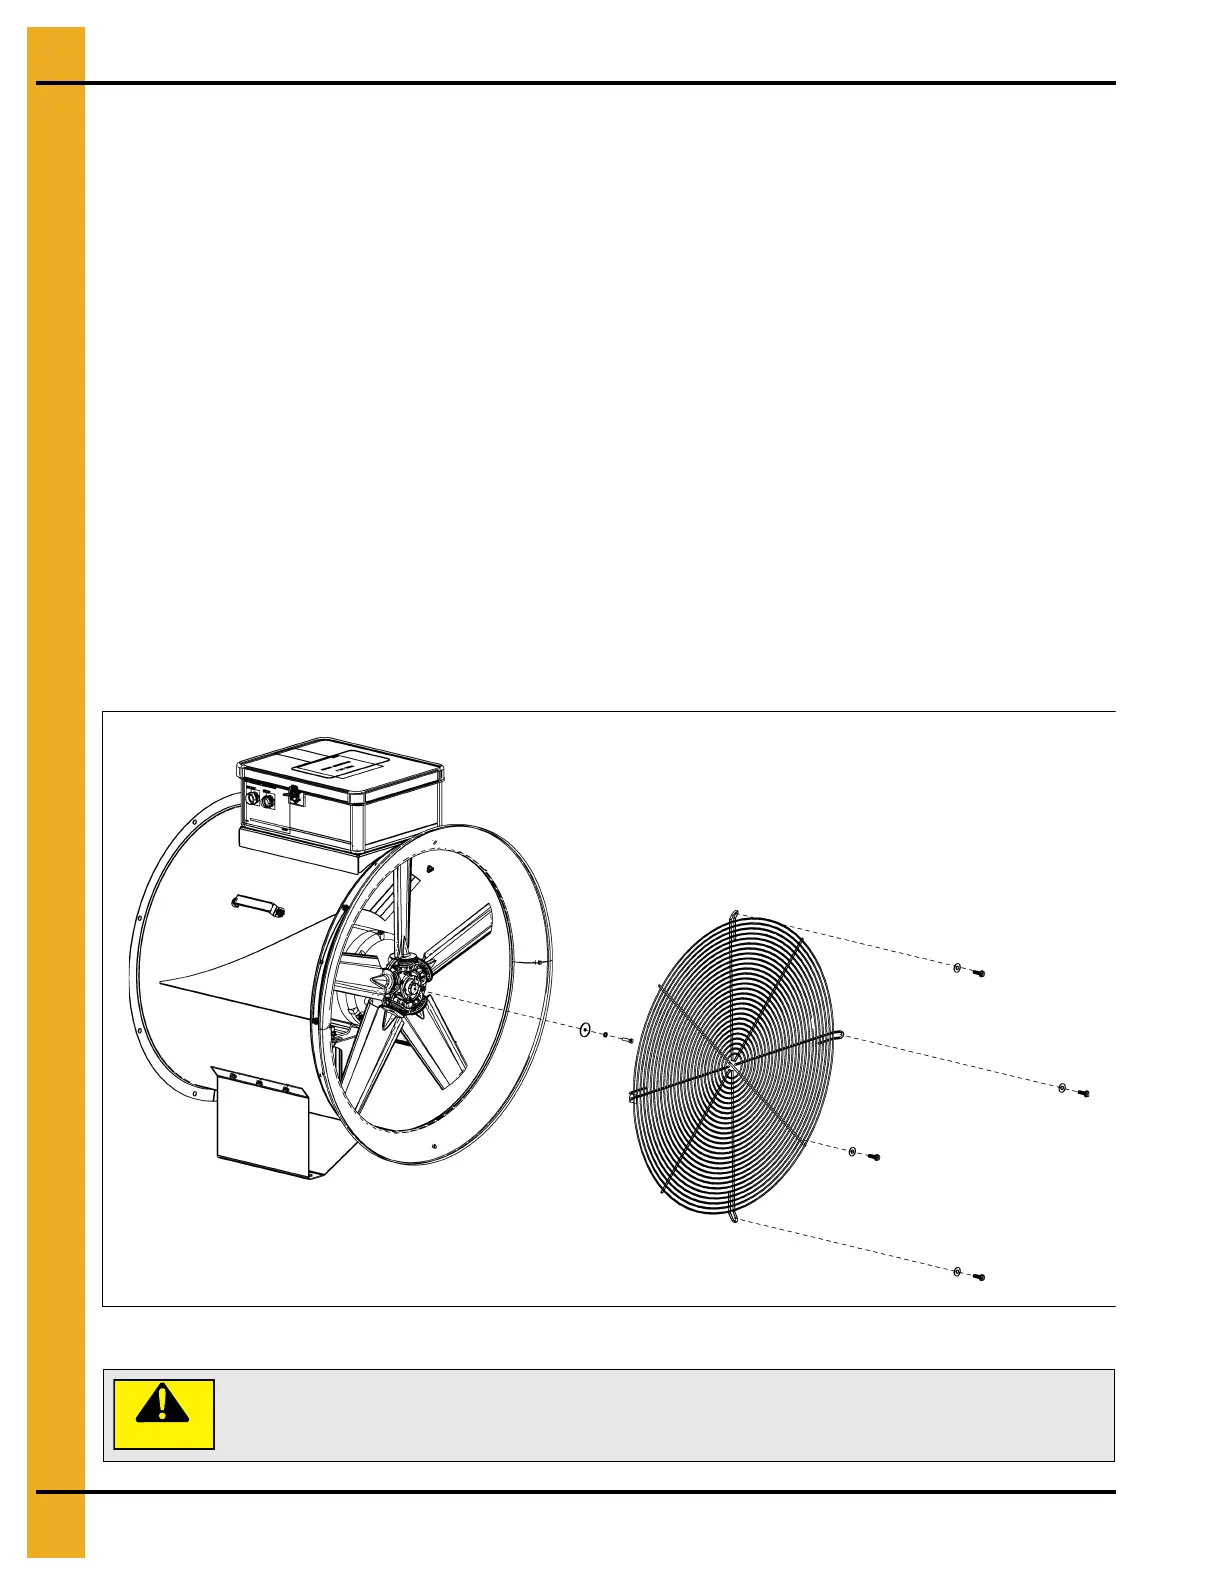
11. Install the grill guard and turn ON the main power source.
12. Operate the fan for 30 minutes.
13. Stop the fan and lock out and tagout the main power to make sure the dryer cannot be started
during servicing.
14. Remove the grill guard and re-tighten the bolts in a circular pattern one time at the final required
torque setting.
15. Install the grill guard and turn ON the main power source.
Figure 10B Vane Axial Fan
CAUTION
Do not exceed the torque specifications listed on the bushing bolt torque chart
on Page 59 Exceeding the recommended torque will crack the fan hub.


 To Next Page