9
To prevent SERIOUS INJURY:
- DO NOT connect power until instructed.
- Keep hands and fingers away from the sprocket during operation.
- Wear gloves when installing chain and cable.
- Keep hands and fingers away from joints and possible sharp edges.
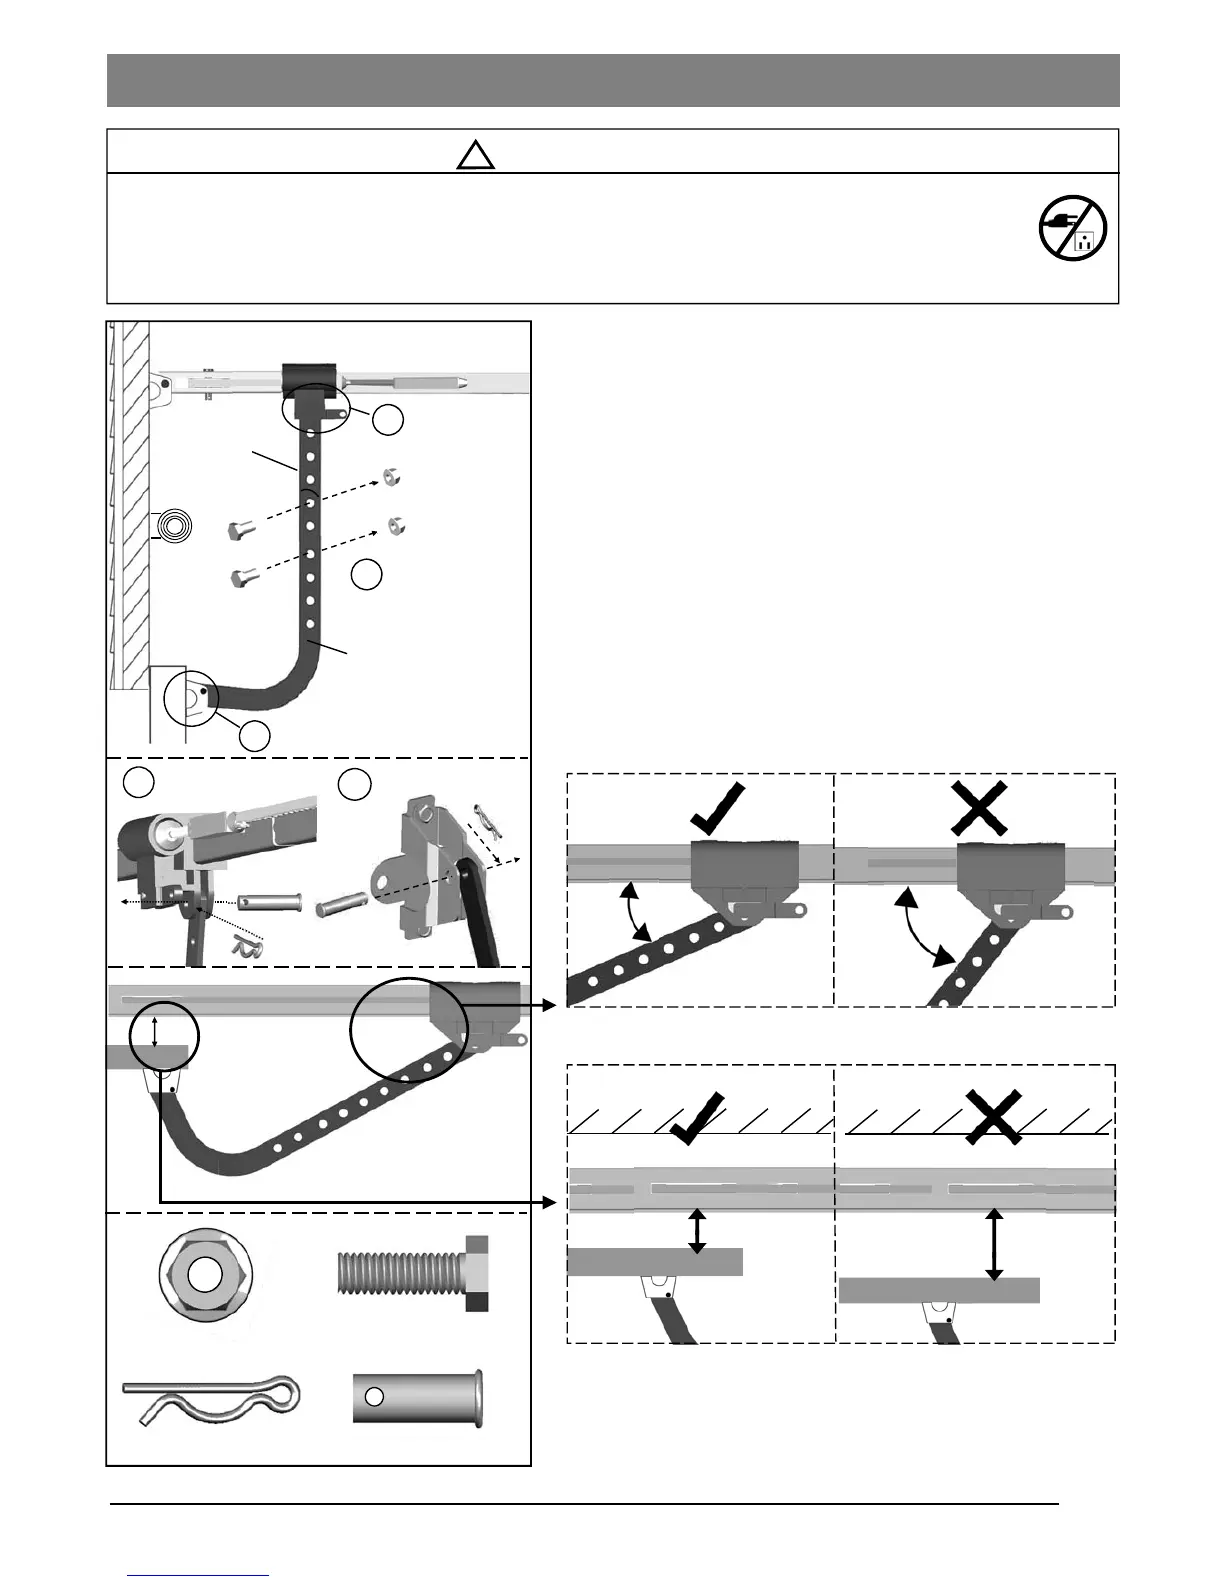
Attaching Door Arms
!
WARNING
Clevis Pin - 5/16” x 1”
Hitch Pin
Bolt 5/16” - 18x1”
Flange Nut
1
2
Fig.1
To Connect Door Arm
Follow the steps shown in Fig. 1
1. Fasten the Straight Door Arm to the Trolley with a
5/16” - 18 x 1” Clevis Pin and lock it with a Hitch Pin.
2. Fasten the Curved Door Arm to the Door Bracket with
5/16” - 18 x 1”Clevis Pin and lock it with a Hitch Pin.
3. To connect the door arms together, choose two pairs of holes
which are as far apart as possible. Fasten the arms using two
5/16” - 18 x 1” Bolts and Flange Nuts.
<1-3/4”
>1-3/4”
Ceiling
Ceiling
Rail of Opener
Door Panel
Rail of Opener
Door Panel
Curved Door Arm
Straight Door Arm
1
2
3
NOTE: The straight door arm must be installed vertically to
the door when door is at closed position.