For
length
adjustlnent
SPITFIRE
•
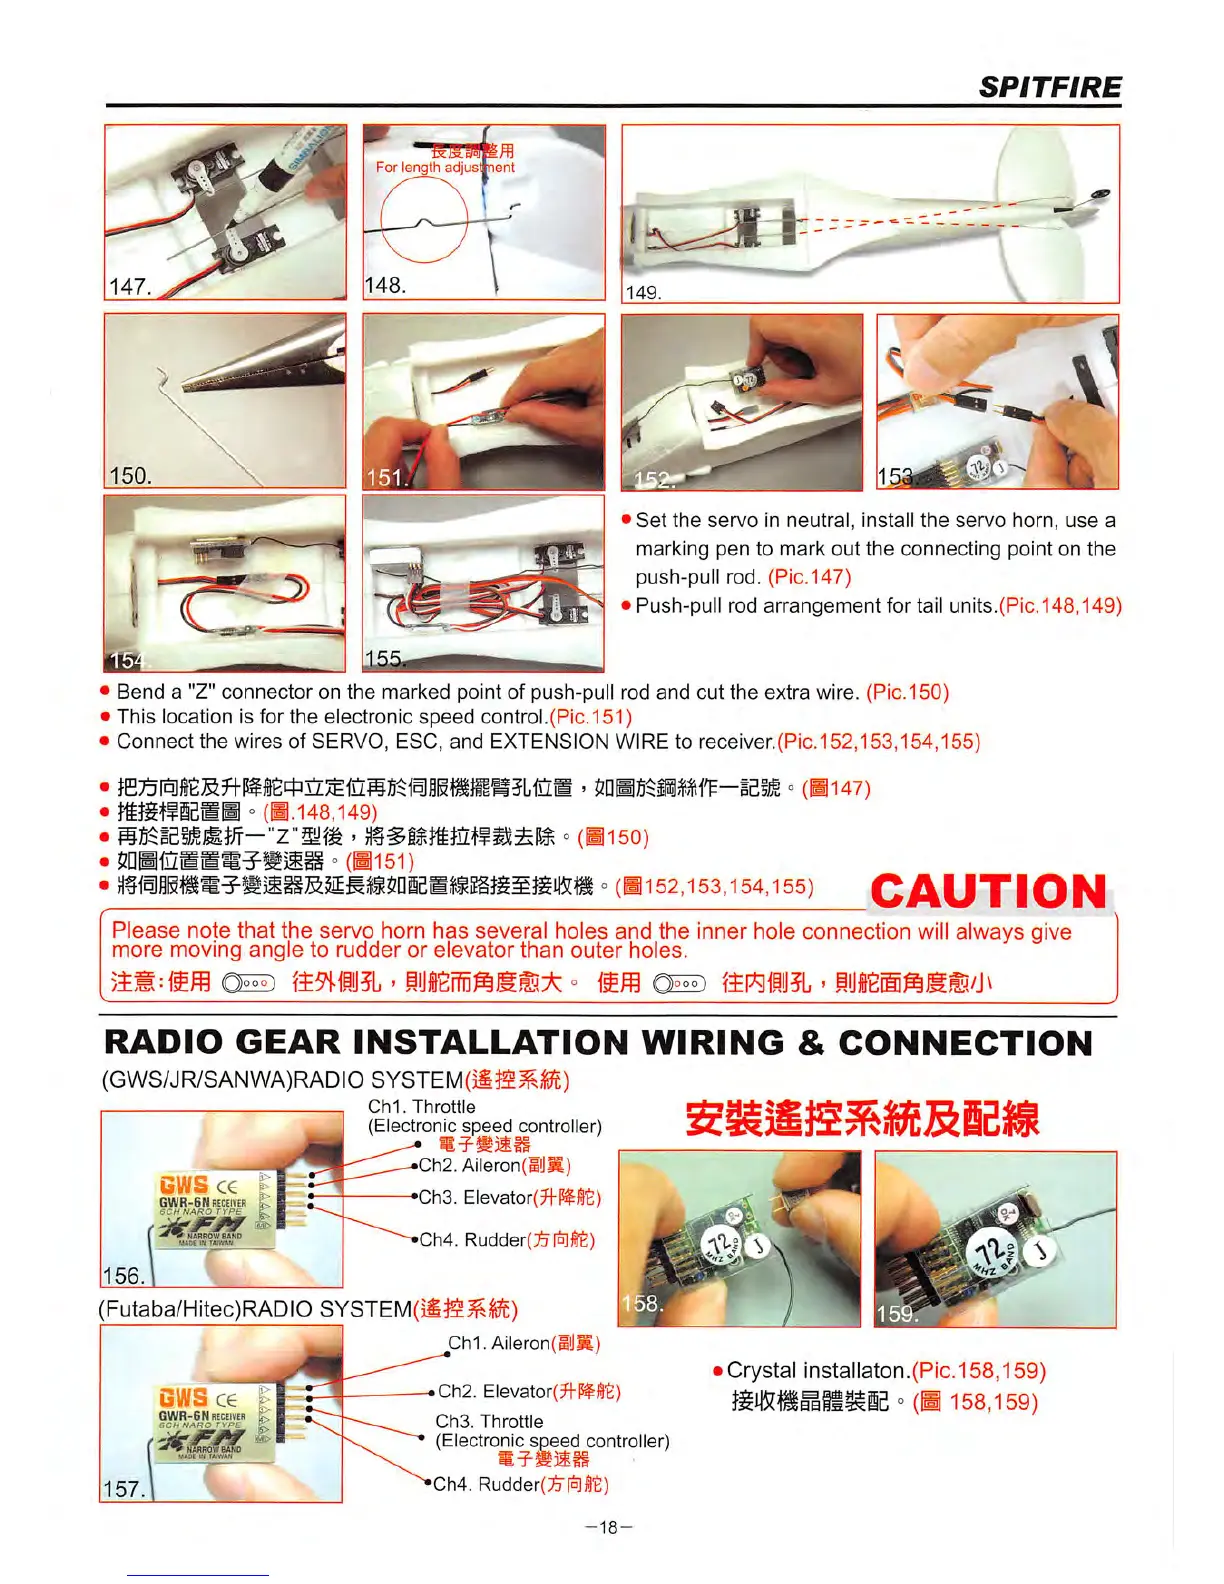
Set
the
servo
in
neutral,
install
the
servo
horn,
use
a
marking
pen
to
mark
out
the
connecting
point
on
the
push-pull rod. (Pic.147)
• Push-pull rod
arrangement
for tall
units.(Pic.148,149)
•
Bend
a "Z"
connector
on
the
marked
point of push-pull rod
and
cut
the
extra
wire. (Pic.
150)
•
This
location Is for
the
electronic
speed
control.(Pic.
151)
•
Connect
the
wires of SERVO, BSC,
and
EXTENSION WIRE to recelver.(Plc.152,153,154,155)
• °
(^147)
• ° (•.148,149)
• °
(^150)
• °
(Bl5l)
• °
(•152,153,154,155)
CAUTION
Please
note that
the
servo
horn
has
several holes
and
the Inner hole connection
will
always give
more
moving
angle
to
rudder
or
elevator
than
outer
holes.
°
mm
imimi
>
RADIO
GEAR
INSTALLATION
WIRING
&
CONNECTION
(GWS/JR/SANWA)RADIO SYSTEM(^^^^,^^)
Chi.
Throttle
(Electronic
speed
controller)
•Ch2. Aileron(S!lK)
Ch3. Elevator(3^^i?6)
bWS
CE
?=•
GWR-6N
RECEIVER
^
6CH
NARO
TYPE
NARROW
8AN0
Ch4.
Rudder(;&[^S'E)
(Futaba/Hitec)RADIO
SYSTEM(iie.^,^)
jZihI.
Aileron(i!lS)
Gh2. Elevator(?|-p^lt)
Ch3.
Throttle
(Electronic
speed
controller)
Ch4.
RudderCE"ism's)
GWS
CE
GWR-6N
RECEIVER
6CH
NARO
TYPE
WBAND
MftOE W TAIWAN
-18-
ICrystal installaton.(Plc.158,159)
° (• 158,159)