200208-S111-73515 8/28
Trigger behaviour
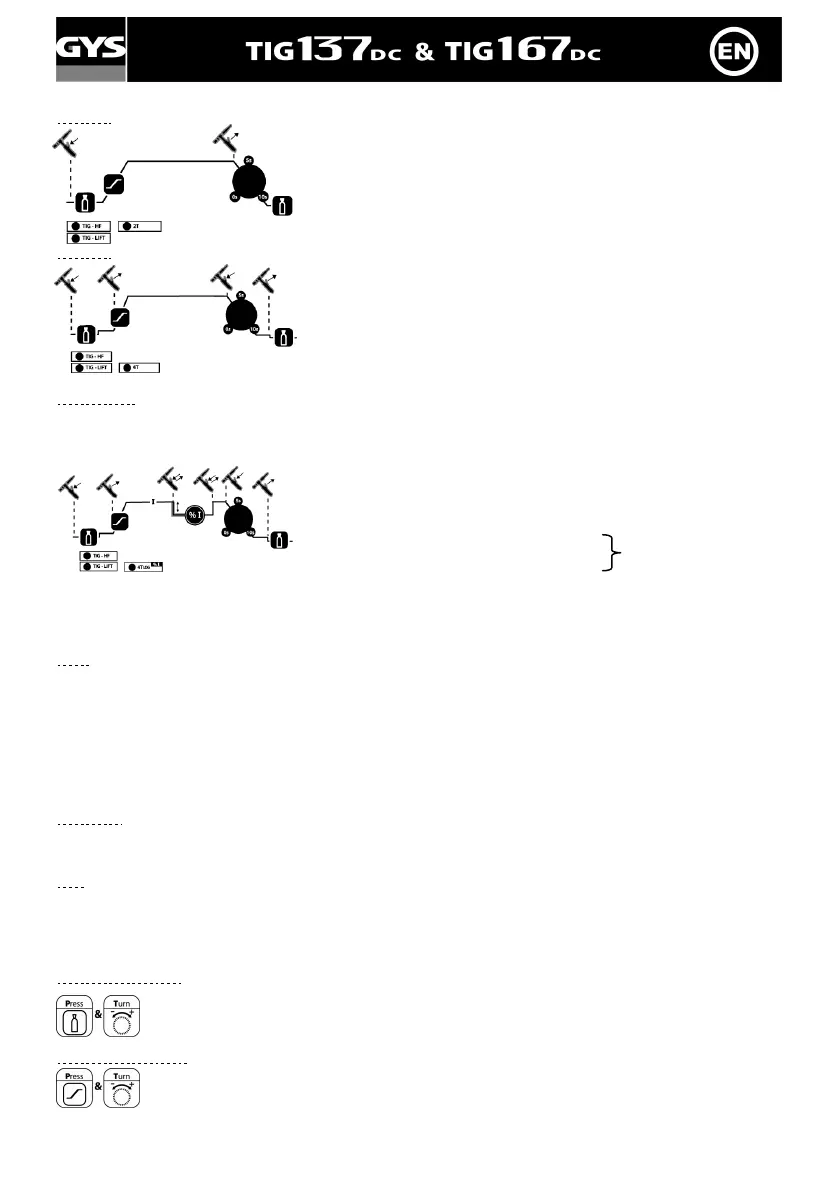
2T mode
1- Press and maintain pressure on the trigger : pre-gas, up slope, welding
2- Release trigger : down slope, post-gas
4T mode
1- Press trigger : pre-gas, followed by starting. In order to make the
electrode positionning easier, a low 10 Amps current is supplied, acting
like a light beam. (=Adjust Ideal Position)
2- Release trigger : up slope until the displayed instruction, welding
3- Press trigger : down slope until 10A (for a good closure of the crater)
4- Release trigger : stop of the current and post-gas.
4T Log mode
This mode is the same as the 4T mode but when in welding phase, a short impulse on the trigger allows a shift to a
previously settled cold current (20% at 70% of hot welding current).
1- Press trigger : pre-gas, followed by starting. In order to make the
electrode positionning easier, a low 10 Amps current is supplied, acting
like a light beam. (=Adjust Ideal Position)
2- Release trigger : elevation of the current to the "hot" welding current
(displayed instruction)
short impulse : shift to cold current (%I)
short impulse : back to the "hot" current.
3- Press trigger : down slope until 10A (for a good closure of the crater)
4- Release trigger : stop of the current and post-gas.
Welding options
Pulse
Not available in 4T Log.
The pulses correspond to alternative increases and decreases of current (hot current, cold current). Pulse mode
allows to assemble parts as it limits the elevation of temperature.
In pulse mode, you can set :
- The cold current (20% at 70% of welding current)
- The welding frequency (from 0.2 to 20Hz)
n.b. : hot and cold current times are the same.
Easy pulse
Simplified pulse mode. You only set the medium current around which the pulsation will oscillate.
The Easy pulse determines the frequency and the hot and cold welding current.
Spot
This mode is only available in TIG HF 2T.
It allows you to prepare parts doing point welding.
Once these parts are maintained, you can shift to TIG welding to make the full cord.
Parameters setting
Pre-gas (0 to 2 sec.)
The pre-gas allows, before starting, to purge the torch and the zone close to the beginning of the
welding cord. It also improves the steadiness of the starting.
Advice : the longer the torch, the longer the time must be (0.15s/torch meter)
Up slope (0 to 5 sec.)
Time needed to go from minimum current to welding current.
To repeat
as you wish