ES0205l 12-00
9
Connecting the Mini Mill to Power
The Mini Mill can be powered from either 3 Phase 208 Wye Power (Neutral Grounded) or Single Phase
240V. In either case, a separate ground wire of the same size as the main conductors must be provided in
the power cable.
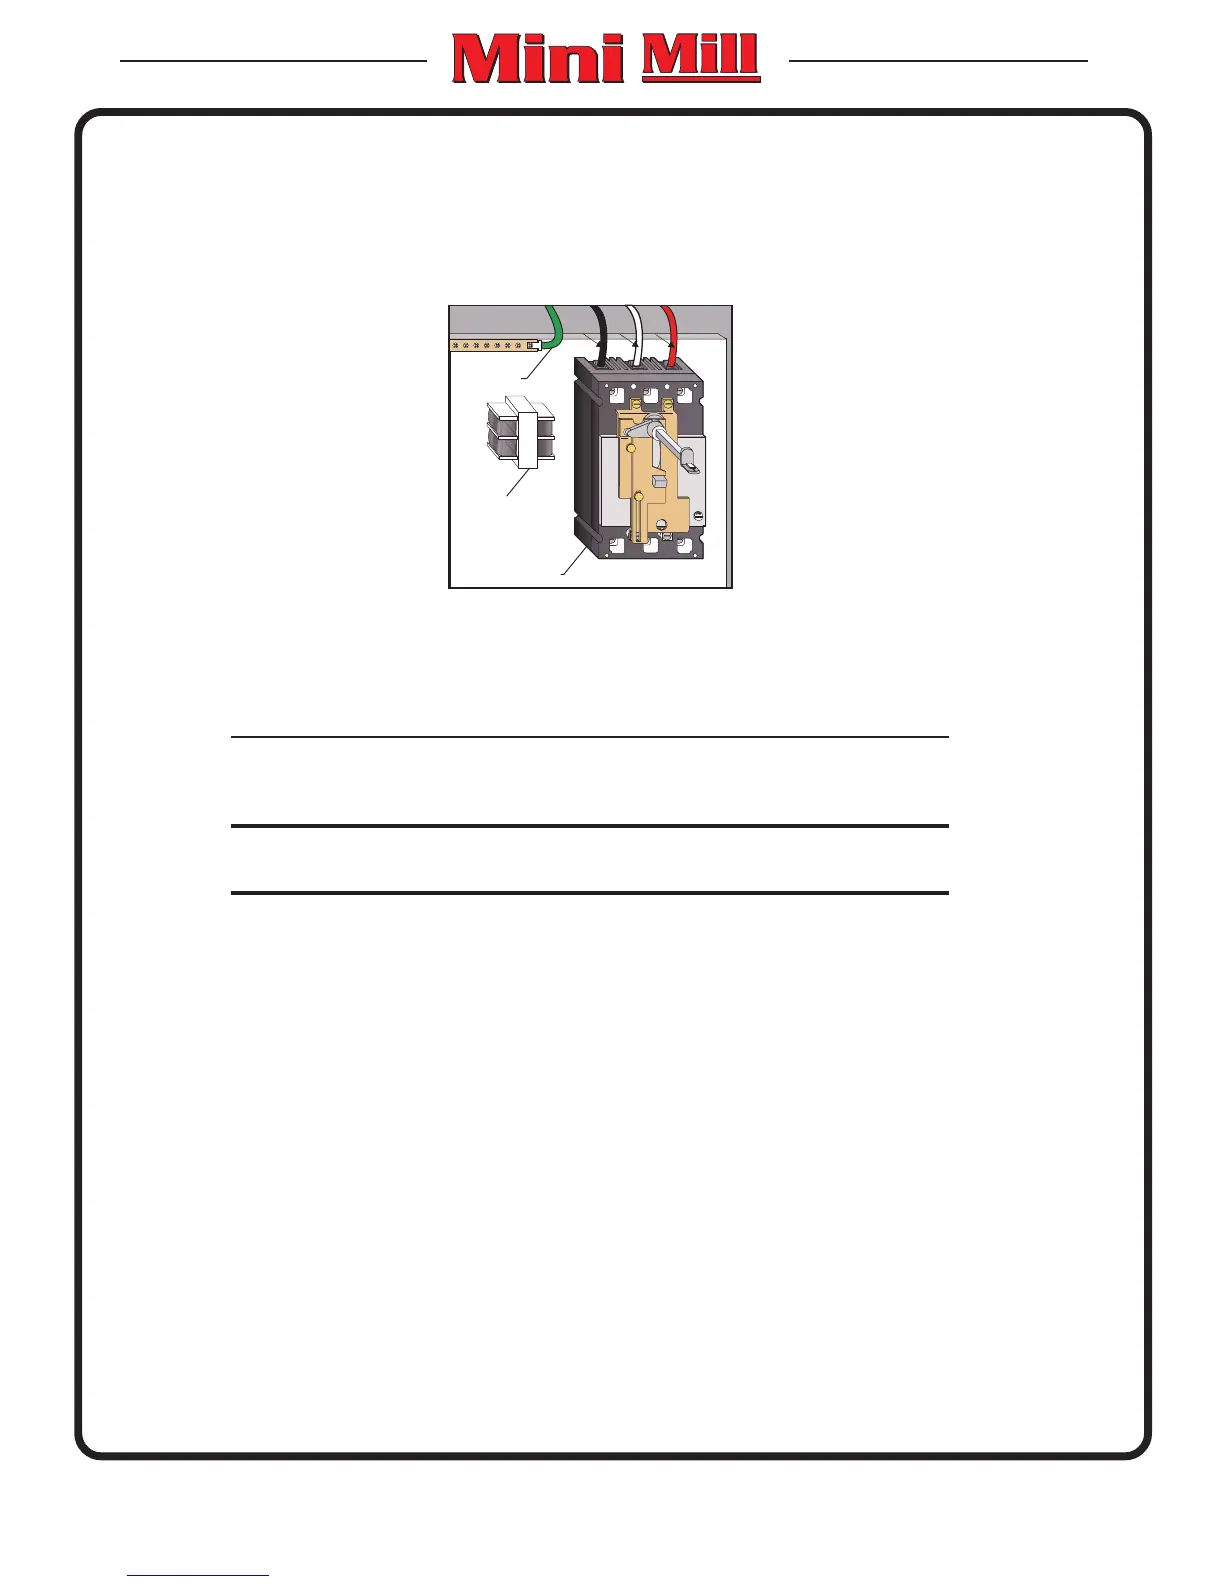
40
L1
Main Circuit Breaker
Ground Line
T5 Transformer
L2
L3
1. With the main circuit breaker in the OFF position (rotate the shaft that connects to the breaker
counterclockwise), hook up the power lines to the terminals on top of the main circuit breaker.
Connect the separate ground line to the ground bus to the left of the circuit breaker.
NOTE: For Single Phase operation, only terminals L1 and L3 of the circuit breaker are
used. L2, the center connection, should be left open.
CAUTION! Make sure that the main circuit breaker is in the OFF position BEFORE
changing the following transformer connections.
2. T5 is a small transformer mounted on the power supply assembly next to the main circuit
breaker. This transformer supplies 24VAC to energize the main contactor. This transformer has
two input connectors located about two-inches from the transformer that allow it to be connected
to either 240V or 200V. If the incoming power is 220-250 VRMS, use the 240V connection. If
the incoming power is 187-219 VRMS, use the 200V connection. Failure to use the correct input
connector will result in either overheating of the main contactor or failure to reliably engage the
main contactor.
3. The main power transformer is located at the bottom-right corner of the control cabinet. This
transformer supplies Single Phase 115V power to the cabinet. It also has two different input
connections located at terminal board TB2. If the incoming power is 187-215 VRMS, connect
wire 74 to the 208V position (center). If the incoming power is 216-250 VRMS, connect wire 74
to the 240V position (left).