STEP 8
Make sure each group of the remaining rotary cables are straight and do
not twist around the other cables.
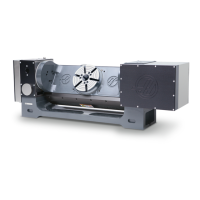
The rear of the rotary has labels for the cable connections. The labels are
TILT (A Axis) [1] and ROTARY (B Axis) [1].
Put an "A Axis" label on the control end of the TILT cable.
Put a "B Axis" label on the control end of the ROTARY cable.
Put the cables along the same path as the air hose that exits the
enclosure.
Put the cables over the side of the machine. Put (1) cable [3] from the
rotary unit through the cable clamp [2]. Do not tighten the thumbscrew at
this time.
Pull the cables and the air hose until they have tension from the rotary to
the cable clamp. Zip-tie the cables together.
Caution: Make sure the cables have sufficient tension to let them
hang from the hole but to not touch the table. Make sure the
cables do not travel in a straight line from the hole to the rotary.
Install the last (1) 1/4-20 x 2" thumbscrew into the cable clamp. Tighten
the thumbscrews.
STEP 9
Remove the dust covers [3] from the connection ports for the A- and B-
Axes. The connections are on the side of the control cabinet.
Caution: Before you connect the cable, make sure the power is
off. If the power is on, this causes damage to the electrical
components.
Connect the TILT and ROTARY axis cables [2].
If the VMC has A-Axis Scales, connect the rotary scale cable [1] to the
port SCALE A Axis.
If the VMC does not have A-Axis Scales, wrap the cable into a coil. Put
the cable between the mill enclosure and the control cabinet.
Set the main circuit breaker to the ON position.
Push [POWER ON].
STEP 10
If your machine has the Next Generation Control (NGC):
1. Do the Next Generation Control - Rotary - Enable and Disable procedure.
2. Go to step 13.
 Loading...